Ground War Part 2: Tactical Principles II
General thoughts on Combat in HOI3 SF:
There are some basic principles that we should go over.
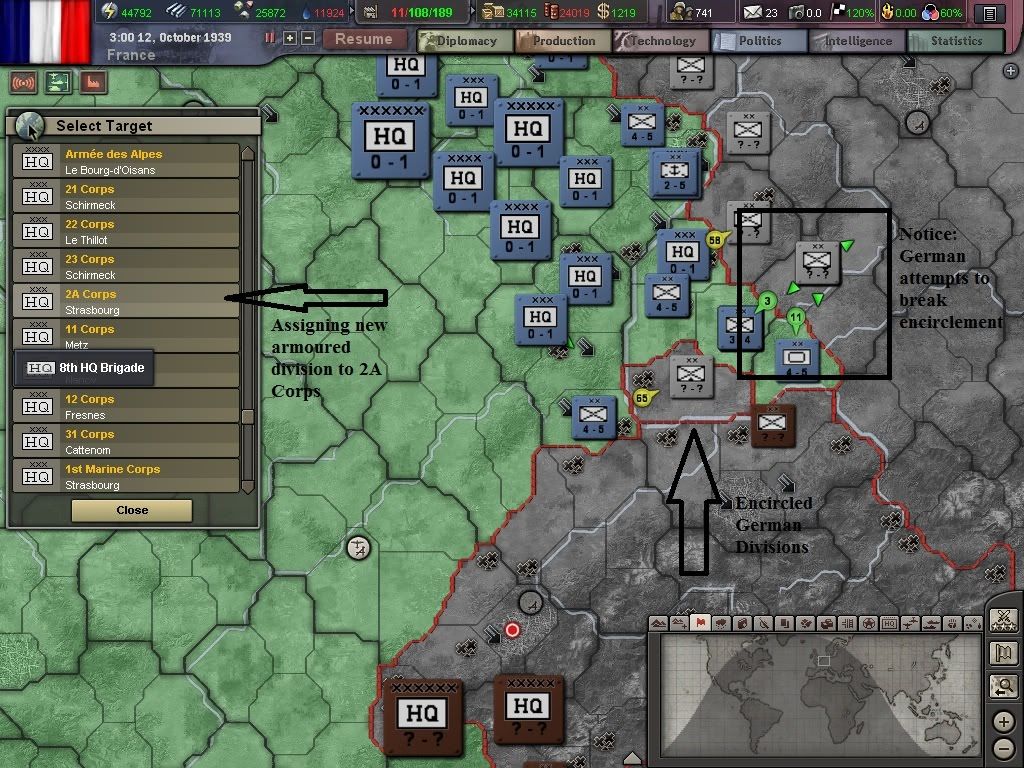
1. Encirclement. This is any field general’s goal. Encircle the enemy so retreat is impossible. The key to this tactic is to achieve penetration with enough forces to keep the encirclement intact (i.e., leaving forces in place to block every avenue of escape), but also to fight off enemy attempts to break through the encirclement to rescue the trapped divisions.
There are several issues at hand. The wider the circle, the more vulnerable the friendly troops are to supply lines being cut. Additionally, the wider the encirclement, the more troops you need.
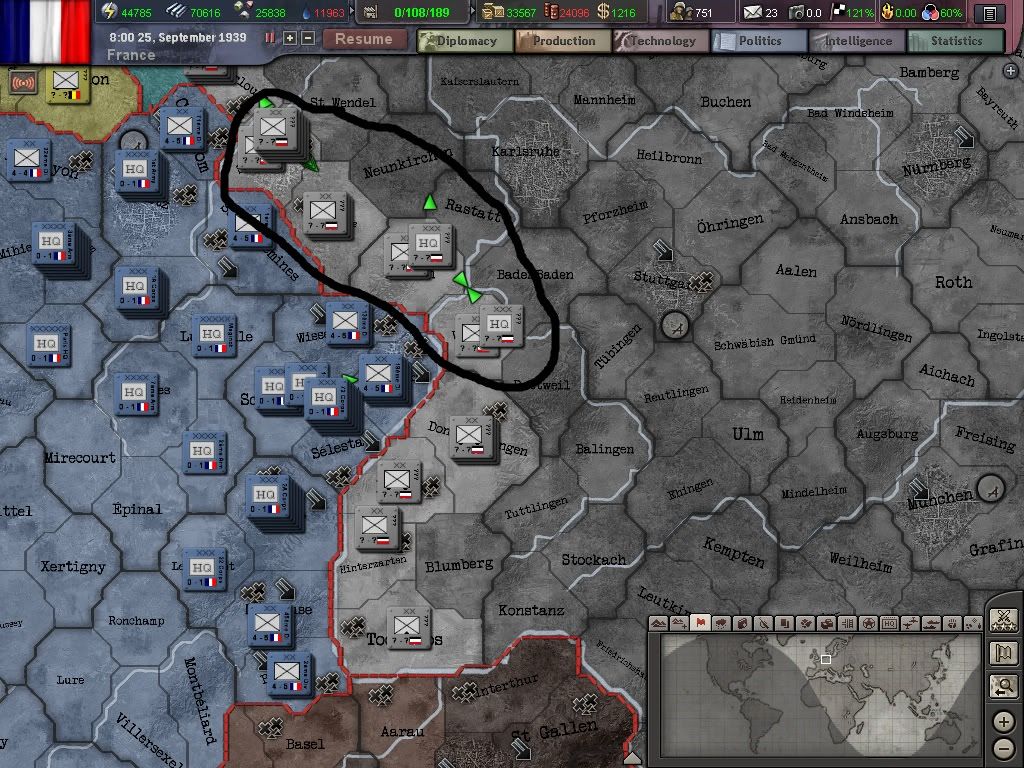
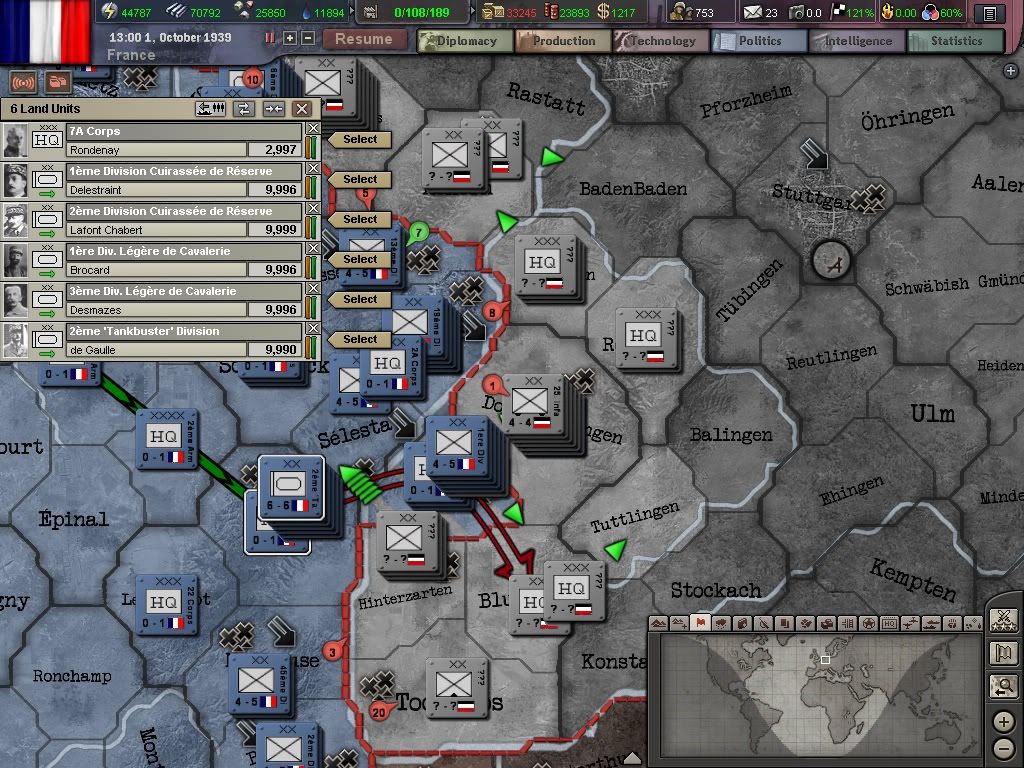
If you think of the thrust as a comet, your “head” will lose its punch as it leaves its “trail” of at least 1 division in each province behind it. This is why the “double pincer” is a very popular variation. It allows 2 prongs to meet in the middle and attack that final province from 2 angles. In our situation we will be attempting this maneuver.
When encircling, you should be especially mindful of certain terrain characteristics that can help you. The first is inaccessible provinces. Any province with infrastructure of 10% can’t be entered. If you leave one of these provinces as the only method of escape, the enemy’s divisions are effectively encircled and when you defeat them they surrender (they’re taken out of the game). The second is coastline. If you encircle and pin the enemy against a coastline and defeat them, it is the same as encircling them. Finally, If you have a border with a neutral country that the enemy can’t enter, they’ll be encircled. However, diplomatically, the enemy may be able to negotiate transit rights with that country and save their units that way.
Encircling is the ONLY way of taking land units out of the game permanently.
2. Pinning/Holding Engagments.
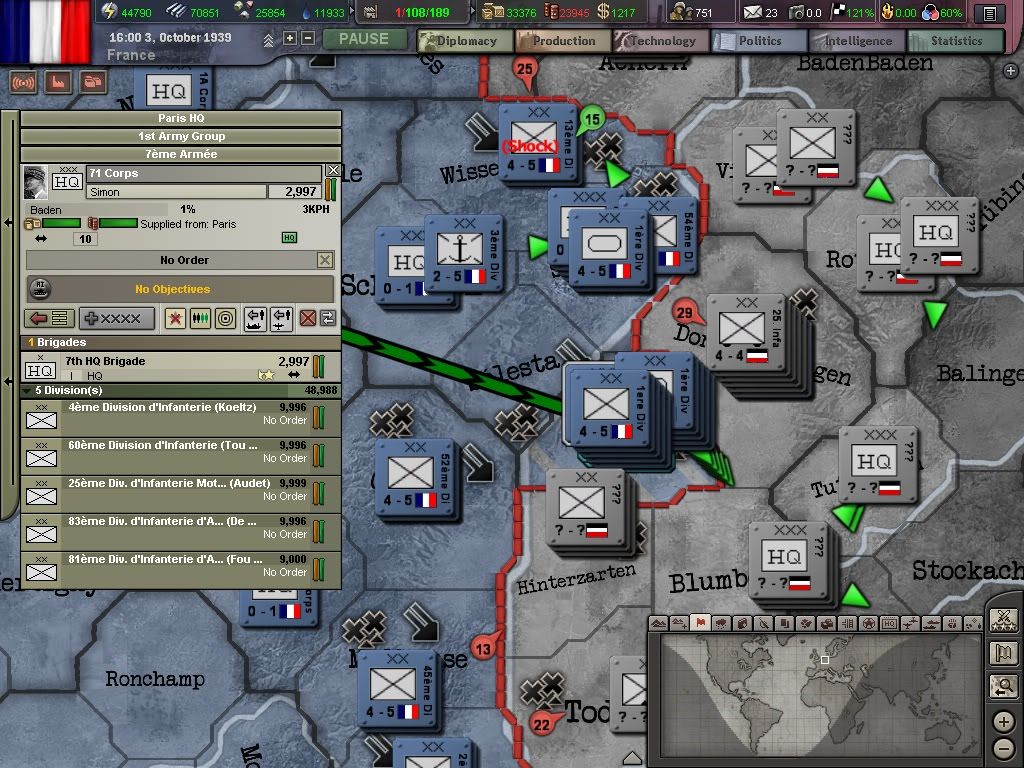
When you attack enemy units, they can’t move until the battle is either won or lost. This way if you need to make sure an enemy stays in one place and not reinforce another area, the best way to do this is to attack them to lock them in place. You don’t have to win this battle. Just have it last long enough to accomplish your goals elsewhere.
3. Double Pincer Movements.
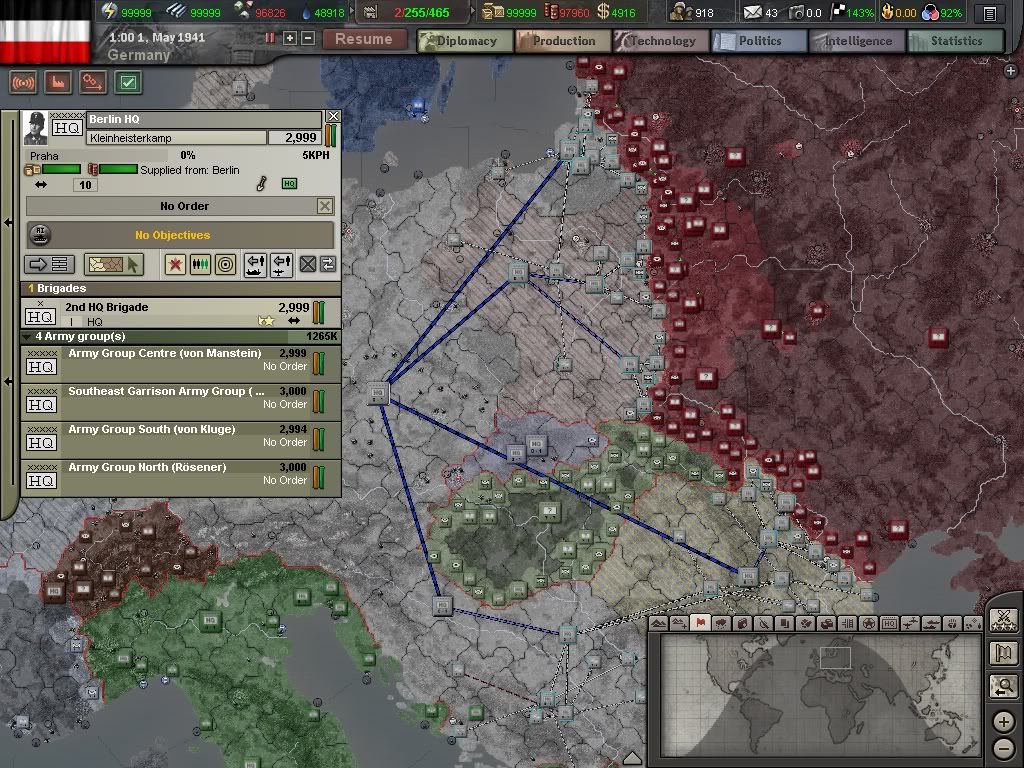
The best double pincer envelopment I’ve achieved in HOI3 was in a game as Germany. A key condition that led to it was the fact that I had invaded and annexed both Yugoslavia and Romania (in order to open up a southern front against USSR, and take oil fields that Romania has), and Hungary was still neutral. This created a nice little gap in my front with the USSR around Hungary.
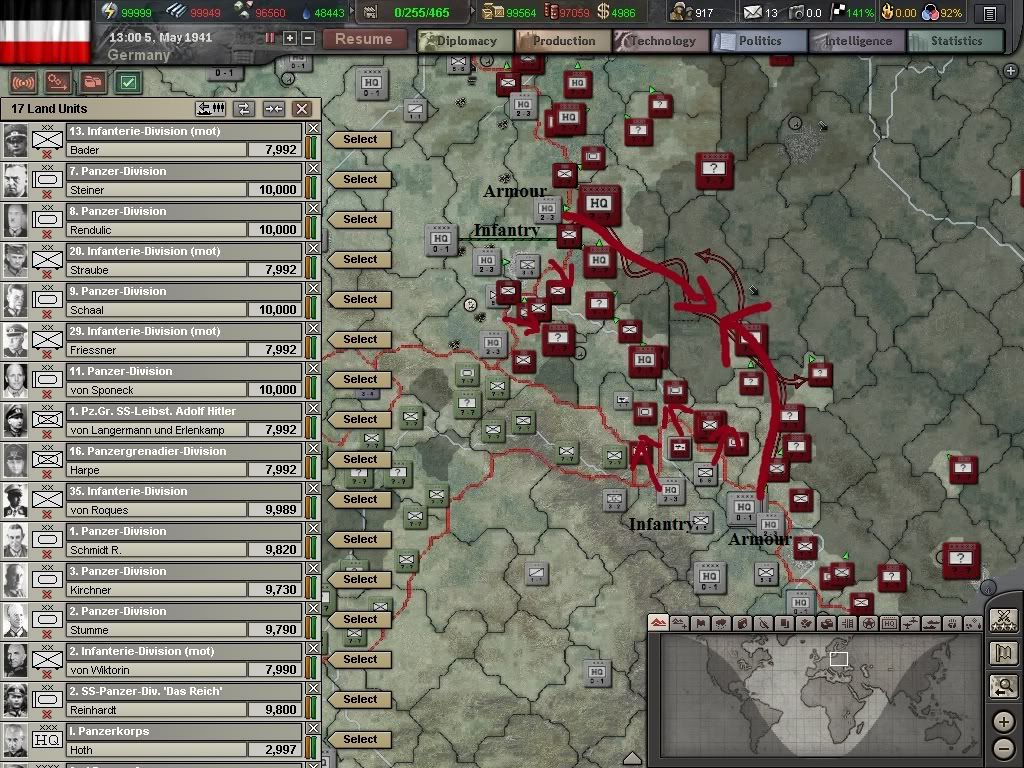
In my Operation Barbarossa (invasion of USSR), I decided to use this gap in the front as a way to envelop large numbers of enemy troops. I came up from Romania with an armoured corps, and using my infantry to pin the border divisions in place, and did the same from southern Poland (although with 2 armoured corps), pinning with infantry and enveloping with armour. By this time, my Operational Level Organization tech was already up to at least 1944 levels, which minimized the amount of waiting time between attacks – this is especially valuable for the armour which needs to close the gaps as quickly as possible.
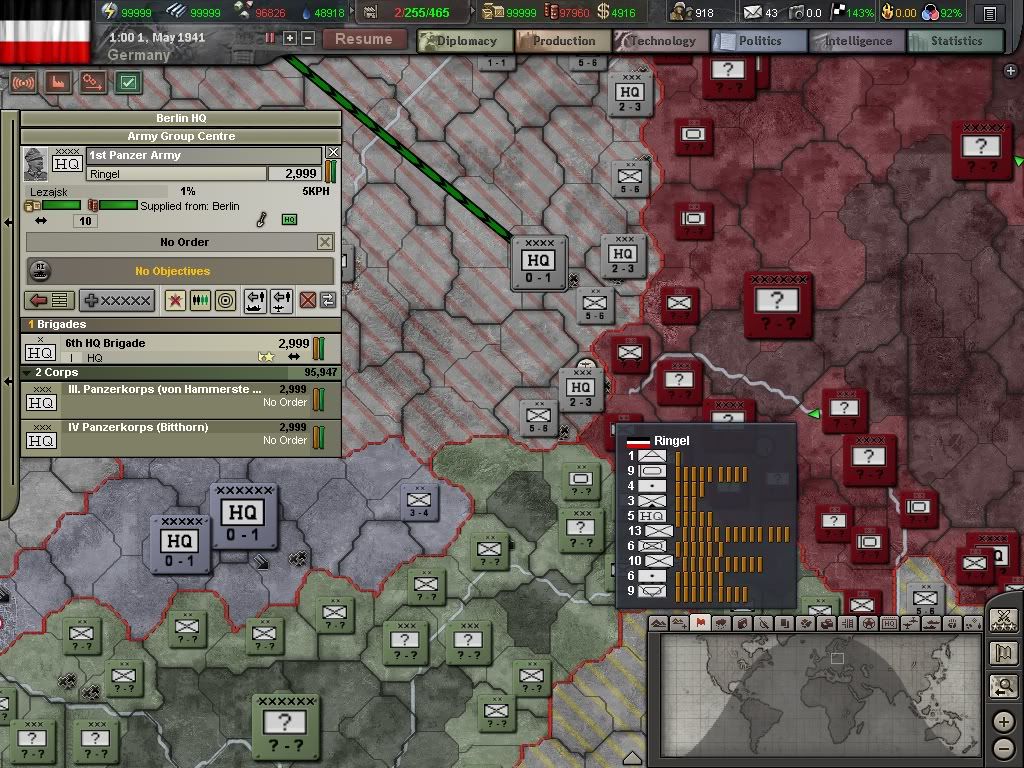
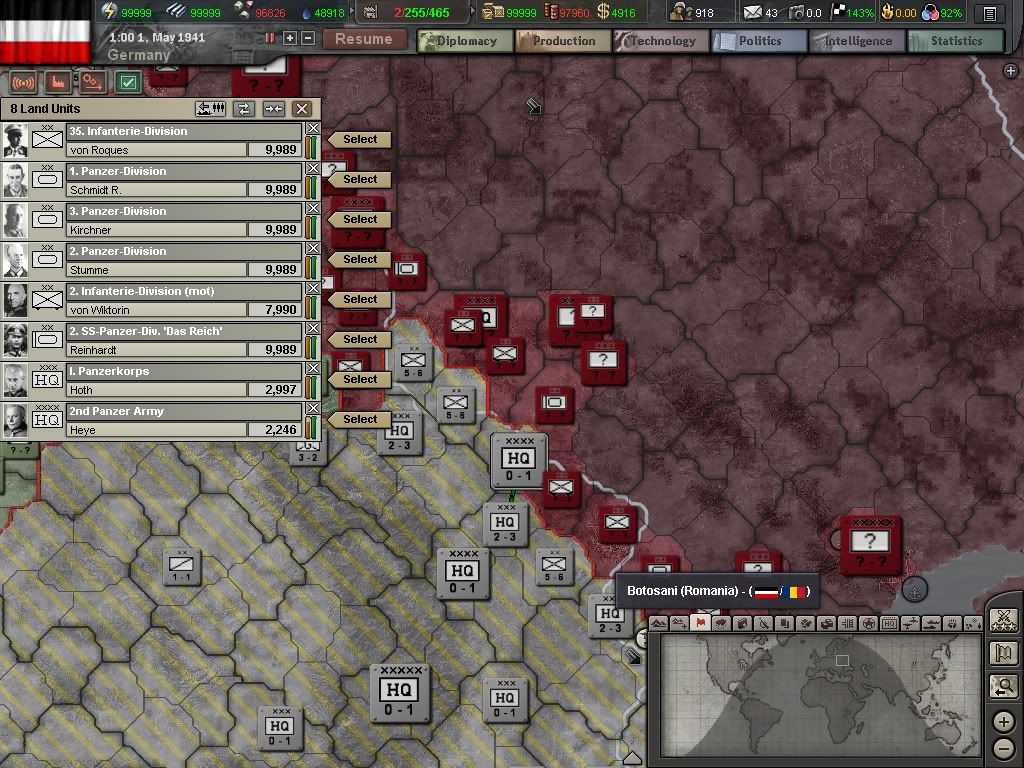
(northern prong)
(southern prong)
(VII armeekorps of infantry holding the line)
Note the armour on the outside of the pincer and the infantry on the inside.
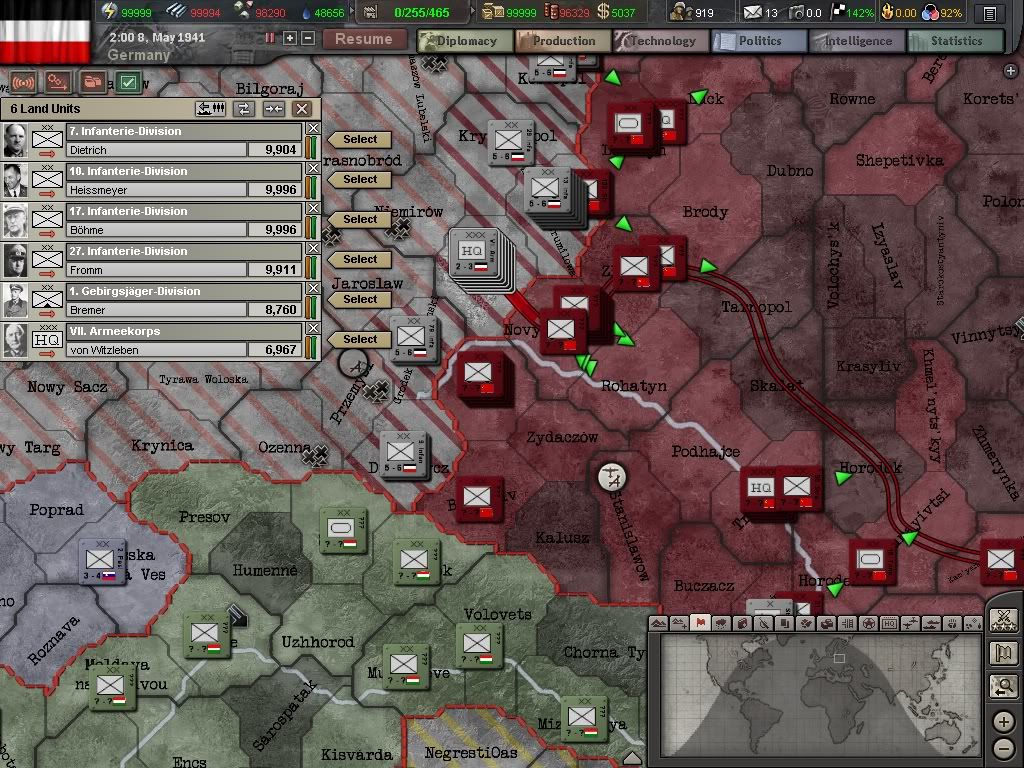
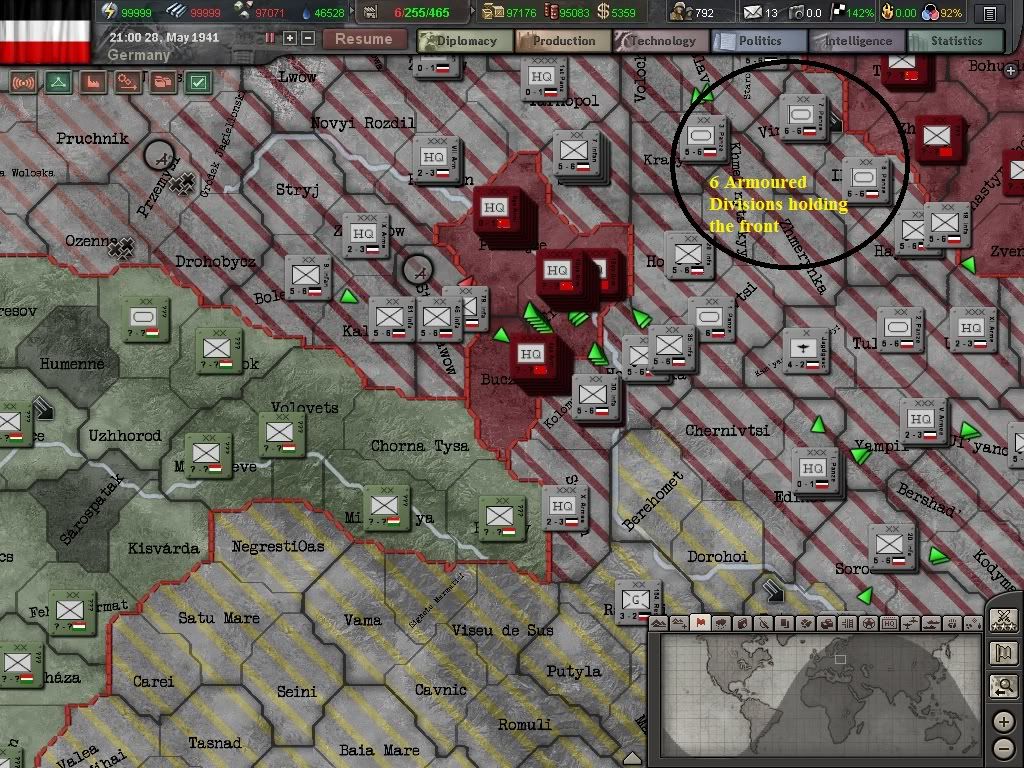
Launching on May 1, 1941, with these two prongs closing in, I managed to close the gaps (it took about 3 weeks).
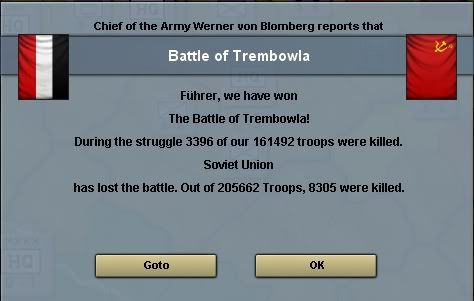
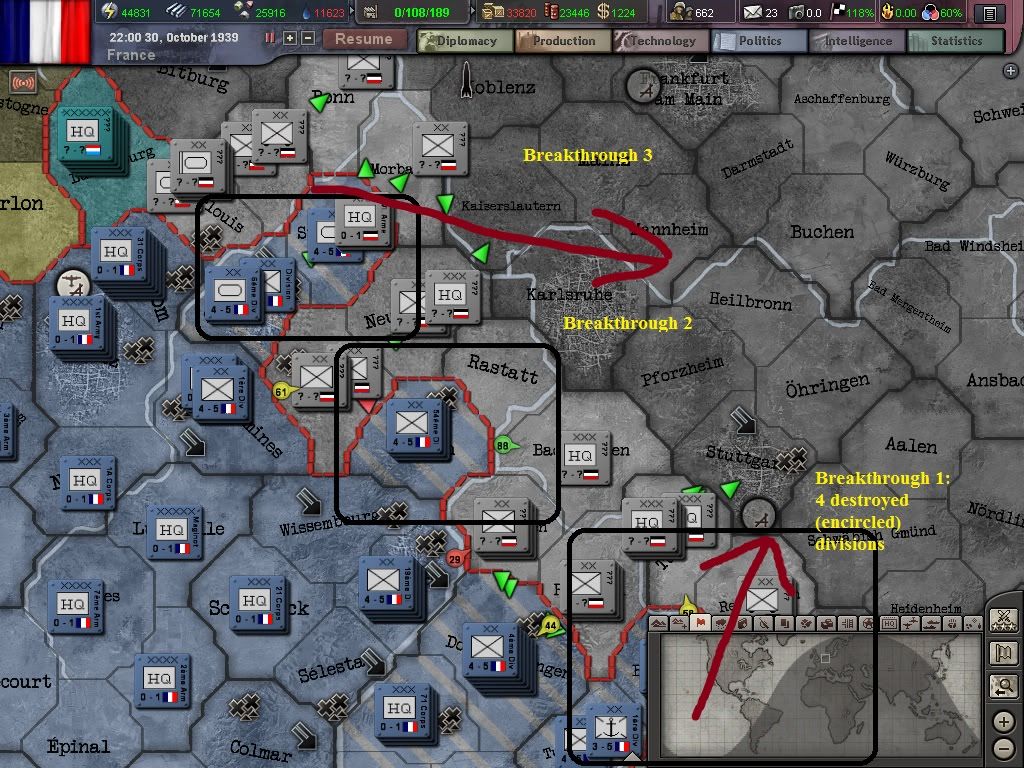
On June 6, the entire pocket was sealed off, eliminating over 200,000 Soviet troops, just over a month after my initial attack.
In fact, my initial attack consisted of 3 simultaneous encirclements. The first was in the north, where I used an armoured corps to cut north east, and I used an amphibious and paratrooper invasion of Riga, with follow-up infantry cutting south to meet the armour. This encircled probably about 100,000 (I didn’t get an accurate count, as the final pocket closure was a little messy!) troops.
Another, smaller one was also achieved in the south as I used another armoured corps to cut south east to Odessa, eventually trapping 4 or 5 divisions.
The one thing to remember is to make sure that your infantry doesn't get left too far behind. Use pinning attacks with the infantry to keep the enemy units in place, so they can't retreat and get outside the pocket before it closes. You don't want to use overwhelming force for these pinning attacks, you need to keep the enemy in place long enough to get your armour (or encircling forces) behind them. Also make sure to leave at least one division in place when moving forward (this is why you see that whole corps of infantry on the northern prong of the pincer). It keeps the circle unbroken.
4. Breaking down Forts.
One of the most common methods of taking provinces that are full of enemies, or have very strong fortifications is to follow the strategies mentioned previously, but do one more thing. These battles can take a long time (weeks even), and it’s good to have several extra units on hand in each province you’re attacking from. When the attacking troops have their organization get low, start attacking with the units that aren’t involved in combat and call off the tired units to let them regain their organization, while maintaining the pressure. If you can surround and cut off the offending province, things will go faster, as they’ll be out of supply fairly quickly.
5. Amphibious Assaults.
Amphibious assaults are tricky, and I’ll deal with them a little bit more later on, but the key to assaulting shorelines is simple. You must get a hold of a port as soon as possible. Without a port, the only way to keep your troops in supply is with airdrops (select a transport and use the “Air Supply” mission. No, it’s not an 80’s “hair band”).
First, USE MARINES. Any unit gets a big penalty when attacking from a ship. Marines (usually 3 Marine and 1 ENG brigade) get a far lower penalty.
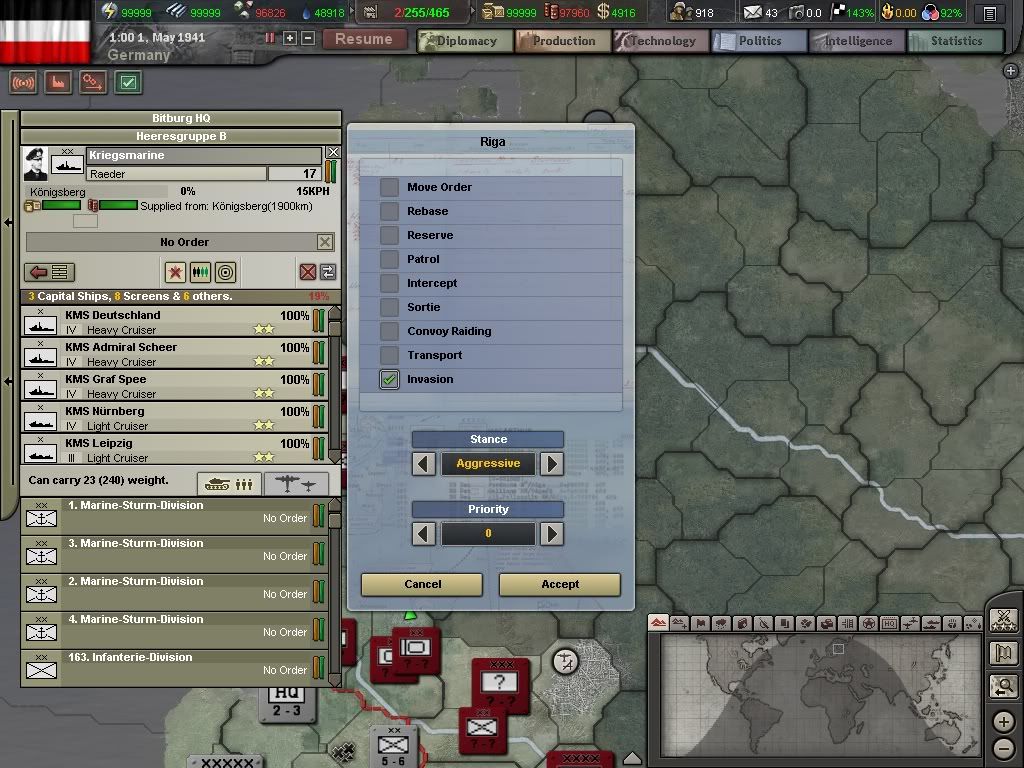
The second thing to know is that you begin your assault one of two ways. The first way is to click the transport fleet (I usually have cruisers attached to this fleet in order to provide defense, but more on that below), and right click on the province and select the “invasion” mission.
The second is to manually select (either from the fleet, or by clicking on the fleet repeatedly to select), and right click the province you’re attacking. If you have a large enough invasion force, you can also manually select the neighbouring provinces on either side to try to land troops unopposed, and from there to attack your chosen province. Frequently, the AI will do this automatically.
This is a really useful strategy because once ashore, those troops don’t have the amphibious assault penalty. The main thing to remember is that the troops ashore only have enough supplies to last about a month at the maximum and you’ll need to capture a port in order to resupply them, and any other troops.
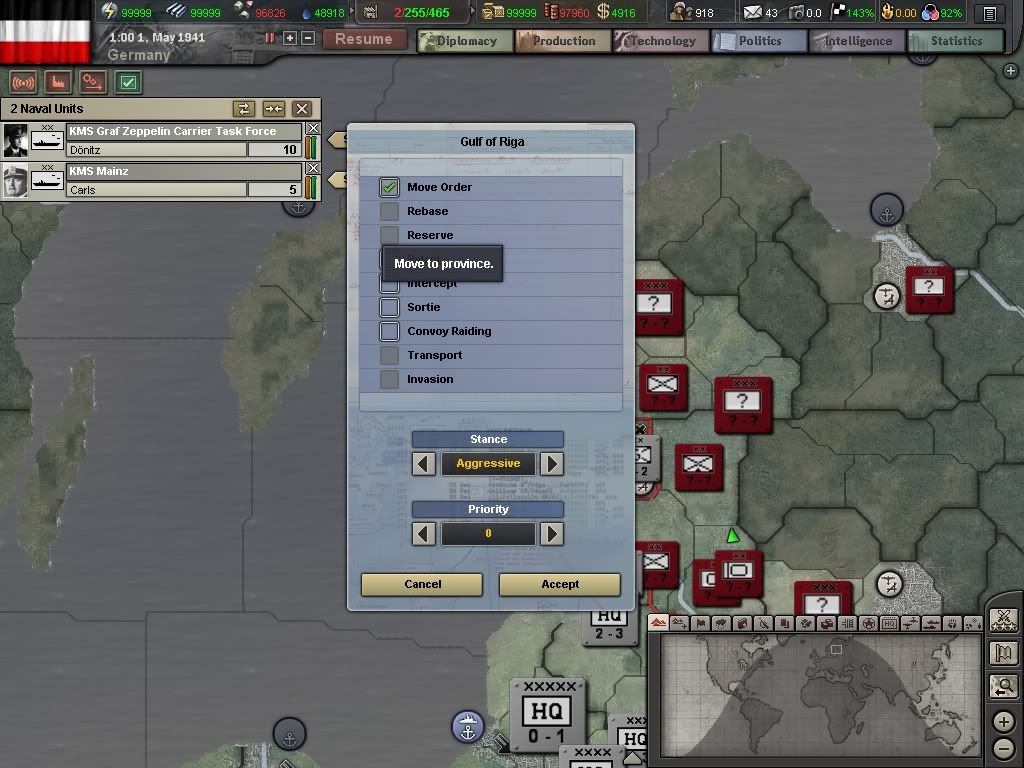
The next thing is that you need to defend your transport fleet while they’re assaulting the shore. This is the first reason that you’re going to need a decent navy (or at least a better one than whoever you’re attacking)! You should put your fleet, or fleets in the province that your transports are unloading the troops from under the “move” order. That will keep them there and engage any opposition that tries to dislodge your foothold. If your transports are destroyed while your troops are in the middle of an amphibious assault, then you're going to lose those troops completely as well.
Finally, in this game, supply becomes a real challenge to overcome. When you’re assaulting a new front across a body of water, you’re going to need to supply your troops. In this respect, you’re not going to want to use a lot of supply heavy units (tanks, motorized, mechanized, etc.) until you know your supply lines can support them.
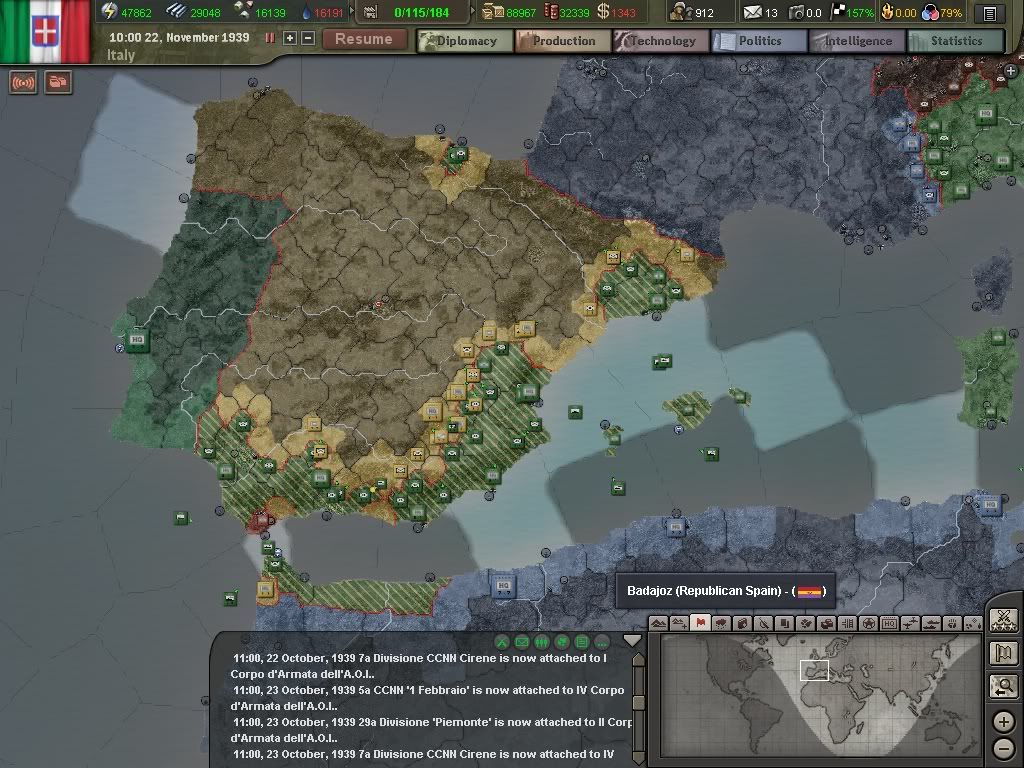
Let’s use my invasion of Spain as an example. Spain is always a supply nightmare. Low infrastructure and small ports (the lower level of naval port means you can get less supplies in each day), means that an invasion of Spain can grind to a standstill very quickly. So how did I conquer Spain? I landed 1 corps of 4 infantry divisions (3 INF brigades, no support) at EVERY port. This kept the drain on my supplies to a minimum, while opening up a large number of ports to keep the units supplied. I then spread out the units to link up the fronts, and pushed towards the centre. I actually deliberately built about 18 infantry divisions over the course of the 6-8 months beforehand in order to make sure I had enough troops of the proper configuration to successfully assault Iberia.
Notice you can see Green (I was playing as Italy) at EVERY port. By the time all the fronts linked up, the Spanish forces were completely surrounded.
6. Paradrops
Paratroopers are costly units. First of all, they take longer to train and cost more IC than regular infantry units. Secondly, in order to drop paratroopers, you need transport planes. These planes have other uses (see Air Supply), but they are very costly in terms of IC. This is why I haven’t built any as France, but I usually have at least one corps of 3-5 airborne divisions when I play most other major countries.
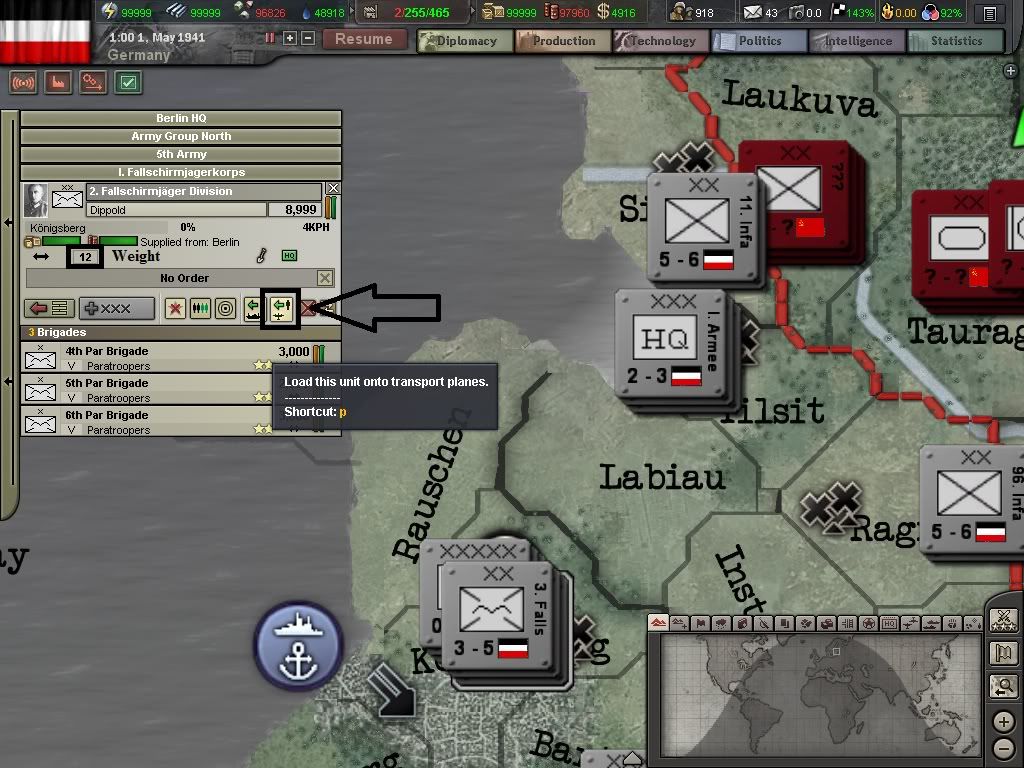
The other thing to keep in mind with paratroopers is that only the paratrooper brigade can be loaded onto transport planes (in the vanilla game. If you use the ICE mod, you can add other “airdrop-able” support brigades). Each troop transport can carry 1 three-brigade paratroop division – 15 weight, while the 3 brigade division is also 15 weight. I'm pretty sure I've researched the Airborne Assault Equipment tech, which is why my Paratroopers division is only 12 weight. If you build 4 brigade divisions, they won’t fit into the transport, although I believe the transports can be upgraded with the right tech.
Deployment: When to use Paratroopers? First of all, you want to make sure that they’re not going to be isolated for long. While paratroopers fight better than other units when out of supply, they’re not superhuman, and actually lack a punch because of the lack of support brigades. I tend to use them to help out taking major objectives, like enemy capitals or VP provinces that are heavily defended. The basically add an extra front. However, if you send them too far ahead of your lines, they can become surrounded and destroyed. This essentially the problem with the Allies operation “Market-Garden” in Holland in the fall of 1944. They depended on the paratroopers landing ahead, capturing key bridges in succession before the Germans could destroy them, but the ground troops couldn’t keep up with the schedule due to heavier than expected German resistance. This hung out the paratroopers to dry.
I usually wait until my ground forces have reached a city, begun the attack, then launch the paratroopers to assist. This will help take the city faster, and make sure that the paratroops don’t get trapped too far behind enemy lines, and overwhelmed.
Also make sure to cover the airdrop with fighters.
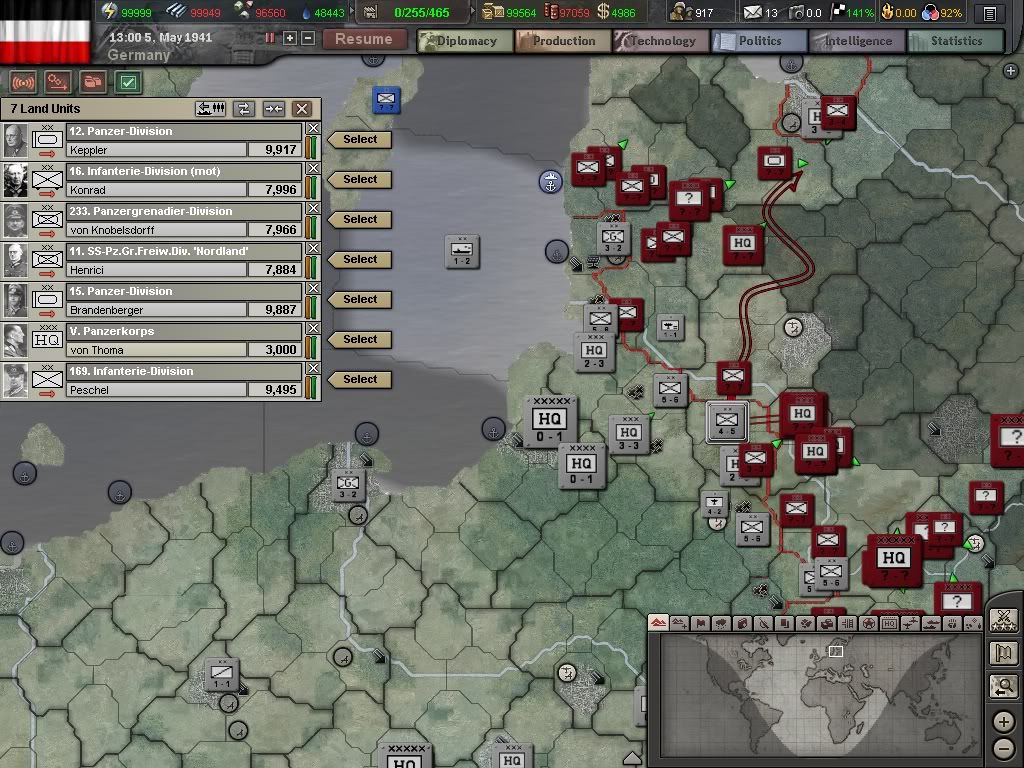
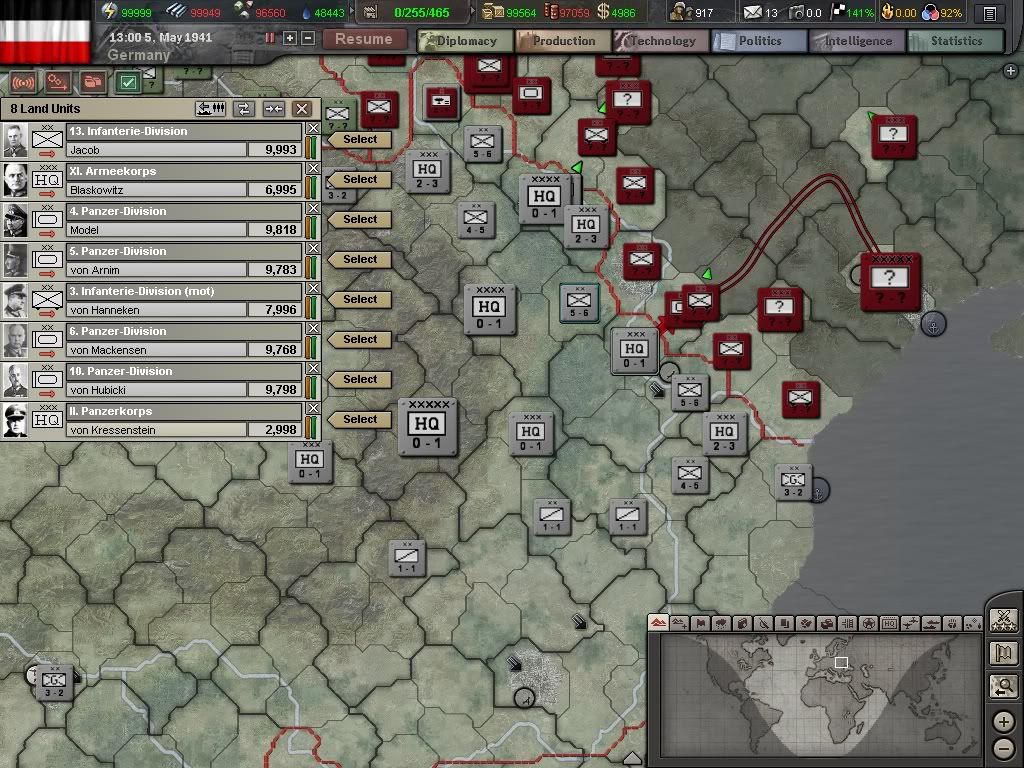
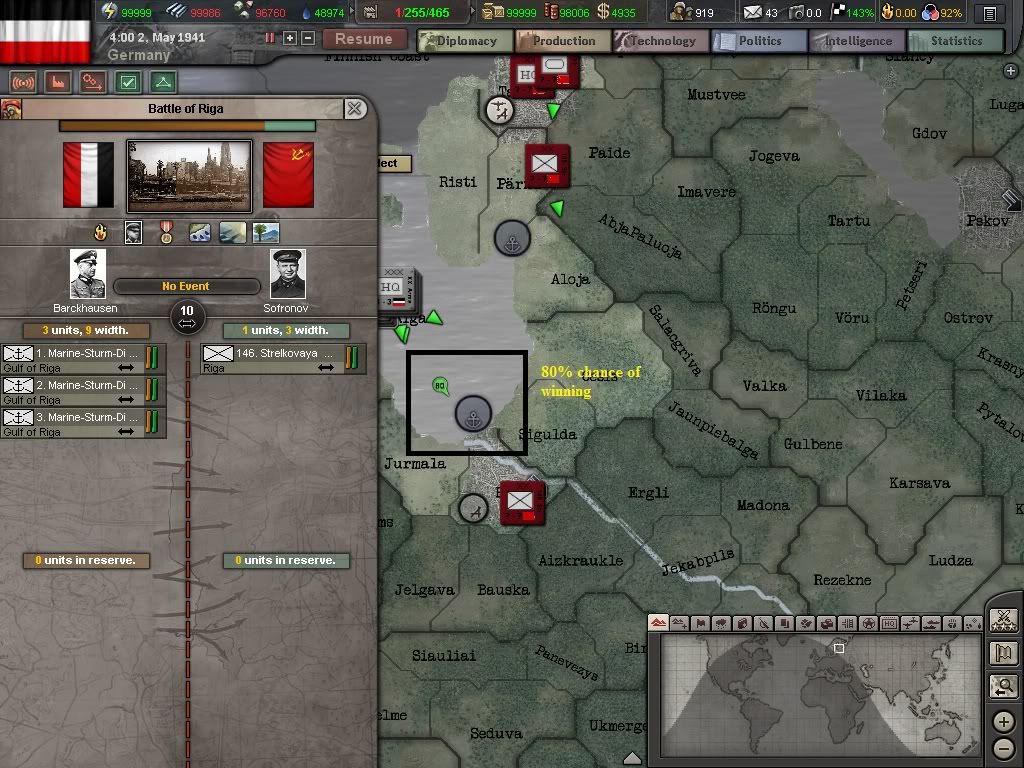
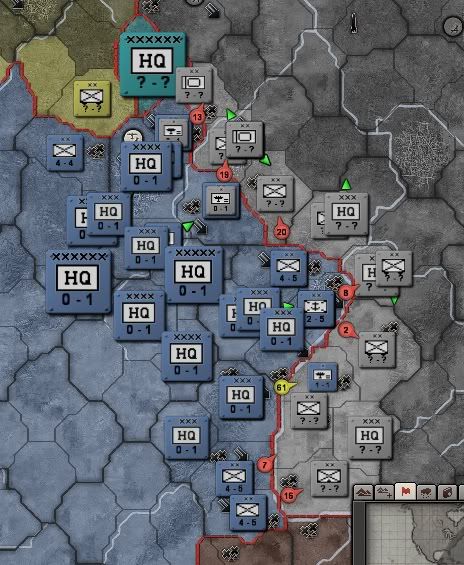
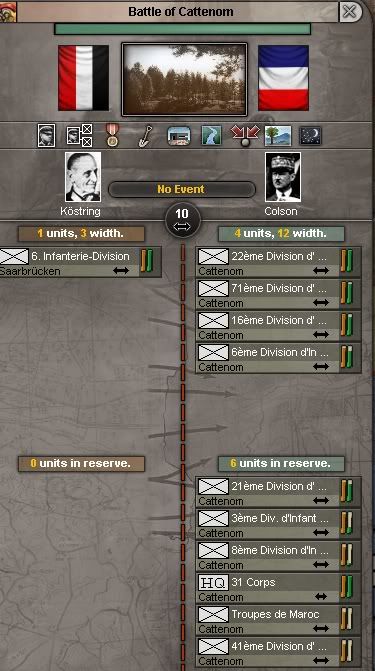
To illustrate the last 2 points, I’ve initiated a combined marine and paratrooper assault of Riga. With just the Marines attacking from offshore, (defended by 2 carrier battle groups), there’s an 80% chance of victory, and a frontage of 10.
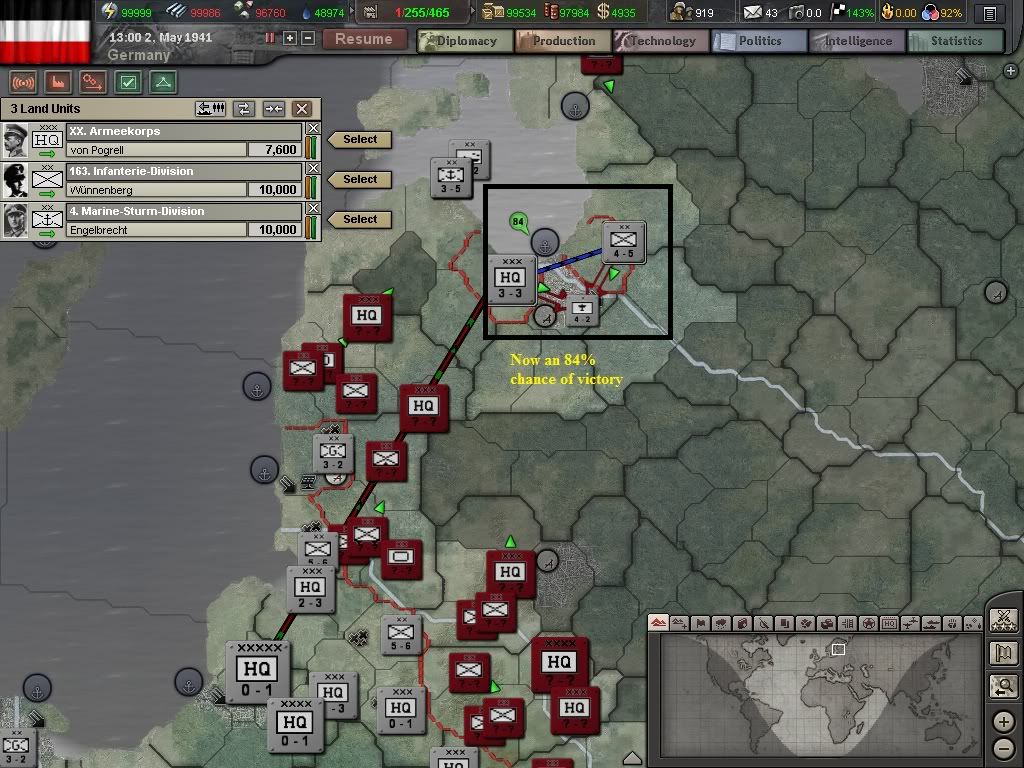
By the time 3 other units (one is a combat capable HQ with an infantry and 2 support brigades attached) begin their assaults from the neighbouring provinces, those chances go up to 84%.
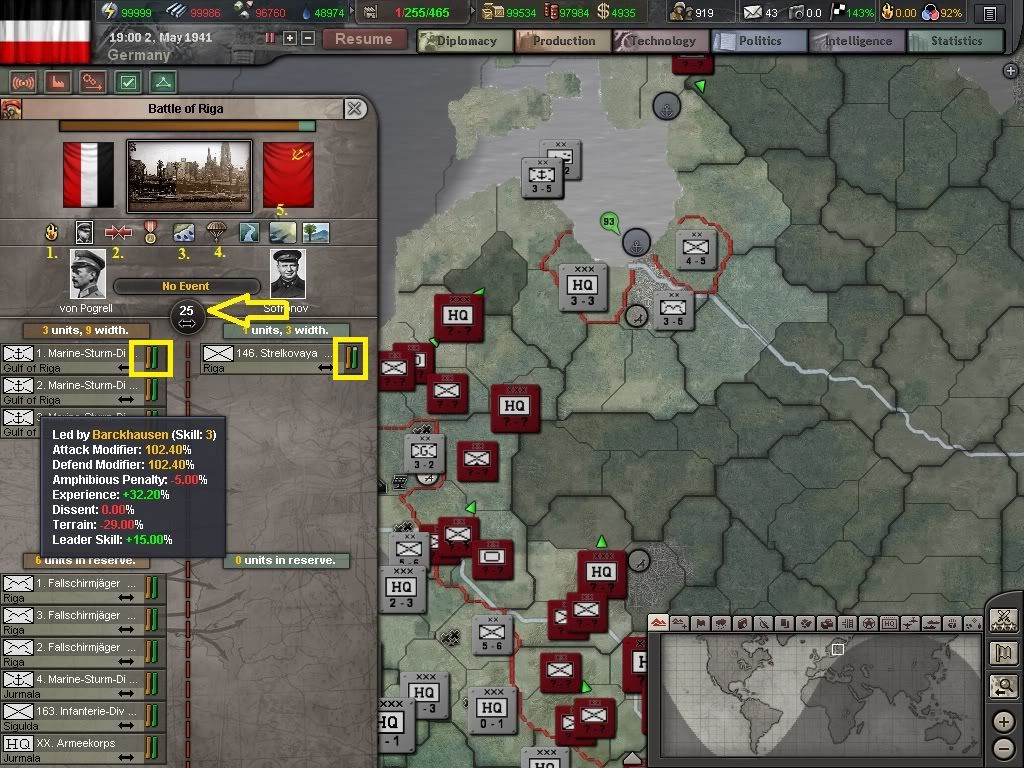
Once I get the paratroopers involved, the combat front goes up to 25, and the victory percentage is up to 93%.
Also of note here is the combat screen which has a few other pieces of information than what I showed earlier.
1. Shows that dissent is a factor – this is another reason to keep your dissent to a minimum (in addition to it taking away from available IC).
2. Shows that the defending unit(s) are being enveloped and is being penalized for that. If it’s a complete encirclement, there’s another symbol and an even bigger penalty.
3. Tell us that the amphibious penalty is being invoked (only 5% for marines, but much higher for other units).
4. Tells us that there have been units paradropped.
5. Tells us that the defenders are being bombarded by ships off the coast.
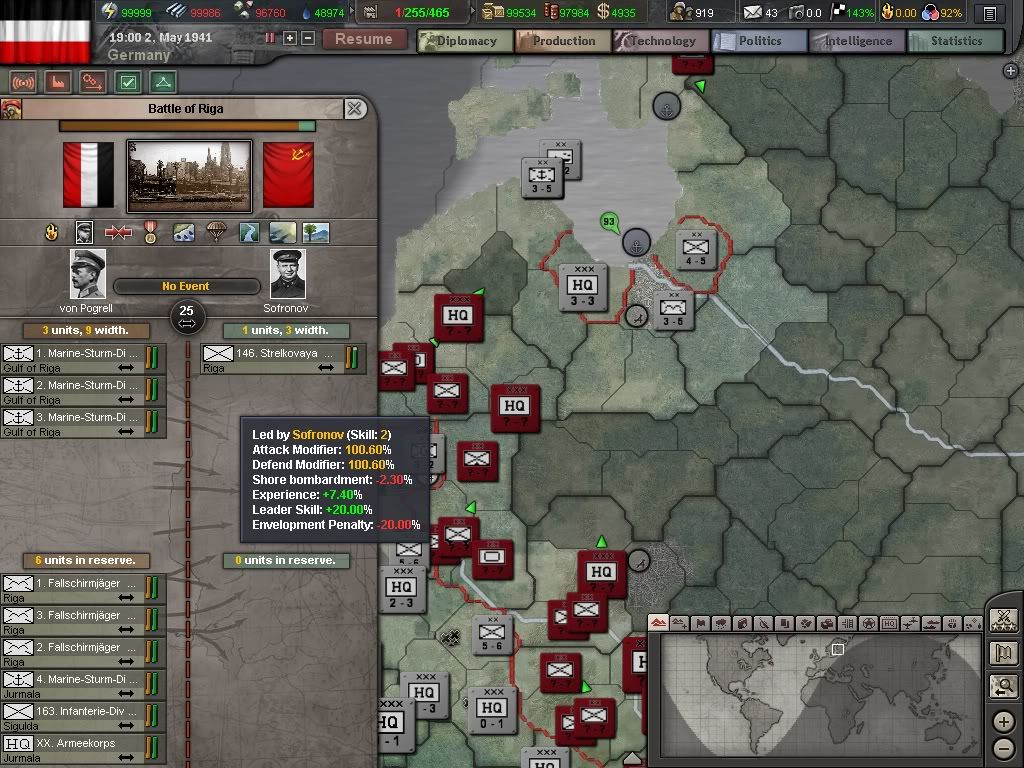
The tooltip gives us a breakdown of how the modifiers are being calculated. This is the one for the attackers, and I’ll show another one for the defenders. If you mouse over the gold and green bars individually, it will show you the percentage of troops that are still alive, and the organization level of the unit. You can see that the green bar of the Russian division has already dropped a little bit.
This next screenshot shows the tooltip over the Russian unit.
This concludes the general principles. Next up: We attack!


")