
Grande italia
- Thread starter Hardradi
- Start date

-
We have updated our Community Code of Conduct. Please read through the new rules for the forum that are an integral part of Paradox Interactive’s User Agreement.
You are using an out of date browser. It may not display this or other websites correctly.
You should upgrade or use an alternative browser.
You should upgrade or use an alternative browser.
Hmm, you might need to take care of those British armies in Suez before taking the French on in France proper. You'll need those Italian North African divisions I reckon.
Good. Consolidate and re-seize the initiative.
You have a few divisions without commanders...
You have a few divisions without commanders...
Read through this in one go! Awesome stuff ") I would love to have your mod, is it available?
I would love to have your mod, is it available?
I would love to have your mod, is it available?A very nice update once again. So many temporal demotions
Yes, they were willing to take a demotion just to get some action.
Gosh, I really love the attention put to details in this AAR
Thanks for the compliment. It takes a bit of time but I remember playing HOI and getting to the end of the game and wishing I could look back and see what certain units had achieved through the course of the game, etc. With this record and some spreadsheets I have been keeping I will be able to do that. A bit weird perhaps.
Good. Consolidate and re-seize the initiative.
You have a few divisions without commanders...
I did, :blush: for roleplay reasons. Now its gloves off.
Hmm, you might need to take care of those British armies in Suez before taking the French on in France proper. You'll need those Italian North African divisions I reckon.
Yes, they are proving to be quite tough at the Suez. The first elements of I-AOI Corps will be heading north in the next post.
Read through this in one go! Awesome stuff
Thanks VM. No the mod isnt available yet. Most of my spare time is taken up with this AAR. Also I have to upgrade it to FtM.
Plan Carnera begins
Recap: After the Italian victory in Ethiopia in May 1936, the large build-up of British forces on the Ethiopian-Sudanese Border unnerved the Italians. Marshal Balbo pitched a “grand plan” (dubbed the "Drin-Drin" Plan by Mussolini) for a war against the Allies to Mussolini. It was accepted and a multi-front war began between Italy and the Allies on the 11th May 1936. The aim was to steal key British and French territories in Africa (including the Suez) and then sue for peace. Mussolini had committed the ‘mad dog act’ so feared by British diplomats and politicians.
On the 2nd July 1936, Spain erupted into civil war. The Italian Fascist’s and the German Nazi’s both supported the Nationalist side.
British opinion on the war hardened towards the beginning of August 1936 and it no longer looked like peace is an option. It has become a battle to the death. Such a battle required a new approach to the war, Plan Carnera.
Europe
Recap: At the start of the war the Italian I and IV armies had easily pushed over the unprepared French forces along Little Maginot Line (in the Alps) and expanded into the Provence and Rhone regions. The front became static with the arrival of two French armour divisions and the French forces then counterattacked and retook Marseille. With reinforcements from the II and VIII armies, the Italians have now retaken the initative along the front. Marseille was recaptured on the 1st August. In accordance with Plan Carnera these forces will now push west and form a front along the Rhone River to Lyon in the north.
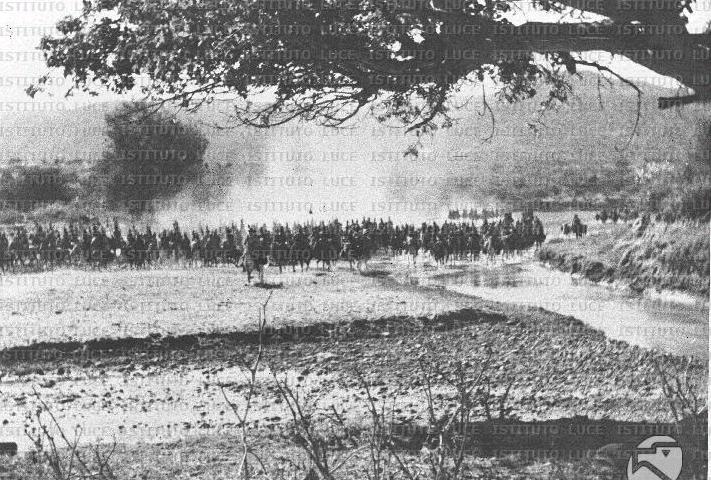
10th August: For four days the 2nd Alpine Division held off a determined French attack at Ruffieux. Despite their strong position on the eastern side of the Rhone, they were unable to hold out against odds of 3:1 and fell back in disarray after taking many casualties.

2nd Alpini Division on the retreat.

The defeat of the 2nd Alpine Division at Ruffieux.
12th August: Now the whole front erupted into battle. The Italians initiated the second stage of the drive to the Rhone in the south. Plan Carnera called for the establishment of a defensive line along the Rhone up to and including the city of Lyon. Four divisions from the II, IV and VIII armies were committed to an attack on the French 1st Division which was dug in at Cavillon on the eastern side of the Rhone River.

The battle of Cavaillon begins.
13th August: The next day, further to the north, five Italian divisions were committed to an all-out assault on Bourgoin-Jallieu. The divisions came from the I, II, IV and the VIII armies. The initial stages of the battle started out badly for the Italians. They had failed to commit another division to the attack from Grenoble and the mass of men advancing from Valence hindered their ability to come to grips with the enemy and caused outright confusion.

The Italian mass assault on Bourgoin-Jallieu begins. The French strike back with devastating bombing of the Italian divisions.
15th August: To make matters worse for the attacking divisions, a few days later the skies were filled with French bomber aircraft. They delivered three devastating bombing runs leaving over 400 Italian dead strewn along their lines. Italian interceptors did not scramble quickly enough and were nowhere to be seen.
16th August: Further north along the front, the French 1st Armoured Division had now occupied Ruffieux after driving out the Italian Alpini. They now continued their advacne east. This time the French 70th Infantry along with the 1st Armour attacked the 3rd ‘Ravenna’ and 2nd Alpine Divisions which were dug in to the alpine foothills at St-Claude.
General Guzzoni ordered and immediate counterattack from the south against the armour division at Ruffieux in an attempt to break the French attack.

The French attack against St-Claude and the Italian counterattack against Ruffieux.
In the battle of Bourgoin-Jallieu matters now got tougher for the Italian forces, the French were able to reinforce their lone division defending the province.

The mass assault against Bourgoin-Jallieu get tougher.
ASI
Recap: In North Africa, the Italian IX Army captured Tunis and is now heading west to Algiers. The X Army and the VI Army advanced east, first taking Cairo and then besieging the British in Alexandria. After a tough battle the British 7th Infantry Division and the Middle East Command were forced to surrender. The Italians were then forced on the defensive along the line of the Suez against a determined British and Iraqi attack. The line was breached in its entirety and the British were able to initially push on before their attack faulted. The deplated state of the VI and X armies meant that this front required new reinforcements - they would arrive from the south in accordance with Plan Carnera.

Italian propoganda, glorifying the struggle in Africa.
Suez Front
9th August: Around midnight the main force of the 2nd ‘Emanuele Filiberto’ Division which had been hurrying north now reached the high ground at Zagazig to the east of Cairo. Expecting to launch a relief attack against the Allied forces to the northwest, they were surprised to find themselves under attack by the disorganized remnants of the 2nd Iraqi Division.

The 2nd ‘Emanuele Filiberto’ Division unexpectedly finds itself under attack.
10th August: The reunited and unblooded 1st Blackshirts Division leaves the safe walls of Tobruk in the transport vessels of the 19th Squadron. They headed west to Alexandria and the Suez front.

1st ‘Eugenio di Savoia’ Division is on the move (yellow) while the 19th Squadron (green) disembarks from Tobruk.
Alarmed that the Iraqi Division at Port Said is approaching the poorly defended Cairo, the unprepared 1st ‘Eugenio di Savoia’ Division, is sent southwest to garrison the city.
After the 19th Transport Squadron (transporting the 1st Blackshirts) had disembarked from Tobruk and headed east to Alexandria, reports came in that an unidentified British fleet was shadowing it along the coast. Reconnaissance plans were sent out to attempt to identify the composition of the fleet but it was not able to be found. Luckily the 19th Transport Squadron managed to stay ahead of its pursuers and safely sailed into the protective harbor at Alexandria.
Crammed onto the docks were the battered soldiers of the 102nd ‘Trento’ and the 7th ‘Cirene’ Blackshirts Divisions, waiting to be picked up and taken west away from the war zone. The soldiers of the 1st Blackshirts had been prepared for this in advance by their officers and were not overly alarmed. They disembarked in an orderly manner before marching east out of the city towards the front lines.
11th August: Despite the Allied advances from Port Said, to the south the Allied positions were weakening. First the attack by the 2nd Iraqi Division on 2nd ‘Emanuele Filiberto’ Division at Zagazig slackened and then fell away altogether. When this it became apparent to the officers of the British division to the east, they too called a halt to their offensive against the 27th ‘Sila’ Division at El Suewis.

MAIN: Battles of Zagazig and El Suweis are won by Italian forces. The 30th ‘Sabauda’ Division lands at Quseir (purple); INSET: The Italians turn on their attackers at Isma’iliya.
Now it was time for the Italians to hit back at these forces at Isma’iliya. The Iraqis briefly held out against the Italian counterattack before taking to their heels in an attempt get to the other side of the Suez while the British 18th Infantry covered their retreat.
To the south, de Stefanis’s 30th ‘Sabauda’ Division had been ferried onto the beautiful but desolate beaches at Quseir on the Egyptian side of the Red Sea. This area is known as the Eastern Desert. The troops struck north, the 3rd Berseglieri Brigade leading the way. The first troops of the I-AOI Corps had landed in accordance with Plan Carnera.

The outriders of the 3rd Berseglieri Brigade head north.
13th August: Under heavy attack from Italian cavalry, tankettes, bersaglieri, infantry and artillery. The British 18th Division is forced to retreat to the eastern side of the canal.

The Italians are soon victorious at Isma’iliya.

The Italian 12th Artillery Regiment, attached to the 27th ‘Sila’ Division, pounding the positons of the British 18th Division.
Algeria
10th August: A report came via Tunisia from Fedinando di Savoia and his 6th Submarine Flotilla coasting along Tunisia. A mountain division had been sighted in Algiers (previously undefended). This lone division could provide significant resistance when the forces of de Bono’s South/Tunisian Army Group were in place for an attack on the city.
AOI
Recap: In East Africa, the strong French 1st Army in Djibouti initially made threatening advances on the Eritrean capital of Asmara but they were eventually surrounded and annihilated by Italian forces. The Italians were also able to capture key British strategic locations in the Somaliland, northern Sudan and British East Africa, effectively trapping the British 3rd Army in the Sudan east of Ethiopia. Entrapement of the British 3rd Army and the coloninal troops in the Sudan was the key objective of Marshal Balbo's "Drin-Drin" Plan. It meant that the Italians could also strike north and attack Egyptian Nile Delta from two directions. In the south, a relief effort attempted by the British 4th Infantry Division just north of Lake Victoria failed and the Italians have finally closed the pincer and trapped the British against the impenetrable water waste called The Sudd. Italian forces will now proceed to push into Tanganyika further to the south.
Uganda/South Sudan
7th August: As night closed in the British 3rd Army committed their last reserve in a final attempt to break out of the Sudan pocket. In foul weather, the 10th Indian Division attacked south out of the Sudd across the savanna of Northern Uganda.

The 10th Indian Division attacks to the south in an attempt to break out of the ‘Sudan sack’ to the south. The beleaguered 4th Indian Division finally gives up the Italians wins Phase 2 of the Battle of Jima.
8th August: Heavily outnumbered, the Indian troops had the advantage that the two of the three Italian Divisions were currently engaged in the battle for Jima. They did however underestimate the shock power of the Ovest Bassacampi ‘Celere’ Division, its swift moving cavalry, armored cars and tankettes quickly formed a front and drove them back into the wetlands of the Sudd.
Eritrean Ascari cavalry move swiftly to intercept the attack.
To the northeast the bloody battle of Jima finally came to its conclusion. After 18 days of tough fighting, the 4th Indian Division and local African troops were finally driven from the Ethiopian escarpment. The difficult terrain caused many deaths on both sides. Jima was the last foothold that the British held in Ethiopia. Nearly 700 men lay dead at the end of the battle which involved over 40,000 troops in total.
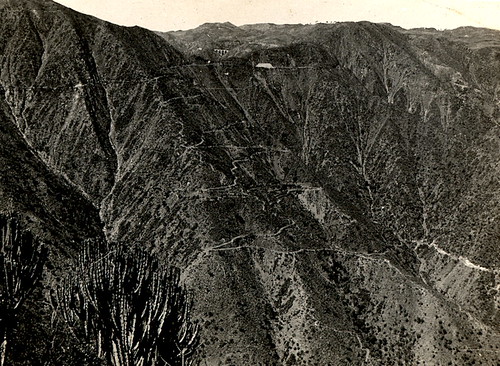
The Ethiopian escarpment in all of its glory, note the winding road.
To the south, right on the equator, the retreating men on the British 4th Division were still under attack from the pursuing 29th ‘Piemonte’ Division. The British had cunningly set up a strong defensive line along the Kagera River (a tributary of Lake Victoria) while the majority of their forces still trekked south. Frattini’s men were having great difficulty in breaching this line in the damp tropical conditions. The attack was called off. They would let the British go and then cross the river.

The 28th ‘Piemonte’ gives up the Battle of Bukoba.

The 28th ‘Piemonte’ shows no mercy.
10th August: Now the 5th ‘Cosseria’ Division had marched south to the front lines. Joining up with D’Oro’s 4th Eritrean Division, they launched a joint assault on the British troops holding Lowelli. Resistance appeared weak as both divisions only came into contact with British HQ units.

The Italians meet up with weak resistance at Lowelli.
Arabia Felix
Recap: On the 11th July, the Italian colonial troops successfully landed and secured the undefended British port of Aden. Yemeni forces (allies of Britain) immediately attacked the Italians but could not hold out when Italian reinforcements arrived. Yemen was overrun but the fighting units of their army escaped across the border into the British Aden Protectorate. This victory yielded full control of the Gate of Tears to the Italians, a significant strategic advantage.
Yemeni loyalist forces then emerged from the deserts to the east, attacked and defeated the Somali Dubats which were guarding Aden. The Italians then landed the 30th ‘Sabauda’ at Aden and drove the loyalist forces deep into the Aden Protectorate.
7th August: There was to be no rest for the veterans of de Stefanis’s 30th ‘Sabauda’. After hurling back the Yemeni forces from Aden, they were now ordered to board a transport fleet, its destination being Port Sudan in the Red Sea. Plan Carnera called for their immediate transfer to the Suez Front.

LEFT: The 30th ‘Sabauda’ leaving Aden in Yemen. RIGHT: The division, just north of Port Sudan in the Red Sea.
10th August: After a brief stopover the overworked Red Sea Flotilla and its precious troops disembark from Port Sudan and continue north towards the Suez. The Royal navy was not spotted. (See above for the landing of this division at Quseir on the Egyptian side of the Red Sea).
Recap: After the Italian victory in Ethiopia in May 1936, the large build-up of British forces on the Ethiopian-Sudanese Border unnerved the Italians. Marshal Balbo pitched a “grand plan” (dubbed the "Drin-Drin" Plan by Mussolini) for a war against the Allies to Mussolini. It was accepted and a multi-front war began between Italy and the Allies on the 11th May 1936. The aim was to steal key British and French territories in Africa (including the Suez) and then sue for peace. Mussolini had committed the ‘mad dog act’ so feared by British diplomats and politicians.
On the 2nd July 1936, Spain erupted into civil war. The Italian Fascist’s and the German Nazi’s both supported the Nationalist side.
British opinion on the war hardened towards the beginning of August 1936 and it no longer looked like peace is an option. It has become a battle to the death. Such a battle required a new approach to the war, Plan Carnera.
Europe
Recap: At the start of the war the Italian I and IV armies had easily pushed over the unprepared French forces along Little Maginot Line (in the Alps) and expanded into the Provence and Rhone regions. The front became static with the arrival of two French armour divisions and the French forces then counterattacked and retook Marseille. With reinforcements from the II and VIII armies, the Italians have now retaken the initative along the front. Marseille was recaptured on the 1st August. In accordance with Plan Carnera these forces will now push west and form a front along the Rhone River to Lyon in the north.
10th August: For four days the 2nd Alpine Division held off a determined French attack at Ruffieux. Despite their strong position on the eastern side of the Rhone, they were unable to hold out against odds of 3:1 and fell back in disarray after taking many casualties.
2nd Alpini Division on the retreat.
The defeat of the 2nd Alpine Division at Ruffieux.
12th August: Now the whole front erupted into battle. The Italians initiated the second stage of the drive to the Rhone in the south. Plan Carnera called for the establishment of a defensive line along the Rhone up to and including the city of Lyon. Four divisions from the II, IV and VIII armies were committed to an attack on the French 1st Division which was dug in at Cavillon on the eastern side of the Rhone River.
The battle of Cavaillon begins.
13th August: The next day, further to the north, five Italian divisions were committed to an all-out assault on Bourgoin-Jallieu. The divisions came from the I, II, IV and the VIII armies. The initial stages of the battle started out badly for the Italians. They had failed to commit another division to the attack from Grenoble and the mass of men advancing from Valence hindered their ability to come to grips with the enemy and caused outright confusion.
The Italian mass assault on Bourgoin-Jallieu begins. The French strike back with devastating bombing of the Italian divisions.
15th August: To make matters worse for the attacking divisions, a few days later the skies were filled with French bomber aircraft. They delivered three devastating bombing runs leaving over 400 Italian dead strewn along their lines. Italian interceptors did not scramble quickly enough and were nowhere to be seen.
16th August: Further north along the front, the French 1st Armoured Division had now occupied Ruffieux after driving out the Italian Alpini. They now continued their advacne east. This time the French 70th Infantry along with the 1st Armour attacked the 3rd ‘Ravenna’ and 2nd Alpine Divisions which were dug in to the alpine foothills at St-Claude.
General Guzzoni ordered and immediate counterattack from the south against the armour division at Ruffieux in an attempt to break the French attack.
The French attack against St-Claude and the Italian counterattack against Ruffieux.
In the battle of Bourgoin-Jallieu matters now got tougher for the Italian forces, the French were able to reinforce their lone division defending the province.
The mass assault against Bourgoin-Jallieu get tougher.
ASI
Recap: In North Africa, the Italian IX Army captured Tunis and is now heading west to Algiers. The X Army and the VI Army advanced east, first taking Cairo and then besieging the British in Alexandria. After a tough battle the British 7th Infantry Division and the Middle East Command were forced to surrender. The Italians were then forced on the defensive along the line of the Suez against a determined British and Iraqi attack. The line was breached in its entirety and the British were able to initially push on before their attack faulted. The deplated state of the VI and X armies meant that this front required new reinforcements - they would arrive from the south in accordance with Plan Carnera.
Italian propoganda, glorifying the struggle in Africa.
Suez Front
9th August: Around midnight the main force of the 2nd ‘Emanuele Filiberto’ Division which had been hurrying north now reached the high ground at Zagazig to the east of Cairo. Expecting to launch a relief attack against the Allied forces to the northwest, they were surprised to find themselves under attack by the disorganized remnants of the 2nd Iraqi Division.
The 2nd ‘Emanuele Filiberto’ Division unexpectedly finds itself under attack.
10th August: The reunited and unblooded 1st Blackshirts Division leaves the safe walls of Tobruk in the transport vessels of the 19th Squadron. They headed west to Alexandria and the Suez front.
1st ‘Eugenio di Savoia’ Division is on the move (yellow) while the 19th Squadron (green) disembarks from Tobruk.
Alarmed that the Iraqi Division at Port Said is approaching the poorly defended Cairo, the unprepared 1st ‘Eugenio di Savoia’ Division, is sent southwest to garrison the city.
After the 19th Transport Squadron (transporting the 1st Blackshirts) had disembarked from Tobruk and headed east to Alexandria, reports came in that an unidentified British fleet was shadowing it along the coast. Reconnaissance plans were sent out to attempt to identify the composition of the fleet but it was not able to be found. Luckily the 19th Transport Squadron managed to stay ahead of its pursuers and safely sailed into the protective harbor at Alexandria.
Crammed onto the docks were the battered soldiers of the 102nd ‘Trento’ and the 7th ‘Cirene’ Blackshirts Divisions, waiting to be picked up and taken west away from the war zone. The soldiers of the 1st Blackshirts had been prepared for this in advance by their officers and were not overly alarmed. They disembarked in an orderly manner before marching east out of the city towards the front lines.
11th August: Despite the Allied advances from Port Said, to the south the Allied positions were weakening. First the attack by the 2nd Iraqi Division on 2nd ‘Emanuele Filiberto’ Division at Zagazig slackened and then fell away altogether. When this it became apparent to the officers of the British division to the east, they too called a halt to their offensive against the 27th ‘Sila’ Division at El Suewis.
MAIN: Battles of Zagazig and El Suweis are won by Italian forces. The 30th ‘Sabauda’ Division lands at Quseir (purple); INSET: The Italians turn on their attackers at Isma’iliya.
Now it was time for the Italians to hit back at these forces at Isma’iliya. The Iraqis briefly held out against the Italian counterattack before taking to their heels in an attempt get to the other side of the Suez while the British 18th Infantry covered their retreat.
To the south, de Stefanis’s 30th ‘Sabauda’ Division had been ferried onto the beautiful but desolate beaches at Quseir on the Egyptian side of the Red Sea. This area is known as the Eastern Desert. The troops struck north, the 3rd Berseglieri Brigade leading the way. The first troops of the I-AOI Corps had landed in accordance with Plan Carnera.
The outriders of the 3rd Berseglieri Brigade head north.
13th August: Under heavy attack from Italian cavalry, tankettes, bersaglieri, infantry and artillery. The British 18th Division is forced to retreat to the eastern side of the canal.
The Italians are soon victorious at Isma’iliya.
The Italian 12th Artillery Regiment, attached to the 27th ‘Sila’ Division, pounding the positons of the British 18th Division.
Algeria
10th August: A report came via Tunisia from Fedinando di Savoia and his 6th Submarine Flotilla coasting along Tunisia. A mountain division had been sighted in Algiers (previously undefended). This lone division could provide significant resistance when the forces of de Bono’s South/Tunisian Army Group were in place for an attack on the city.
AOI
Recap: In East Africa, the strong French 1st Army in Djibouti initially made threatening advances on the Eritrean capital of Asmara but they were eventually surrounded and annihilated by Italian forces. The Italians were also able to capture key British strategic locations in the Somaliland, northern Sudan and British East Africa, effectively trapping the British 3rd Army in the Sudan east of Ethiopia. Entrapement of the British 3rd Army and the coloninal troops in the Sudan was the key objective of Marshal Balbo's "Drin-Drin" Plan. It meant that the Italians could also strike north and attack Egyptian Nile Delta from two directions. In the south, a relief effort attempted by the British 4th Infantry Division just north of Lake Victoria failed and the Italians have finally closed the pincer and trapped the British against the impenetrable water waste called The Sudd. Italian forces will now proceed to push into Tanganyika further to the south.
Uganda/South Sudan
7th August: As night closed in the British 3rd Army committed their last reserve in a final attempt to break out of the Sudan pocket. In foul weather, the 10th Indian Division attacked south out of the Sudd across the savanna of Northern Uganda.
The 10th Indian Division attacks to the south in an attempt to break out of the ‘Sudan sack’ to the south. The beleaguered 4th Indian Division finally gives up the Italians wins Phase 2 of the Battle of Jima.
8th August: Heavily outnumbered, the Indian troops had the advantage that the two of the three Italian Divisions were currently engaged in the battle for Jima. They did however underestimate the shock power of the Ovest Bassacampi ‘Celere’ Division, its swift moving cavalry, armored cars and tankettes quickly formed a front and drove them back into the wetlands of the Sudd.
Eritrean Ascari cavalry move swiftly to intercept the attack.
To the northeast the bloody battle of Jima finally came to its conclusion. After 18 days of tough fighting, the 4th Indian Division and local African troops were finally driven from the Ethiopian escarpment. The difficult terrain caused many deaths on both sides. Jima was the last foothold that the British held in Ethiopia. Nearly 700 men lay dead at the end of the battle which involved over 40,000 troops in total.
The Ethiopian escarpment in all of its glory, note the winding road.
To the south, right on the equator, the retreating men on the British 4th Division were still under attack from the pursuing 29th ‘Piemonte’ Division. The British had cunningly set up a strong defensive line along the Kagera River (a tributary of Lake Victoria) while the majority of their forces still trekked south. Frattini’s men were having great difficulty in breaching this line in the damp tropical conditions. The attack was called off. They would let the British go and then cross the river.
The 28th ‘Piemonte’ gives up the Battle of Bukoba.
The 28th ‘Piemonte’ shows no mercy.
10th August: Now the 5th ‘Cosseria’ Division had marched south to the front lines. Joining up with D’Oro’s 4th Eritrean Division, they launched a joint assault on the British troops holding Lowelli. Resistance appeared weak as both divisions only came into contact with British HQ units.
The Italians meet up with weak resistance at Lowelli.
Arabia Felix
Recap: On the 11th July, the Italian colonial troops successfully landed and secured the undefended British port of Aden. Yemeni forces (allies of Britain) immediately attacked the Italians but could not hold out when Italian reinforcements arrived. Yemen was overrun but the fighting units of their army escaped across the border into the British Aden Protectorate. This victory yielded full control of the Gate of Tears to the Italians, a significant strategic advantage.
Yemeni loyalist forces then emerged from the deserts to the east, attacked and defeated the Somali Dubats which were guarding Aden. The Italians then landed the 30th ‘Sabauda’ at Aden and drove the loyalist forces deep into the Aden Protectorate.
7th August: There was to be no rest for the veterans of de Stefanis’s 30th ‘Sabauda’. After hurling back the Yemeni forces from Aden, they were now ordered to board a transport fleet, its destination being Port Sudan in the Red Sea. Plan Carnera called for their immediate transfer to the Suez Front.
LEFT: The 30th ‘Sabauda’ leaving Aden in Yemen. RIGHT: The division, just north of Port Sudan in the Red Sea.
10th August: After a brief stopover the overworked Red Sea Flotilla and its precious troops disembark from Port Sudan and continue north towards the Suez. The Royal navy was not spotted. (See above for the landing of this division at Quseir on the Egyptian side of the Red Sea).
Last edited:
It seems that you will need to concentrate your forces in order to push the Brits back. Also, I think you should adopt a defensive stance on the French Theatre. Surely you don't plan to capture Paris on your own?
Looks like Africa is going much better than expected. The fresh divisions should push back the now severely struggling Iraqis, and will hopefuly move swiftly to be sent to Europe before any considerable armoured forces can arrive enmass with this new offensive.
Good stuff, as always. As you push south, what's up with South Africa? Are they still neutral?
I'm curious, are you really expecting to be able to peace out with the Allies, or did you just throw that in for role-playing purposes?
I'd avoid bleeding your forces white on the French line until you've polished off the Brits in Africa.
I concure, pull back in France, and then concentrate your forces in Africa and in Asia Minor, and then you should have enough forces to push back the Frence.
It seems that you will need to concentrate your forces in order to push the Brits back. Also, I think you should adopt a defensive stance on the French Theatre. Surely you don't plan to capture Paris on your own?
My manpower is starting to bleed out in France the further I advance. This is because I don’t have any airport in range of my most northerly conquests. A defensive stance, pre Plan Carnera may have been more appropriate.
I was thinking about making a bold prediction about drinking coffee on Champs-Élysées by Christmas. :laugh:
I'd avoid bleeding your forces white on the French line until you've polished off the Brits in Africa.
I concure, pull back in France, and then concentrate your forces in Africa and in Asia Minor, and then you should have enough forces to push back the Frence.
As above, you guys are right. At the moment I cant protect my men from French bombers and it is wreaking havoc with my troops. I will certainly stop once I secure the Rhone Front and await reinforcements.
I'm curious, are you really expecting to be able to peace out with the Allies, or did you just throw that in for role-playing purposes?
Initially I was, I did a test run and it was available but then I appeared to lose it in my current game. However, as tommylotto previously mentioned, if I take the Suez it appears to have some impact and they will agree to peace. There may be some underlying peace attribute assigned to the Suez.
Good stuff, as always. As you push south, what's up with South Africa? Are they still neutral?
Yes, they are still neutral. I imagine their pro-British government wouldny like me taking control of Northern Rhodesia. At the moment the cunning Brits are influencing South Africa (and the USA). The South Africans see Nationalist Spain as a bigger threat than me though.
Hunting the hunters
Recap: After the Italian victory in Ethiopia in May 1936, the large build-up of British forces on the Ethiopian-Sudanese Border unnerved the Italians. Marshal Balbo pitched a “grand plan” (dubbed the "Drin-Drin" Plan by Mussolini) for a war against the Allies to Mussolini. It was accepted and a multi-front war began between Italy and the Allies on the 11th May 1936. The aim was to steal key British and French territories in Africa (including the Suez) and then sue for peace. Mussolini had committed the ‘mad dog act’ so feared by British diplomats and politicians.
On the 2nd July 1936, Spain erupted into civil war. The Italian Fascist’s and the German Nazi’s both supported the Nationalist side.
British opinion on the Italian conquests hardened towards the beginning of August 1936 and it no longer looked like peace is an option. It has become a battle to the death. Such a battle required a new approach to the war called Plan Carnera.
Europe
Recap: At the start of the war the Italian I and IV armies had easily pushed over the unprepared French forces along Little Maginot Line (in the Alps) and expanded into the Provence and Rhone regions. The front became static with the arrival of two French armour divisions and the French forces then counterattacked and retook Marseille. With reinforcements from the II and VIII armies, the Italians have now retaken the initiative along the front. Marseille was recaptured on the 1st August. In accordance with Plan Carnera these forces have started the thrust west to form a front along the Rhone River to Lyon in the north.
Rhone Front
16th August: General Guzzoni’s counterattack against the French armour at Ruffieux was soon successful. The armour division broke of its attack on St-Claude and soon after the entire French attack against St-Claude was also called off.

Guzzoni’s successful defence of St-Claude.
Over the Alps in northern Italy, the skies were filled with the dreaded sight of British Armstrong-Whitworth Whitely bombers. Again their target was was Milan. Fiat Cr.32 fighters quickly scrambled and intercepted them to the southwest of the city. One bomber was shot down before they reached Milan but rest got through unscathed. There were no specific targets on this run, they were simply trying to obliterate Milan. Another bomber was shot down over the city by anti-aircraft fire and the interceptors pursed the bombers far to the west as they returned from whatever airfield the came from.

Further bombing of Milan.

Piazza Fontana after an Allied raid
The lone French division holding out in the battle of Bourgoin-Jallieu had now been reinforced making the battle tougher for the massed Italian divisions. To assisting the assault the Regina Aeronautica had earmarked four wings of Italian bombers. Particularly vulnerable to the bombing runs of the Caproni light bombers were the French armoured cars. Quite a few were knocked out of action.

Italian massed bombers unleashing chaos onto the French lines. Laffly S15 TOE armoured cars pictured.

Caproni Ca. 101 D.2 version, of the 15th Bomber Flight "La Disperata" of the 4th Bombers Squadron “Drago”.
17th August: In no way did the Regina Aeronautica rule the skies. Throughout the entire day French Amiot 143 medium bombers subjected Italian troops at Grenoble and Valence to incessant bombing. The massed Italian divisions at Valance were particularly vulnerable. To make matters worse Italian interceptors were themselves intercepted by French sea planes, stopping them from driving off the French bombers.

Devastating French bombing on the massed Italian divisions in Valence.
18th August: The sole French division dug in at the ancient commune Cavaillon on the eastern side of the Rhone had been under heavy attack from four Italian Divisions and Italian bombers. In fact they had been undertaking a fighting withdrawal, having left the commune and headed west to Arles on the Rhone so that they were not cut off. During the withdrawal many French triopps got lost and were massacred around the Alpilles masiff.

The French retreat from Cavaillon making General Pintor is very happy. The southern part of the Rhone Front is almost secure.
Mediterranean Sea
16th August: To support the future troop buildup along the Suez Front, the Chief of the Navy, Domenico Cavagnari was ordered to run supply convoys to all major North African ports. Assigned to shadow these convoys were a number of submarine and other maritime assets. In addition, at the centre of the triangle formed by Palermo (Sicily), Caglirari (Sardinia) and Tunis he assigned a submarine flotilla to patrol for Allied convoy raiders. Likewise a patrol was set up in the southern Adriatic Sea. This is where both French and British raiders had been having significant success against Italian merchant shipping.

MAIN: Patrol zones in the Mediterranean (green defensive and red offensive). INSET: New convoys to North Africa. NOTE: I am not sure why my new player designed convoys are not showing up.
17th August: No sooner had these new initiatives been put in place when a report came in of contact with a British submarine flotilla off Tunis by the 8th Submarine Flotilla. The nearby 2nd Marine Squadron was able to intercept and joined the battle already in progress.
The British subs were caught unawares and soon surrounded by Italian ships. A mass of depth charges were dropped in and around them. In serious trouble, the British were briefly saved when three flotillas of French subs and several French armed merchantmen attempted to come to the rescue. At the same time Marshal Balbo himself had flown two squadrons of naval bombers into the area. They were able to warn the Italian fleet of the approaching French and at the same time lend a hand in herding the British subs.
At this, the French fleet then decided that it would be better off extracting itself from the battle and leave the British to their fate. Four of the five British subs we already sunk with most of the crewmen ending up in a terrifying situation of being trapped in the sinking subs. As the first signs of dusk started to creep into the skies the last British sub surfaced from damage and was promptly dispatched by the cruiser Trento.

The sea battle in the Gulf of Tunis

The RM Trento is given the honors for dispatching the British 10th Submarine Flotilla.
18th August: The hunt continued for a lone French merchantman that had escaped during the battle. The merchantman managed to sneak behind Zembra Island out of sight of the Italian fleet but it wasn’t long before they were found. At the same time four capital ships appeared on the horizon to the west. It was the remains of the French battle fleet, led by the Courbet, steaming to the rescue. Between them and the lone merchantmen stood the entire 2nd Marine Squadron. Before they were even in range the French merchantman was sunk by one of the subs of the 27th Flottila. When the French capitals were in range, the RM Andrea Doria opened fire with its long range guns and scored a hit the French cruiser Algerie. With this the French fleet fled the battle.

The 2nd sea battle in the Guld of Tunis.
The same day two French submarine flotilla’s were located in the Adriatic Sea. The waiting 3rd Naval Squadron, launched out of the harbor of Bari in pursuit of the French.

French subs driven away from the coast of Dalmatia in the Adriatic Sea.
After a brief skirmish, the French subs managed to slip away relatively unharmed.
ASI
Recap: In North Africa, the Italian IX Army captured Tunis and is now heading west to Algiers. The X Army and the VI Army advanced east, first taking Cairo and then besieging the British in Alexandria. After a tough battle the British 7th Infantry Division and the Middle East Command were forced to surrender. The Italians were then forced on the defensive along the line of the Suez against a determined British and Iraqi attack. The line was breached in its entirety and the British were able to initially push on before their attack faulted. The depleted state of the VI and X armies meant that this front required new reinforcements - they would arrive from the south in accordance with Plan Carnera. de Stefanis’s 30th ‘Sabauda’ Division was the first division to be landed in the Eastern Desert of Egypt.
Suez Front
17th August: The tired and battered 27th ‘Sila’ Division was having a hard time holding out against the fresh 42nd ‘East Lancashire’ Division. They were also subject to bombing be unidentified Allied aircraft. With the threat of an Iraqi Division outflanking him to the south, Nicolosi had seen enough and ordered a retreat of the division to the high ground to the west.

Battered and under relentless attack, Nicolosi orders his men to retreat west from Isma’iliya.
Men of the 27th 'Sila' Division on the retreat.
AOI
Recap: In East Africa, the strong French 1st Army in Djibouti initially made good advances on the Eritrean capital of Asmara but they were eventually surrounded and annihilated by Italian forces. The Italians were also able to capture key British strategic locations in the Somaliland, northern Sudan and British East Africa, effectively trapping the British 3rd Army in the Sudan east of Ethiopia. Entrapment of the British 3rd Army and the colonial troops in the Sudan was the key objective of Marshal Balbo's "Drin-Drin" Plan. It meant that the Italians could also strike north and attack Egyptian Nile Delta from two directions. In the south, a relief effort attempted by the British 4th Infantry Division just north of Lake Victoria failed and the Italians have finally closed the pincer and trapped the British against the impenetrable water waste called The Sudd. Italian forces will now proceed to push into Tanganyika further to the south.
Uganda/South Sudan
17th August: The weak British resistance at Lowelli was still stubbornly holding on but taking heavy casualties. Under heavy attack from three Italian Divisions with more moving into position, it was only a matter of time before the British would have to give ground.
At Jima, Italian forces had now occupied the main town. As they were descending down the Ethiopian escarpment, they came under an attack as two ramshackle British Indian divisions attempted to drive them back. Italian commanders did not expect that the British attack would achieve anything apart from a delay.
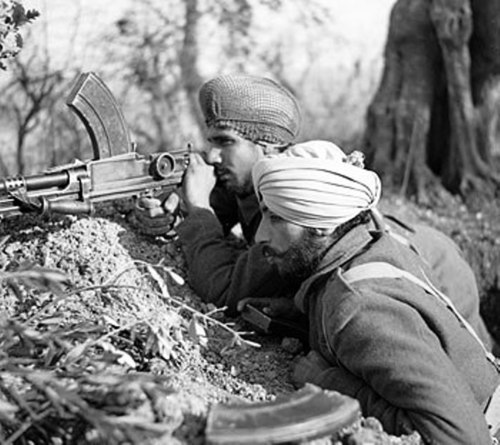
Indian troops manning a Bren LMG

The battle of Lowelli continues while a new battle flares up in Jima.
It wasn’t long before the ‘battle’ of Lowelli was over. The British HQ troops were easily overrun slaughtered in the lowland forests to the west of the Ethiopian escarpment.

Victorious battle of Lowelli and Jima
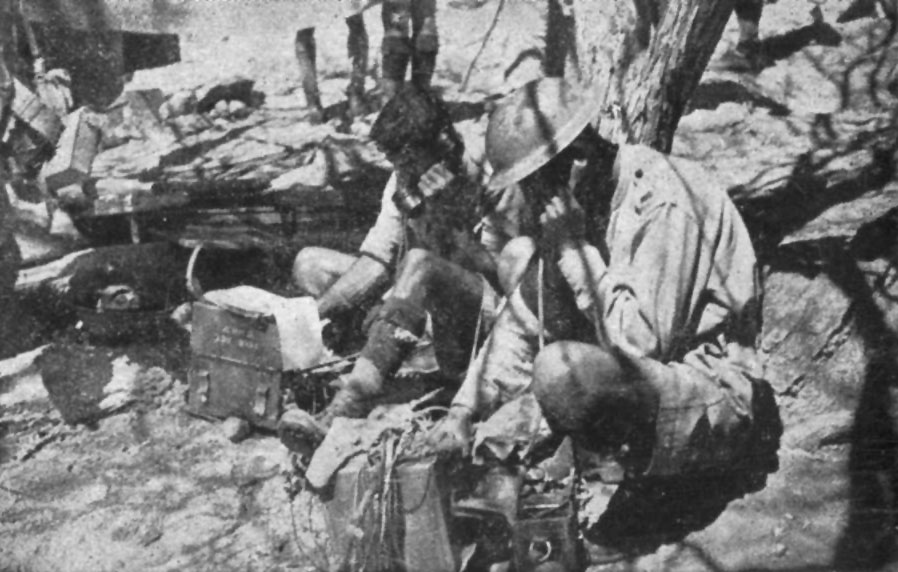
British signalmen operating a field telephone before his position is overrun
18th August: The desperate Indian Divisions that had attempted to establish a foothold at the bottom of the Ethiopian escarpment were driven out after the Italian troops sustained heavy losses.
Recap: After the Italian victory in Ethiopia in May 1936, the large build-up of British forces on the Ethiopian-Sudanese Border unnerved the Italians. Marshal Balbo pitched a “grand plan” (dubbed the "Drin-Drin" Plan by Mussolini) for a war against the Allies to Mussolini. It was accepted and a multi-front war began between Italy and the Allies on the 11th May 1936. The aim was to steal key British and French territories in Africa (including the Suez) and then sue for peace. Mussolini had committed the ‘mad dog act’ so feared by British diplomats and politicians.
On the 2nd July 1936, Spain erupted into civil war. The Italian Fascist’s and the German Nazi’s both supported the Nationalist side.
British opinion on the Italian conquests hardened towards the beginning of August 1936 and it no longer looked like peace is an option. It has become a battle to the death. Such a battle required a new approach to the war called Plan Carnera.
Europe
Recap: At the start of the war the Italian I and IV armies had easily pushed over the unprepared French forces along Little Maginot Line (in the Alps) and expanded into the Provence and Rhone regions. The front became static with the arrival of two French armour divisions and the French forces then counterattacked and retook Marseille. With reinforcements from the II and VIII armies, the Italians have now retaken the initiative along the front. Marseille was recaptured on the 1st August. In accordance with Plan Carnera these forces have started the thrust west to form a front along the Rhone River to Lyon in the north.
Rhone Front
16th August: General Guzzoni’s counterattack against the French armour at Ruffieux was soon successful. The armour division broke of its attack on St-Claude and soon after the entire French attack against St-Claude was also called off.
Guzzoni’s successful defence of St-Claude.
Over the Alps in northern Italy, the skies were filled with the dreaded sight of British Armstrong-Whitworth Whitely bombers. Again their target was was Milan. Fiat Cr.32 fighters quickly scrambled and intercepted them to the southwest of the city. One bomber was shot down before they reached Milan but rest got through unscathed. There were no specific targets on this run, they were simply trying to obliterate Milan. Another bomber was shot down over the city by anti-aircraft fire and the interceptors pursed the bombers far to the west as they returned from whatever airfield the came from.
Further bombing of Milan.
Piazza Fontana after an Allied raid
The lone French division holding out in the battle of Bourgoin-Jallieu had now been reinforced making the battle tougher for the massed Italian divisions. To assisting the assault the Regina Aeronautica had earmarked four wings of Italian bombers. Particularly vulnerable to the bombing runs of the Caproni light bombers were the French armoured cars. Quite a few were knocked out of action.
Italian massed bombers unleashing chaos onto the French lines. Laffly S15 TOE armoured cars pictured.
Caproni Ca. 101 D.2 version, of the 15th Bomber Flight "La Disperata" of the 4th Bombers Squadron “Drago”.
17th August: In no way did the Regina Aeronautica rule the skies. Throughout the entire day French Amiot 143 medium bombers subjected Italian troops at Grenoble and Valence to incessant bombing. The massed Italian divisions at Valance were particularly vulnerable. To make matters worse Italian interceptors were themselves intercepted by French sea planes, stopping them from driving off the French bombers.
Devastating French bombing on the massed Italian divisions in Valence.
18th August: The sole French division dug in at the ancient commune Cavaillon on the eastern side of the Rhone had been under heavy attack from four Italian Divisions and Italian bombers. In fact they had been undertaking a fighting withdrawal, having left the commune and headed west to Arles on the Rhone so that they were not cut off. During the withdrawal many French triopps got lost and were massacred around the Alpilles masiff.
The French retreat from Cavaillon making General Pintor is very happy. The southern part of the Rhone Front is almost secure.
Mediterranean Sea
16th August: To support the future troop buildup along the Suez Front, the Chief of the Navy, Domenico Cavagnari was ordered to run supply convoys to all major North African ports. Assigned to shadow these convoys were a number of submarine and other maritime assets. In addition, at the centre of the triangle formed by Palermo (Sicily), Caglirari (Sardinia) and Tunis he assigned a submarine flotilla to patrol for Allied convoy raiders. Likewise a patrol was set up in the southern Adriatic Sea. This is where both French and British raiders had been having significant success against Italian merchant shipping.
MAIN: Patrol zones in the Mediterranean (green defensive and red offensive). INSET: New convoys to North Africa. NOTE: I am not sure why my new player designed convoys are not showing up.
17th August: No sooner had these new initiatives been put in place when a report came in of contact with a British submarine flotilla off Tunis by the 8th Submarine Flotilla. The nearby 2nd Marine Squadron was able to intercept and joined the battle already in progress.
The British subs were caught unawares and soon surrounded by Italian ships. A mass of depth charges were dropped in and around them. In serious trouble, the British were briefly saved when three flotillas of French subs and several French armed merchantmen attempted to come to the rescue. At the same time Marshal Balbo himself had flown two squadrons of naval bombers into the area. They were able to warn the Italian fleet of the approaching French and at the same time lend a hand in herding the British subs.
At this, the French fleet then decided that it would be better off extracting itself from the battle and leave the British to their fate. Four of the five British subs we already sunk with most of the crewmen ending up in a terrifying situation of being trapped in the sinking subs. As the first signs of dusk started to creep into the skies the last British sub surfaced from damage and was promptly dispatched by the cruiser Trento.
The sea battle in the Gulf of Tunis
The RM Trento is given the honors for dispatching the British 10th Submarine Flotilla.
18th August: The hunt continued for a lone French merchantman that had escaped during the battle. The merchantman managed to sneak behind Zembra Island out of sight of the Italian fleet but it wasn’t long before they were found. At the same time four capital ships appeared on the horizon to the west. It was the remains of the French battle fleet, led by the Courbet, steaming to the rescue. Between them and the lone merchantmen stood the entire 2nd Marine Squadron. Before they were even in range the French merchantman was sunk by one of the subs of the 27th Flottila. When the French capitals were in range, the RM Andrea Doria opened fire with its long range guns and scored a hit the French cruiser Algerie. With this the French fleet fled the battle.
The 2nd sea battle in the Guld of Tunis.
The same day two French submarine flotilla’s were located in the Adriatic Sea. The waiting 3rd Naval Squadron, launched out of the harbor of Bari in pursuit of the French.
French subs driven away from the coast of Dalmatia in the Adriatic Sea.
After a brief skirmish, the French subs managed to slip away relatively unharmed.
ASI
Recap: In North Africa, the Italian IX Army captured Tunis and is now heading west to Algiers. The X Army and the VI Army advanced east, first taking Cairo and then besieging the British in Alexandria. After a tough battle the British 7th Infantry Division and the Middle East Command were forced to surrender. The Italians were then forced on the defensive along the line of the Suez against a determined British and Iraqi attack. The line was breached in its entirety and the British were able to initially push on before their attack faulted. The depleted state of the VI and X armies meant that this front required new reinforcements - they would arrive from the south in accordance with Plan Carnera. de Stefanis’s 30th ‘Sabauda’ Division was the first division to be landed in the Eastern Desert of Egypt.
Suez Front
17th August: The tired and battered 27th ‘Sila’ Division was having a hard time holding out against the fresh 42nd ‘East Lancashire’ Division. They were also subject to bombing be unidentified Allied aircraft. With the threat of an Iraqi Division outflanking him to the south, Nicolosi had seen enough and ordered a retreat of the division to the high ground to the west.
Battered and under relentless attack, Nicolosi orders his men to retreat west from Isma’iliya.
Men of the 27th 'Sila' Division on the retreat.
AOI
Recap: In East Africa, the strong French 1st Army in Djibouti initially made good advances on the Eritrean capital of Asmara but they were eventually surrounded and annihilated by Italian forces. The Italians were also able to capture key British strategic locations in the Somaliland, northern Sudan and British East Africa, effectively trapping the British 3rd Army in the Sudan east of Ethiopia. Entrapment of the British 3rd Army and the colonial troops in the Sudan was the key objective of Marshal Balbo's "Drin-Drin" Plan. It meant that the Italians could also strike north and attack Egyptian Nile Delta from two directions. In the south, a relief effort attempted by the British 4th Infantry Division just north of Lake Victoria failed and the Italians have finally closed the pincer and trapped the British against the impenetrable water waste called The Sudd. Italian forces will now proceed to push into Tanganyika further to the south.
Uganda/South Sudan
17th August: The weak British resistance at Lowelli was still stubbornly holding on but taking heavy casualties. Under heavy attack from three Italian Divisions with more moving into position, it was only a matter of time before the British would have to give ground.
At Jima, Italian forces had now occupied the main town. As they were descending down the Ethiopian escarpment, they came under an attack as two ramshackle British Indian divisions attempted to drive them back. Italian commanders did not expect that the British attack would achieve anything apart from a delay.
Indian troops manning a Bren LMG
The battle of Lowelli continues while a new battle flares up in Jima.
It wasn’t long before the ‘battle’ of Lowelli was over. The British HQ troops were easily overrun slaughtered in the lowland forests to the west of the Ethiopian escarpment.
Victorious battle of Lowelli and Jima
British signalmen operating a field telephone before his position is overrun
18th August: The desperate Indian Divisions that had attempted to establish a foothold at the bottom of the Ethiopian escarpment were driven out after the Italian troops sustained heavy losses.
Last edited:
Africa is just about finished, and you are making steady progress against the Allied naval prescence in the Med. Now if you could just get some decent interceptors to help out Milan
General Guzzoni doing well. I think French situation is a delicate one. They will have to abandon the northern border in order to stop Italians.
What is the secret of your great success against the sub menace?
I'm guessing ASW maybe researched a bit ahead.
Africa is just about finished, and you are making steady progress against the Allied naval prescence in the Med. Now if you could just get some decent interceptors to help out Milan
Yes, I cant wait to finish of the British 3rd Army in East Africa. It a long time coming for them. The sea war goes well for now. :mellow:
I actually manage to do something about those bombers at some stage in the future.
General Guzzoni doing well. I think French situation is a delicate one. They will have to abandon the northern border in order to stop Italians.
I dont think they will abandon the German border. They could easily push me back to the Alps if they repositoned their forces. It seems they AI would like to be conquered by Italy rather than Germany.
What is the secret of your great success against the sub menace?
I'm guessing ASW maybe researched a bit ahead.
This was my first serious attempt to do something about it. Its not clear to me at the moment. Firstly, I had a lot of my convoys covered by Subs and other fleets. Then I put a few NAV's up to look around. Then I set 1 Sub Flotilla to Intercept in the Gulf of Tunis and likewise something to intercept in the Adriatic. It was the Intercept command which allowed the Subs to Contact the fleet and engage them in battle. Then I had a large battlefleet very close nearby. I launched it and they joined the battle.
I have not done any ASW research. I think it was mainly the Intercept command. This allowed me to locate and engage with the Subs. The nearby battle fleet finished off the British Subs in the Gulf of Tunis. Note the French Subs in the Adriatic fell into the same trap but were able to escape.