Abstract, reasoning and goals:
Hello eu4 fanatics. I was originally going for the “African Power” achievement that I had attempted before. The previous runs were mostly left after I lost my next goal in the run, and then got lost with the technology power difference getting too big. I have recently started reading the wikis, watching guides (Thanks to Reman and Arumba!) and putting my engineering mind to getting just a bit more optimized on what to do. I’ve made concise goals, timelines and reasonable steps to arrive there without depending on rng events and still having the room to account for bad rng. I still haven’t touched very hard mode, so everything in this run is on normal difficulty, but I foresee no reason why it can’t be done on very hard as well.
I have written this monster of a guide mostly as a script for a series of videos I’m planning to make. There are several videos I can make just from the many runs that went into this guide. For example: generic mission optimization combined with developing Feudalism and Renaissance, colonial empire strategy, Republic absolutism strategy, trade empire guide, institutions guide (what to plan, when to develop, etc…) and, of course, the overall Kongo guide.
Kongo suited me just fine as a starter nation: it had power dominance in the region and could easily win wars there but had crippling long term start as it couldn’t get access to Feudalism and Renaissance. I was used to developing Renaissance, but developing both Feudalism and Renaissance was challenging to optimize. It also had access to colonization, but on the hardest continent to do so: development deprived lands, fully aggressive natives and colonizers taking some parts of it right at the start. It also had Fetishist as religion and generic missions. Overall, it had its powers but they all came with setbacks: perfect for learning how to improve more at the game. Not that difficult like starting as a vassal, but difficult enough going into late game, which was what I wanted.
The most learning I had was optimizing the generic missions, which is why this guide was written after 9 start playthroughs (up to 1480), 3 of them going to 1580’s and 1 of them going beyond. The footage is made from combining the best and worst parts of these attempts, and hence covers different scenarios. For example, only one video has the newest optimization (move capital twice) in it.
The theme of this run is optimizing the mana as best as we can, colonizing rush and establishing a massive trade empire. We will always be behind on tech compared to western powers as we start without 2 institutions, which is a recipe for massive tech difference. Just about every point will count, and patience is the virtue. Since Africa is poor except some gold provinces, trading is a must. Establishing a trade empire and thus securing our financial situation is easy with Kongo, as it’s one of the well placed nations in Africa to easily reach both sides of the continent, allowing to reach both sides of the globe. Colonization goes hand in hand with our trade empire, providing access to different nodes and giving us many, many merchants.
If you want to see a preview of what this run looks like: the start will mostly be easy, nonstop wars, then followed up with some boring times of waiting, then some boring colonization, then suddenly you are in everywhere, doing everything, reaching at everything and literally not having enough diplomats to do what you want. Welcome to troop transport and micromanagement hell. After that, the action never truly stops. So yeah, only war start, boring follow up, then nonstop activity. Welcome to Kongo, optimized.
The highlights of my run so far include:
Pivotal/Critical goals:
General information:
Religion:
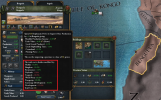
Always pick unrest reduction option as Fetishist (Milira, tolerance of true faith). This is a must as we will be always lowering autonomy; reduces unrest will help you survive quite a lot. When you switch to Sunni, go for legalism and keep it as high as possible.
Trade:
Send traders to Ivory Coast and Kongo to collect trade. Send your light ships to privateer in the Ivory Coast. Anchor your transports, they are useless for now. We want to unite the Kongo trade node under our vassals but we are not exactly in a rush to do so. Ask our vassals to transfer trade power to us. Make your trading policy building spy networks on Kongo region as we will be doing that a lot.
Also, build light ships but take care to look at your sailor spending on missions. If you are not spending as much as you’re gaining, build a bit over naval force limit. Keep this up the whole game, until you run into the sailor problem.
We should swap our home trading region to Ivory coast when we personally own most non-colonizer provinces in the node (some valueless uncolonized provinces can be left), have at least 4 traders and good control over Zanzibar.
Estates:
Pick up the monthly points for admin and diplo, military points won’t really matter as we only need to get to tech 3 for military for the following 15 years. Take the increased manpower and strong duchies policies. After stabbing up, pick up the advisor cost reduction policies or pick up the loyalty threshold increase policies for all 3 estates. We will pick up military points when we take crownland twice more or we will fall under the threshold of 10% crownland and thus start to have 0.2 autonomy increase. When at peace, we can tie even in autonomy with 10-20% crownland with the 0.1 autonomy increase. Since our critical goal #1 is government reforms, we need to get above 30% crownland and stay there. Try to seize crownland as often as possible without caring for estate loyalty penalties.
The sweet spot for estate is having all estates have max loyalty of just a bit over 45%. This way, we can easily get to 50% needed to not trigger rebellion and unrest problems in some provinces with diet. For diet (time it with seize crownland), if you see any subjugation quests from the Amirs, take them.
If possible, we should time our seizing of crownland for just after integrating vassals, as this lowers our crownland and since our development goes up, the effect from seizing crownland just after the integration is higher than just before. A small optimization.
Advisors:
Pick up admin and diplo advisors at the start of the game. When you complete your first wars and gather some money from those, pick up a military advisor. Doesn’t matter which ones, pick any.
When we have enough land and enough income, the missions will occasionally grant us with cheaper advisors. Picking these is a good option if we don’t have one yet. When we have gotten our trade established and gold production set, get a full set of +5 advisors. It's easy to afford at that point.
Advisors:
My idea progression was:
The ones after humanist ideas can change, as they are all personal preferences and not critical points of the plan. There is the very useful -20% diplo annexation cost reduction with Administrative and Influence ideas which, combined with Parliament 10 year bonus, gets us to -70% diplo annex cost overall. Another extremely useful policy is the -1 unrest and -5 years of seperatism with Humanist and Offensive ideas which gets us to stack -10.5 unrest reduction with republic. This policy essentially enabled me to never get natural revolts after court and country event finished. With 98% overextension and 2 war exhaustion, I had only 4.5 unrest in the newly conquered provinces. Naval is good to contest the colonizers, for after a point, they will jump in against you in any great power fight.
Starting moves:
Diplomats:
Now that the background stuff is out of the way, let’s get on with the exciting part of eu4 campaigns: how to expand and build your empire. Due to our critical goal #2 (develop institutions), we will NOT be spending any points whatsoever in coring any lands and trying to shy away from diplo cost of unjustified demands in war such as asking for unclaimed land. Our goal is to feed everything to our vassals, create new vassals and integrate them. Therefore, our diplomats will always be working. Assign them to build spy networks on your path of conquests for claims. In their downtime, assign them to build relations with your vassals. Do not stop for aggressive expansion: it’s worthless lands so the only people to care won’t care until it’s their turn to die.
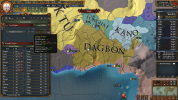
An example of building spy networks for claims is as follows: build claims for Nunu and Yaka provinces, but in the meanwhile build spy network for the next in line of your path (Kalundwe) and the one next to that (Kikondja). When you go to war, take Nunu and the unclaimed Munene province so you have a border with Kalundwe. Then, immediately make claims for both provinces, give the land to your vassal, and go to war against Kalundwe. When you eventually take both provinces, we should have enough spy network to build claims on both provinces of Kikondja. Make your claims, then release Kalundwe and go to war and repeat. Due to the alliance chains the Central Africans tend to make, we will need to wait for truces, but we can still tell our vassals to build claims by highlighting them as important to our fledgling empire.
Conquests:
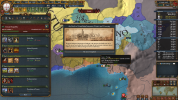
To make dealing with alliance chains easier, we should ally one of the Central African nations like Lunda who is exactly at the middle of everyone and thus can be used to called into wars for promise of land (and not fulfil that promise and break alliance after war because they are next), or lock down one of the allies in a previous war and declare after they are fully occupied. At the start, we will have 3 war targets available for us: choose the one which has the lowest number of allies. Hire the free company and complete the force limit mission, then go to war when you built your claims.
We will never have true allies until the 1500’s. Until then, every ally we will make, we will eventually eat. Therefore, never accept royal marriages outside your vassals. Making a temporary alliance for calling into war in promise of land with one of the nations is fine. However, we need 2 nations with 150 relations to complete the important mission “Trustworthy Allies”. Pick allies from the northeast and southeast parts and royal marry them. Your king will likely die before you are to either diplo-vassalize them or conquer them, so the stab hit from royal marriage will be negated.
Integration:
Trustworthy Allies mission is the prerequisite of the next mission which will give us the all-important 15% diplo-annex cost reduction. As this is our only cost reduction we will get for a long, long time, I’ve based my run off this 1 mission and milked it as much as I could. In my run, I’ve focused on keeping 2 large vassals or 3 medium size ones and started to integrate them so that their annexation times would be very close to each other. When the annexation progress hits 85% on any of them, finish the mission and integrate both. This 15% cost reduction lasts 25 years, enough to vassalize and integrate another set of nations. I went all out on getting vassals integrated during this limited time period to fully take advantage of it, even going so far to bank some diplo points and skipping exploration ideas and use all 3 of my diplomats to integrate 3 vassals at the same time so they finish very close to each other to avoid the -3 diplo rep malus from integrating early, resulting in a photo finish. However, I do recommend to just casually integrate vassals over time slowly, without caring for the -3 malus after the first 2 integrations. A general advice I will give is to not give lands to a vassal you are just about to integrate. Separate vassals by integration order and plan your conquests accordingly. They will generally increase autonomy, so we will need ample time for the autonomy and the devastation to naturally recover.
At the start, give all the newly conquered lands to your vassals, and integrate both of your starter vassals. Be sure to time the integrations to finish roughly at the same time. When starting integration, complete the “Trustworthy Allies” mission. Complete the “Acquire Subjects” mission at 85% integration of any vassal. This will enable us to complete the “Expand Nation” mission before we start developing both institutions.
Be sure to keep a spare diplomat (if you have one) to build spy network on the adjacent nation to your vassal that you’re integrating. Optimization!
Developing and capital moving strats:
Before you develop institutions, there are 2 paths we can go with: either just developing it normally in our capital area, or moving our capital to a shore before finishing the mission. Since there are both pros and cons to both options, this is purely an option and not a directive.
Developing in our capital normally:
I should tell more about spawning Colonialism: Spawning colonialism is possible at these provinces:
Feudalism & Renaissance:
As we start without Feudalism and renaissance and with no way to get it from our neighbours until 1500’s, we will need to develop them. The only way to conquer land with Feudalism is to no cb an east african nation, force vassalize them and get claims (or no cb) bordering lands, or integrate them and do the same. This takes a long time and costs a lot of admin points, along with messing up our overall autonomy levels so I wouldn't recommend it. We need Feudalism in order to develop renaissance, which nobody has. Since we don’t use much of our mana during conquests (with the exception of integrating Loango and Ndongo) or teching up with 50% penalty, we will be saving it all to develop 2 institutions at start.
For Feudalism, we cannot gain prosperity in our capital before we hit point cap. Our goal here is to make the Burghers influential and loyal at 60% and complete the “Expand Nation” mission after integrating both starter vassals. Since we can start annexing our starter vassals at 1455 January, we will only acieve this goal earliest at 1457. There is also a rare monsoon event that gives you 20% development reduction for 5 years: if you get this event forget everything and develop there before the 5 year duration of this event runs out. Choose your new coastal capital to develop and primarily spend your admin points, then immediately embrace Feudalism and acquire mil tech 3. Don’t tech up again until developing renaissance. Mil tech 3 is an exception because fighting with tech 2 vs tech 3 makes you lose battles when you outnumber your foes 2 to 1.
For renaissance, wait for your new capital area to gain prosperity, and try to do the same things we already did with Feudalism. With the state edict, Burgher loyalty, prosperity and the mission reward still active, you should have a significant 40% dev cost reduction. The gold cost to embrace them is mediocre as most your land is still within the control of your vassals. Your vassals don’t count for the gold cost.
The colonial nation rush:
General:
By late 1470’s, we finally acquire our first idea group and pick exploration ideas. A little before this point, change points focus into diplo. Diplo tech 3 is all we need until we finish the ideas. To make things faster, don’t tech up after that and save points for ideas. Pick the policy that gives no uprising chance: Africa is brutal with native uprisings during colonization. After you get your first colonist, immediately pick the Burgher privilege of “Grant New World Charters”. This will make your colonization much easier.
By 1480’s, we will have enough splendor to take our first age power. Pick the “Claim neighboring provinces with claims” power, as this will make waiting for vassals to fabricate claims a thing of the past. Use this power to fabricate claims on everywhere in the Great Lakes and Zambezi regions.
If everything goes to plan, by 1490’s, we should attain great power status. Use this to influence your vassals for easy opinion.
Conquests:
By this point, we have united most of our part of the trade node and have truces with the leftovers. That’s fine, now we focus on Great Lakes and Zambezi regions. We have a border over a lake for the Great Lakes, but lack one for Zambezi. In a run, I got lucky and managed to diplo vassalize Tumbuka, the north-most country in Zambezi. Lacking that luck, look to building a spy network, then sending your colonist to the bordering province. You don’t need to complete the colony yet, it’s just needed to get your claims and coring range. Repeat what we have done in opening and you should be fine: Kongo is quite powerful in comparison to everyone in the subcontinent.
When conquering the Great Lakes area, assign it to a vassal and leave them. You can take advantage of the age power to claim every area and give them to your vassal after war. For this Great Lakes vassal, placing a relative to the throne is a good option, as we will not integrate it for a long time. Diplo points are for exploration ideas at this point in the game.
We should rush for the gold as soon as we have reach in the south-eastern part of the subcontinent. Take every gold mine you can, core and state them, lower autonomy after cores are finished and slap on the autonomy reduction edict. When we have spare points after they revolt, turn on the development edict and dev these provinces up to 8 production each.
Also, hold off from spawning Sunni zealots as we MUST have the government reform into republic before we can switch religion. Give these lands to a Sunni vassal.
As soon as you get an explorer, explore the northern Africa coast and prepare to claim and take over what you can see. This time, don’t feed it into a vassal, take it all for yourself as coring range and distance to other nations to diplo vassalize is the key. Try to conquer whatever you can find in the Ivory Coast trade region, barring fighting the colonizer western powers. If you leave them alone, they should also leave you alone.
Our goal is to dominate Ivory coast. However, taking steps to slowly conquer the Timbuktu and Katsina trade regions should also be a goal. We can just leave these lands in the hands of our vassals and let them build claims and whatnot, slowly getting the conquests rolling. Prioritize vassalizing Timbuktu trade region as we can send a trader to steer trade to Ivory coast directly from here.
Colonizing madness:
There are 3 critical, 4 major and 5 minor colonizing targets. Minor ones are mostly advice of colonizing.
Critical:
Colonialism institution strats:
This time, we have a shot at actually spawning colonialism or acquire it naturally if that fails. If we don’t spawn it, our coastal provinces will automatically get the institution after we have established our first colonial nation. Colonialism has “Port or capital of an Old World country that has colonial subjects in the New World” spread modifier” (highest spread modifier actually) that we should have fulfilled by now, which means we can embrace colonialism without developing for it. This will cost quite a lot of gold though, as we should hold a lot of land by now. Take some loans if needed.
When you have colonialism, try to slow the spread of it as much as possible. Having a vassal between your lands and your enemies slows the spread of institutions quite a lot, making you keep a local tech advantage.
After the institution spawns and colonizers arrive at Africa, move our capital over to Gold Coast (or wherever the closest colonizer is) to acquire the border bonus for tech cost reduction. The way it works is that we automatically have tech cost reduction from everyone in our culture group and any nation that has any cored province that has a land connection to our capital. Colonizing the entire desolate colonizable land in the Ivory Coast this early in the game is difficult: it’s much easier to move our capital (again) to somewhere north in Ivory Coast, where colonizers always settle and get the border bonus this way. This time it’s definitely worth moving our capital as we should be behind by 3-4 tech levels in admin/diplo trees at this point, and that’s a 20% reduction, which already redeems the moving the capital admin cost in 2 techs.
Government and religion shift pain times:
Prepare for Sunni switch:
About 10 years before the final government reform (check the expected time in the reform progress bar, should be around early 1530’s) is the time we spawn our Sunni zealots and slowly let them convert our lands. Start this spawning of rebels only after taking crownland, as taking crownland requires you to have no rebels (and be at peace).
Trail a bit behind the rebels and free the provinces, we will lose prosperity and it will take a couple years to recover it, but we need to go below the 50% religious unity threshold that we need for our merchants to pick the “Propagate Religion” trade policy. Of course, the more they convert the better, as religious unity will be a huge factor when we stab up to 4 TIMES after we convert to Sunni.
If your capital is taken by rebels (let them as it’s a 30+ dev province and will be difficult to convert later on), let the rebels walk away and then start unsieging it. If the rebels challenge you, that’s fine; kill them and wait for new rebels.
The conversion option only opens after we reform away from tribal, hence our mandatory wait until this year to convert. By the time we change government to Republic, try to have at least half your lands as Sunni. Making your vassals go completely passive is the best option to keep them from killing the rebels during a war, as it happened in a run of mine.
If we don’t have enough lands converted, we can opt to wait a bit more while trying to spawn more zealots (this was difficult with the unrest reduction my nation had stacked, but provoking them if you have the expansion speeds things up) and wait for 100 republic tradition.
Switch government type:
At around 1530’s, you should reach the final government reform at the tribal tree and get ready to complete goals #1 and #4. My preferred pick was republic for republics let you experience a more relaxed game. If you want to get the Afrikan Power achievement as fast as possible, reform to horde and plunder your way through everything. If you want to go for the easy and standard absolutism power spike, choose Monarchy. If you want flexibility and no rebels, choose republic. Basically, any govenment type works, so choose one you are most confortable with. The following is written with Republic as it was my choice.
After the switch, the most painful parts of the run start: devastating stability cost, low crownland, low republic tradition, low religious unity, few mana.
The general goal is to get to near 100 republic tradition, convert to Sunni, get a young leader, and keep him there as long as possible. For mana points, it’s better to take the reform that gives random candidate +1 bonus, and go for frequent elections to reach higher mana generation faster. Credit to Arumba and his Kongo essay for this strategy.
To arrive to that point, just keep switching leaders for a while. Using military points for republic tradition is a good trade, so if you need to stab up, don’t hesitate to bump up your republic tradition with mil points.
Switch to Sunni:
Before clicking the decision, make sure you have admin points banked up. The more, the better. The amount depends on the stab you have, but should never be less than 500 as we want to immediately jump back to +1 stab to protect our prosperity.
If we have done everything correctly, we should have religious unity above 50%, meaning that we can select every trader we have any spam the Propagate Religion trade policy. However, this is the ideal; the reality is that we will have about 40% Sunni in our lands when we swap religion. In my run, I had to convert some of my land and take land from Kilwa to push my religious unity above 50%, then used my traders in Kongo, Great Lakes, Zambezi, Zanzibar, Cape and Ivory Coast to convert religion, effectively giving me 6 more missionaries.
As we are closing to the year 1550, we should pick the school that gives us development reduction (Maliki), as we will be developing for Printing Press asap.
When we switch into Sunni, we will lose a lot of crownland for some reason. Keep that in mind.
Colonial empire building via aggressive takeover:
Now that our first colonial nation has been formed, you got a taste of the future. Now it’s time to get our hands dirty, reach far and wide, towards EVERY SINGLE colonial nation except the Caribbean. Look towards extending your colonial range and getting more colonial companies established, preferably at 10 provinces. Our goal isn’t to build a massive colonial empire, it’s to build colonial companies with 10 provinces, earning the merchant and them leave them to themselves. There aren’t any critical goals to accomplish now, just general rules of thumb and advices:
By this point, we have enough power to switch our main trade node from Kongo to Ivory coast. Collect from Ivory Coast, set all your light ships to protect trade there, then transfer trade from Kongo, Great Lakes, Zambezi, Zanzibar, Cape trade nodes. If you have taken a foothold in Coromandel or Malacca trade nodes, transfer trade from there as well. Keeping a small light ship fleet in Zanzibar is also preferred as the conquest there isn’t finished yet.
If possible without angering your vassals, ask for transfer trade power and nothing else. We don’t have the diplomats or the time to improve relations with the many vassals that we have.
Estates:
Now that we have converted to Sunni, we have unlocked the all powerful Dhimmi. Get their loyalty above 60% whenever possible, as the tech cost reduction is massive for us as we are trailing behind in tech until 1570’s. Pick the loyalty giving privilege and the government capacity one; both are needed at this point.
Continue seizing crownland after timing some teching ups with Dhimmi, as crownland will start to drastically drop with your continued conquests everywhere. However, the rebels will now be difficult to determine where they will spawn, since your country is huge in area now. If you stack enough privileges, you should be able to occasionally seize crownland without angering any of your estates. Time your diets accordingly.
Developing (for the last time):
This is the last hurdle our Kongo run will have. There is no easy way to get this institution, and it’s spread in Europe is very slow too. As we have flipped Sunni, there is no way for us to get a natural spread like we had with colonialism, or any way to acquire it (must be Protestant or Reformed for provinces to naturally spread). Luckily, we have recently switched to Sunni and picked the dev cost reduction school. This time, we can stack a nice 55% dev cost reduction with ease:
If you haven’t, now is the ideal time to develop all your gold mines to 10 production. Some may not have prosperity (rebel problems in the area); you may choose to wait to develop these but since we aren’t developing that much, it should be fine to develop without prosperity. By now their autonomy should be low enough to massively profit from these gold mines. Waiting for flipping to Sunni and getting Maliki school and/or upgrading the trade centers to lvl3 would lower the dev cost by 20%.
Nigh unstoppable:
This is the point where we can finally go all out. No more saving points for developing or stability, no more rushing a critical colony, no more income problems, no more government or religion change problems. Counting our colonial nations and vassals, we should have roughly double the dev of the #2 great power by now. By the year 1570, you should have caught up in tech with the colonizers and finally see the red ahead of time percentage on your tech costs. If you have made it this far, congratulations! Nothing should stop you now. The only limiting factor we have is governing capacity.
Now you should always be 2-3 above colony limit and completing the remaining Colonial nations. By now, only Canada, east coast and Australia should remain. These are all non-competed Colonial regions, so we can take our time and fill out the remaining parts in Ivory Coast first. Leaving some provinces to the colonizers works since we can get the neighbour bonus from them.
Integration:
By now, we should have many vassals around the world:
Humanist ideas:
We can’t pick diplomatic or influence ideas yet. That would put us at a massive diplo deficit as we need to integrate vassals first and ideas second, just to hang out until the age of absolutism starts. Also, if we don’t pick humanist ideas, our admin points will overflow. The best way to spend admin points is coring, but overextension also reduces our diplomatic reputation to the point where diplo annex process stops. Therefore, humanist is the way to go.
Trade, buildings and ships:
All these are interconnected so I’m writing them together. By now, we should have more merchants than we require, having 8-11 traders just from colonial nations. Now, it’s time to establish the great trade route of Ivory Coast. Use all merchants to make a long chain that ends in Ivory Coast. Following the reverse path is the easiest to plan out: Cape, Zanzibar, Kongo and Zambezi, Malacca, etc…
To spawn Global Trade, you need to siphon as much trade from Malacca and India trade nodes as possible. Malacca is the easiest to enter into, divided by many nations while India is mostly dominated by Vijayanagar. We won’t have total or majority control of both nodes as that’s way too much claims and development to conquer, even with vassals. If you can’t conquer it, or even if you conquer it, send light ship fleets to divert trade from both these trade nodes. Do the same for Zanzibar and most importantly Ivory Coast, as European powers will siphon off some trade by diverting it.
The only buildings you make should be sailor increasing ones. We don’t need max ship limit as every colonial nation gives us +10 ship limit, totalling to 120 naval limit increase before the 25% navy limit increase from exploration ideas. Therefore, we will never reach that without first encountering the monthly sailor problem first. Otherwise, spend your money on upgrading all trade centers to lvl 3 on Ivory Coast. We will develop these later on by building universities on these provinces when we hit admin tech 17.
Just before the year 1600, use the state edicts everywhere to protect trade, giving us a needed edge. In my playthrough, I was barely beaten by Portugal with Sevilla trade node by less than a ducat, forgetting the use of the edicts. It may save you!
By now, we should have close to 100 ducat trade income, with massive multiplier bonuses from our merchants, plutocratic and national ideas and 10 province colonial nations. The huge light ship fleets help us retain most of it in Ivory Coast or transfer from India and Micronesia. Combined with a respectable gold income, we will have so much money that we can afford 3 over limit colonies, +4 advisors, force limit army and still have a decent net gain.
Absolute madness:
The age of Absolutism prep:
Starting right off the bat with a golden age helps. We can easily fulfil the following 3 requirements:
The following part is written for Republics. Other government types can skip some parts of this prep work, as they don't have a natural absolutism penalty with their government types and thus, getting the +20 max absolutism should be easy. Getting golden age is critical for the Court and Country event. Actually, for republics, every single step is critical; there is only 5 max absolutism to spare in this plan. It’s very tight, but doable.
We have made most of the absolutism preparation by getting rid of the Amirs with parliament reform. While we wait for 1610, the start of absolutism, keep removing policies while keeping an eye for the loyalty balance of 50%. Since parliament gets rid of calling a diet, we need to have natural 50% loyalty threshold in our 3 remaining estates. Full Humanist ideas gives Dhimmi loyalty, high Legalism (Muslim piety) gives Clergy loyalty (trading Dhimmi with Clergy in this case), Republic government type and full Plutocratic ideas gives Burgers loyalty. Thus, we can easily keep seizing crownland without having many policies. If it happens, don’t hesitate to seize land even if it causes rebels; getting crownland above 75% is much more critical than prosperity and dealing with small rebel stacks.
Our goal with estates is to get rid of every single policy. There must be zero max absolutism reduction when we trigger the event. Removing the monthly admin and diplo policies is necessary at this point, especially since removing them gives 5% loyalty limit, making it easier to seize crownland. If necessary, take the parliament decisions to grant loyalty to estates (they need to be pissed off at you though for this decision to appear) and take their policies away. At this point, since the influence increase from diets have started to run out, we can easily achieve more loyalty than influence. In fact, the influence should be so low that the penalties from pissing off the estates should be the minimum ones.
When the age starts, and we have built up to current max absolutism, switch from short election cycle reform to the long one, giving us an effective +20 max. Totally worth the 50 progress cost.
Then, do the same for switching into Noble Elites from Oligarchy. This will net us +20 more max, getting us just above the 65 limit. Do this last, as the 8 year election cycle sucks.
DO NOT FOLLOW the standard absolutism plan by having unrest enough to trigger particularist rebels and accepting them, then lowering autonomy everywhere for cheap absolutism start. This causes you to lose a massive amount of crownland when we accept rebel demands: about 18%. This means that we have to resort to more passive means of getting to 50 absolutism to start the crisis:
When we arrive at >75% crownland and zero estate policies, it’s go time.
The Court and Country event:
Tank your stability by switching your colonization policy repeatedly, then no cb someone you can beat easily that’s far away. This should be enough to trigger the disaster.
The following sections are written under the assumption that we will hit our absolutism cap at the end of the event, for this is very simple to achieve with the events in the crisis.
The largest max absolutism we can have is:
If this is too tight, you can easily achieve the +10 max ending (it requires above 30 absolutism) without switching into Noble Elites and having some estate policies active or not having above 75% crownland. You do need to switch into longer elections though, it really helps.
At the end of the event, with the tight but achievable +20 strategy, we will have 110 max absolutism. Now, we can switch back into Oligarchy and get our 4-year election cycles back for mana, ending with 90 max. I wouldn’t recommend switching back into the shorter election cycles, the -20 max drop isn’t worth it; 5-year election cycle is good enough. When our golden age ends, we’ll drop to 85 max, but at that point the final government reform won’t be too far away to get and that’s +25 max. After that, we can swap into shorter elections again.
With the relaxed +10 strategy, we will have a respectable 80 max absolutism during our golden age, without any estate effects.
Now, we do have some alternative methods if we want to mix things up…
The end
You have made it! The world is your playground, there are no crises to manage and no natural enemies. Now, we have enough gold income to afford max force limit army and navy, +5 advisors, any number of mercenary replacements as we want. Now we can start going after the “Afrikan Power” goal a lot faster.
The only real limit is governing capacity. Therefore, build as many courthouses/town halls and State houses (we have lots of gems to optimally build them) to reduce the usage. Build universities at your world ports (coastal lvl3 trade center) to have truly ridiculous developing costs and dev them with your spare mana. Once, the 20% reduction in an area event hit one of my lvl 3 trade centers, resulting in a 90% reduction. Keep building the sailor increasing buildings of any type.
I recommend taking influence ideas, as diplomatic ideas aren’t as critical after getting the +1 diplomat government reform. The full influence gives the reduced extra demand cost, which we will use a lot.
Religious ideas aren’t as helpful for conquering African and Indian lands as a significant part of those are the same religion as ours: Sunni.
The only long term advice I can give is about seeking to conquer Coal owned provinces if possible, for the global 5% goods produced modifier we get per coal owned province. This can easily skyrocket our massive trade income even higher.
I don’t have much experience with revolutions, so I will also skip that part.
This is the point where the guide stops, as there is nothing more to write about. We have achieved our finances, our power base, our religion switch, our government switch, embraced institutions, caught up with tech and ideas and got +20 max absolutism. There is simply nothing left other than the classic war and vassal ideas that everyone has tons of stuff on. All other institutions can be triggered or acquired naturally, so I don’t see the need to write about those.
Thank you for reading my optimized guide to Kongo. I hope everyone learns something about this guide project I’ve endeavored on, as I have learned a lot while writing this.
Good luck out there, and don’t forget to enjoy this brilliant game.
Determinor
Timeline
1458 Integrate both starter vassals, developing Feudalism
1465 Attain prosperity, developing Renaissance
1475 Great power status
1480 First colonist, unite Kongo region
1500 Achieve colonial range to South America
1510 First colonial nation
1515 Attain Colonialism from port provinces
1530 Government reform to republic
1545 Religion flip to Sunni, near max republican tradition
1560 Develop Printing Press
1570 Catching up to date in technology
1575 10 merchants from Colonial nations
1580 Empire rank
1600 Potentially spawn Global Trade, 15 merchants, 100 ducat trade income
1610 Age of absolutism start, immediately start golden age
1628 75% crownland, start Court and Country
1638 Finish Court and Country with +20 max absolutism bonus
Hello eu4 fanatics. I was originally going for the “African Power” achievement that I had attempted before. The previous runs were mostly left after I lost my next goal in the run, and then got lost with the technology power difference getting too big. I have recently started reading the wikis, watching guides (Thanks to Reman and Arumba!) and putting my engineering mind to getting just a bit more optimized on what to do. I’ve made concise goals, timelines and reasonable steps to arrive there without depending on rng events and still having the room to account for bad rng. I still haven’t touched very hard mode, so everything in this run is on normal difficulty, but I foresee no reason why it can’t be done on very hard as well.
I have written this monster of a guide mostly as a script for a series of videos I’m planning to make. There are several videos I can make just from the many runs that went into this guide. For example: generic mission optimization combined with developing Feudalism and Renaissance, colonial empire strategy, Republic absolutism strategy, trade empire guide, institutions guide (what to plan, when to develop, etc…) and, of course, the overall Kongo guide.
Kongo suited me just fine as a starter nation: it had power dominance in the region and could easily win wars there but had crippling long term start as it couldn’t get access to Feudalism and Renaissance. I was used to developing Renaissance, but developing both Feudalism and Renaissance was challenging to optimize. It also had access to colonization, but on the hardest continent to do so: development deprived lands, fully aggressive natives and colonizers taking some parts of it right at the start. It also had Fetishist as religion and generic missions. Overall, it had its powers but they all came with setbacks: perfect for learning how to improve more at the game. Not that difficult like starting as a vassal, but difficult enough going into late game, which was what I wanted.
The most learning I had was optimizing the generic missions, which is why this guide was written after 9 start playthroughs (up to 1480), 3 of them going to 1580’s and 1 of them going beyond. The footage is made from combining the best and worst parts of these attempts, and hence covers different scenarios. For example, only one video has the newest optimization (move capital twice) in it.
The theme of this run is optimizing the mana as best as we can, colonizing rush and establishing a massive trade empire. We will always be behind on tech compared to western powers as we start without 2 institutions, which is a recipe for massive tech difference. Just about every point will count, and patience is the virtue. Since Africa is poor except some gold provinces, trading is a must. Establishing a trade empire and thus securing our financial situation is easy with Kongo, as it’s one of the well placed nations in Africa to easily reach both sides of the continent, allowing to reach both sides of the globe. Colonization goes hand in hand with our trade empire, providing access to different nodes and giving us many, many merchants.
If you want to see a preview of what this run looks like: the start will mostly be easy, nonstop wars, then followed up with some boring times of waiting, then some boring colonization, then suddenly you are in everywhere, doing everything, reaching at everything and literally not having enough diplomats to do what you want. Welcome to troop transport and micromanagement hell. After that, the action never truly stops. So yeah, only war start, boring follow up, then nonstop activity. Welcome to Kongo, optimized.
The highlights of my run so far include:
- Switching your capital, twice, early in the game.
- Stacking 30% to 55% development cost reduction for developing institutions, with the rare chance of 20% more reduction from an event.
- Integrating 3 vassals at the same time just before the reduced diplo annex cost runs out.
- 11 merchants, 110 naval limit and 55% trade power increase from colonial nations.
- Banking 800 admin for stability.
- Empire rank at 1570’s.
- Missing spawning global trade by less than 1 gold in trade node
- 250 ducat trade income and 18 merchants at 1635.
- +20 max absolutism Court and Country event finish
- 100 absolutism with the final government reform
- No rebels for 150 years
Pivotal/Critical goals:
- We need to rush through government reforms to get rid of uncivilized status and reform into a republic. This means that you should always look away from coring provinces at the start and instead giving them to vassals or taking all the land and releasing them as vassals. You should also reduce autonomy if autonomy is above 30% and run state edicts to reduce autonomy.
- When you integrate your vassals, the autonomy mostly drops to 60% when stated, which we instantly do and lower autonomy and put the monthly autonomy reduction edict. This cuts on the time where autonomy is really high, land is devastated, land has separatism and it also saves us points as integrating vassals uses 8 points per dev instead of the coring usage of 10 points per dev. 20% is a good amount since we don’t have natural reduction to vassal integration or coring as Kongo.
- Never March your vassals; you will integrate all in Africa.
- We are tribal at the start of the game and we need to switch to a proper government by reforms. The final reform will make us switch and this will cost us a lot of crownland (I don’t know why, but we lose quite a lot of crownland when we switch governments) so keep seizing crownland continuously.
- We need to develop 3 institutions: Feudalism, Renaissance and Printing press. You should develop the first 2 as fast as possible, and look towards developing the 3rd one. The only exception of teching up without the first 2 institutions is the Military tech 3, which you should be able to take without too much penalty (5-10%).
- We need to rush colonial nations and get them to 10 provinces to acquire a merchant.
- This will be extremely valuable when combined with the 4th point of converting your lands to Sunni, as you can essentially use your merchants as missionaries with the trade policy “Propagate Religion”.
- The first colonial nation, Colonial Brazil, is the pivot of the whole strategy. You need to colonize St. Helena, the island west to the coast of Kongo, and pick up the colonial range advisor, along with the colonial range idea from Exploration idea group. This will give juuust enough range for you to colonize that area. As your starting colonization speed is slow, this will be a huge setback. The coring of natives is way easier. If needed, temporarily colonize adjacent provinces to claim them or even permanently colonize provinces to reach inland natives. Otherwise, keep expanding your coring range slowly by colonizing across Americas to cover all potential colonial nations. Creating a colonial nation will allow us to naturally get Colonialism institution in our ports and embrace it without developing for it.
- We need to convert to Sunni. Fetishist is decent with republic, but it’s nowhere as useful as Islam. Propogate Religion is overpowered and most of the remaining lands we need to conquer in Africa are Sunni, so we won’t have a hard time with rebels after conquering them. If you want a more rewarding but harder, get Ibadi if you can spread it via rebels. The closest Sunni provinces are near Mutapa. You need to get there and conquer them, have a straight land connection throughout your lands owned by you and not your vassals, and then spawn Sunni zealots to convert your lands. The rebels won’t convert you to Sunni, so you must use the decision to convert to Sunni, which will cost 4 stab. However, that needs you to reform into a proper government, hence the 1st point being the 1st point. You should, however, start converting your lands via these rebels slowly, taking them back behind them after they are 3 provinces away. You should kill these rebels if they ever siege your capital down, as this starts the trigger for the rebels to win (increased autonomy, stab loss). You can always spawn more rebels after all.
- We want to let the colonizers colonize somewhere in the Ivory Coast, and then establish a border next to them and move our capital over to get the bordering neighbour tech cost reduction for the rest of the game as early as possible. Only move after colonialism spawns.
- We want to dominate the Ivory Coast trade node. To build our trade empire, we’ll need to control this node and the downstream nodes as much as possible. This includes the Indian region trade nodes, notably Malacca. This is why we need to spread around so fast and acquire so many traders: to transfer trade from everywhere and convert everywhere to Sunni.
- We want the gold from the Mutapan provinces. Rush for these as soon as possible, conquer them yourself, state the lower autonomy, put the autonomy reduction edict and occasionally swap to development edict when you have some diplo points and Burgher loyalty above 60%. This will provide a massive income boost, which will come at a time you are starting to struggle financially.
- We want to have prosperity everywhere, especially for developing institutions. The goal is to always have stab above 1 and make sure we never develop any devastation. This is especially important for the first 20 years. This changes how we wage war a bit: the focus is to kill enemy troops and siege the whole country asap or locking them down and chasing their armies if they escape into our territory. Never let the enemy siege our lands!
- We want the +20 max rewards for Court and Country. This can be achieved both by Republics or Kingdoms, Kingdoms being significantly easier of course. However, I like Republics and found a way to make this work for them too.
General information:
Religion:
Always pick unrest reduction option as Fetishist (Milira, tolerance of true faith). This is a must as we will be always lowering autonomy; reduces unrest will help you survive quite a lot. When you switch to Sunni, go for legalism and keep it as high as possible.
Trade:
Send traders to Ivory Coast and Kongo to collect trade. Send your light ships to privateer in the Ivory Coast. Anchor your transports, they are useless for now. We want to unite the Kongo trade node under our vassals but we are not exactly in a rush to do so. Ask our vassals to transfer trade power to us. Make your trading policy building spy networks on Kongo region as we will be doing that a lot.
Also, build light ships but take care to look at your sailor spending on missions. If you are not spending as much as you’re gaining, build a bit over naval force limit. Keep this up the whole game, until you run into the sailor problem.
We should swap our home trading region to Ivory coast when we personally own most non-colonizer provinces in the node (some valueless uncolonized provinces can be left), have at least 4 traders and good control over Zanzibar.
Estates:
Pick up the monthly points for admin and diplo, military points won’t really matter as we only need to get to tech 3 for military for the following 15 years. Take the increased manpower and strong duchies policies. After stabbing up, pick up the advisor cost reduction policies or pick up the loyalty threshold increase policies for all 3 estates. We will pick up military points when we take crownland twice more or we will fall under the threshold of 10% crownland and thus start to have 0.2 autonomy increase. When at peace, we can tie even in autonomy with 10-20% crownland with the 0.1 autonomy increase. Since our critical goal #1 is government reforms, we need to get above 30% crownland and stay there. Try to seize crownland as often as possible without caring for estate loyalty penalties.
The sweet spot for estate is having all estates have max loyalty of just a bit over 45%. This way, we can easily get to 50% needed to not trigger rebellion and unrest problems in some provinces with diet. For diet (time it with seize crownland), if you see any subjugation quests from the Amirs, take them.
If possible, we should time our seizing of crownland for just after integrating vassals, as this lowers our crownland and since our development goes up, the effect from seizing crownland just after the integration is higher than just before. A small optimization.
Advisors:
Pick up admin and diplo advisors at the start of the game. When you complete your first wars and gather some money from those, pick up a military advisor. Doesn’t matter which ones, pick any.
When we have enough land and enough income, the missions will occasionally grant us with cheaper advisors. Picking these is a good option if we don’t have one yet. When we have gotten our trade established and gold production set, get a full set of +5 advisors. It's easy to afford at that point.
Advisors:
My idea progression was:
- Exploration Diplo
- Expansion Admin
- Plutocratic Military
- Humanist Admin
- Influence Diplo
- Administrative Admin
- Offensive Military
- Naval Military
- Trade Diplo
The ones after humanist ideas can change, as they are all personal preferences and not critical points of the plan. There is the very useful -20% diplo annexation cost reduction with Administrative and Influence ideas which, combined with Parliament 10 year bonus, gets us to -70% diplo annex cost overall. Another extremely useful policy is the -1 unrest and -5 years of seperatism with Humanist and Offensive ideas which gets us to stack -10.5 unrest reduction with republic. This policy essentially enabled me to never get natural revolts after court and country event finished. With 98% overextension and 2 war exhaustion, I had only 4.5 unrest in the newly conquered provinces. Naval is good to contest the colonizers, for after a point, they will jump in against you in any great power fight.
Starting moves:
Diplomats:
Now that the background stuff is out of the way, let’s get on with the exciting part of eu4 campaigns: how to expand and build your empire. Due to our critical goal #2 (develop institutions), we will NOT be spending any points whatsoever in coring any lands and trying to shy away from diplo cost of unjustified demands in war such as asking for unclaimed land. Our goal is to feed everything to our vassals, create new vassals and integrate them. Therefore, our diplomats will always be working. Assign them to build spy networks on your path of conquests for claims. In their downtime, assign them to build relations with your vassals. Do not stop for aggressive expansion: it’s worthless lands so the only people to care won’t care until it’s their turn to die.
An example of building spy networks for claims is as follows: build claims for Nunu and Yaka provinces, but in the meanwhile build spy network for the next in line of your path (Kalundwe) and the one next to that (Kikondja). When you go to war, take Nunu and the unclaimed Munene province so you have a border with Kalundwe. Then, immediately make claims for both provinces, give the land to your vassal, and go to war against Kalundwe. When you eventually take both provinces, we should have enough spy network to build claims on both provinces of Kikondja. Make your claims, then release Kalundwe and go to war and repeat. Due to the alliance chains the Central Africans tend to make, we will need to wait for truces, but we can still tell our vassals to build claims by highlighting them as important to our fledgling empire.
Conquests:
To make dealing with alliance chains easier, we should ally one of the Central African nations like Lunda who is exactly at the middle of everyone and thus can be used to called into wars for promise of land (and not fulfil that promise and break alliance after war because they are next), or lock down one of the allies in a previous war and declare after they are fully occupied. At the start, we will have 3 war targets available for us: choose the one which has the lowest number of allies. Hire the free company and complete the force limit mission, then go to war when you built your claims.
We will never have true allies until the 1500’s. Until then, every ally we will make, we will eventually eat. Therefore, never accept royal marriages outside your vassals. Making a temporary alliance for calling into war in promise of land with one of the nations is fine. However, we need 2 nations with 150 relations to complete the important mission “Trustworthy Allies”. Pick allies from the northeast and southeast parts and royal marry them. Your king will likely die before you are to either diplo-vassalize them or conquer them, so the stab hit from royal marriage will be negated.
Integration:
Trustworthy Allies mission is the prerequisite of the next mission which will give us the all-important 15% diplo-annex cost reduction. As this is our only cost reduction we will get for a long, long time, I’ve based my run off this 1 mission and milked it as much as I could. In my run, I’ve focused on keeping 2 large vassals or 3 medium size ones and started to integrate them so that their annexation times would be very close to each other. When the annexation progress hits 85% on any of them, finish the mission and integrate both. This 15% cost reduction lasts 25 years, enough to vassalize and integrate another set of nations. I went all out on getting vassals integrated during this limited time period to fully take advantage of it, even going so far to bank some diplo points and skipping exploration ideas and use all 3 of my diplomats to integrate 3 vassals at the same time so they finish very close to each other to avoid the -3 diplo rep malus from integrating early, resulting in a photo finish. However, I do recommend to just casually integrate vassals over time slowly, without caring for the -3 malus after the first 2 integrations. A general advice I will give is to not give lands to a vassal you are just about to integrate. Separate vassals by integration order and plan your conquests accordingly. They will generally increase autonomy, so we will need ample time for the autonomy and the devastation to naturally recover.
At the start, give all the newly conquered lands to your vassals, and integrate both of your starter vassals. Be sure to time the integrations to finish roughly at the same time. When starting integration, complete the “Trustworthy Allies” mission. Complete the “Acquire Subjects” mission at 85% integration of any vassal. This will enable us to complete the “Expand Nation” mission before we start developing both institutions.
Be sure to keep a spare diplomat (if you have one) to build spy network on the adjacent nation to your vassal that you’re integrating. Optimization!
Developing and capital moving strats:
Before you develop institutions, there are 2 paths we can go with: either just developing it normally in our capital area, or moving our capital to a shore before finishing the mission. Since there are both pros and cons to both options, this is purely an option and not a directive.
Developing in our capital normally:
- Strength: cheaper Feudalism cost. The initial capital has a lvl 2 trade center which grants 5% dev cost reduction in that province only. Also, we will be developing in our capital which will give us about 5% more dev cost reduction.
- Strength: cheaper Renaissance cost. The province that we will develop it in only has grassland, whereas the other option for Renaissance will have Savannah, a 15% dev cost increase.
- Strength: for some reason, prosperity always grew faster in my original capital area. I don’t know why but this was the case for 5 of my games.
- Weakness: developing in the Kongo trade region instead of Ivory Coast trade region, which is our end goal.
- Weakness: moving capital later on will be much more expensive due to developing it and having a development difference with new capital.
- Weakness: both institutions are noticeably more expensive for reasons stated above.
- Weakness: Kongo trade region gets 50% reduced trade income modifier because the home trade region also moves with the capital. Even though you collect both from Ivory Coast and Kongo, you will make more in Kongo before 1510’s. Since you will move again afterwards, this makes us lose trade income overall.
- Strength: developing in the Ivory Coast; a better trade node than Kongo in the long term.
- Strength: gaining much more sailors very early. This will make winning naval wars possible without hampering the growth of our trade fleets.
- Strength: moving capital later on is cheaper.
- Weakness: 203 extra admin points spent to move capital. These balance out somewhat.
- Strength: great chances at spawning Colonialism in our nation.
- Strength: more building slots in ports is better than inland provinces.
I should tell more about spawning Colonialism: Spawning colonialism is possible at these provinces:
- Capital which is also a port
- Any trade center port
- Any 12 development port
- Our capital in the shore
- 2 provinces in the shore that we developed for institutions and thus above 12 development
- 1 province in the shore that has a coastal center of trade (that we colonized)
Feudalism & Renaissance:
As we start without Feudalism and renaissance and with no way to get it from our neighbours until 1500’s, we will need to develop them. The only way to conquer land with Feudalism is to no cb an east african nation, force vassalize them and get claims (or no cb) bordering lands, or integrate them and do the same. This takes a long time and costs a lot of admin points, along with messing up our overall autonomy levels so I wouldn't recommend it. We need Feudalism in order to develop renaissance, which nobody has. Since we don’t use much of our mana during conquests (with the exception of integrating Loango and Ndongo) or teching up with 50% penalty, we will be saving it all to develop 2 institutions at start.
For Feudalism, we cannot gain prosperity in our capital before we hit point cap. Our goal here is to make the Burghers influential and loyal at 60% and complete the “Expand Nation” mission after integrating both starter vassals. Since we can start annexing our starter vassals at 1455 January, we will only acieve this goal earliest at 1457. There is also a rare monsoon event that gives you 20% development reduction for 5 years: if you get this event forget everything and develop there before the 5 year duration of this event runs out. Choose your new coastal capital to develop and primarily spend your admin points, then immediately embrace Feudalism and acquire mil tech 3. Don’t tech up again until developing renaissance. Mil tech 3 is an exception because fighting with tech 2 vs tech 3 makes you lose battles when you outnumber your foes 2 to 1.
For renaissance, wait for your new capital area to gain prosperity, and try to do the same things we already did with Feudalism. With the state edict, Burgher loyalty, prosperity and the mission reward still active, you should have a significant 40% dev cost reduction. The gold cost to embrace them is mediocre as most your land is still within the control of your vassals. Your vassals don’t count for the gold cost.
The colonial nation rush:
General:
By late 1470’s, we finally acquire our first idea group and pick exploration ideas. A little before this point, change points focus into diplo. Diplo tech 3 is all we need until we finish the ideas. To make things faster, don’t tech up after that and save points for ideas. Pick the policy that gives no uprising chance: Africa is brutal with native uprisings during colonization. After you get your first colonist, immediately pick the Burgher privilege of “Grant New World Charters”. This will make your colonization much easier.
By 1480’s, we will have enough splendor to take our first age power. Pick the “Claim neighboring provinces with claims” power, as this will make waiting for vassals to fabricate claims a thing of the past. Use this power to fabricate claims on everywhere in the Great Lakes and Zambezi regions.
If everything goes to plan, by 1490’s, we should attain great power status. Use this to influence your vassals for easy opinion.
Conquests:
By this point, we have united most of our part of the trade node and have truces with the leftovers. That’s fine, now we focus on Great Lakes and Zambezi regions. We have a border over a lake for the Great Lakes, but lack one for Zambezi. In a run, I got lucky and managed to diplo vassalize Tumbuka, the north-most country in Zambezi. Lacking that luck, look to building a spy network, then sending your colonist to the bordering province. You don’t need to complete the colony yet, it’s just needed to get your claims and coring range. Repeat what we have done in opening and you should be fine: Kongo is quite powerful in comparison to everyone in the subcontinent.
When conquering the Great Lakes area, assign it to a vassal and leave them. You can take advantage of the age power to claim every area and give them to your vassal after war. For this Great Lakes vassal, placing a relative to the throne is a good option, as we will not integrate it for a long time. Diplo points are for exploration ideas at this point in the game.
We should rush for the gold as soon as we have reach in the south-eastern part of the subcontinent. Take every gold mine you can, core and state them, lower autonomy after cores are finished and slap on the autonomy reduction edict. When we have spare points after they revolt, turn on the development edict and dev these provinces up to 8 production each.
Also, hold off from spawning Sunni zealots as we MUST have the government reform into republic before we can switch religion. Give these lands to a Sunni vassal.
As soon as you get an explorer, explore the northern Africa coast and prepare to claim and take over what you can see. This time, don’t feed it into a vassal, take it all for yourself as coring range and distance to other nations to diplo vassalize is the key. Try to conquer whatever you can find in the Ivory Coast trade region, barring fighting the colonizer western powers. If you leave them alone, they should also leave you alone.
Our goal is to dominate Ivory coast. However, taking steps to slowly conquer the Timbuktu and Katsina trade regions should also be a goal. We can just leave these lands in the hands of our vassals and let them build claims and whatnot, slowly getting the conquests rolling. Prioritize vassalizing Timbuktu trade region as we can send a trader to steer trade to Ivory coast directly from here.
Colonizing madness:
There are 3 critical, 4 major and 5 minor colonizing targets. Minor ones are mostly advice of colonizing.
Critical:
- St. Helena. This is the small island west of Kongo. This is the pivot to kickstarting our colonial companies and everything crumbles if we fail to take it. When the colony is completed, search for a colonial range advisor no matter the cost! Combined with the 3rd exploration idea, we barely get enough range to colonize a couple provinces of South America, somewhere in the middle of it. While doing so, use your diplomats to build claims on the close-by natives and take them. If you are not fast enough, either Portugal and Spain will get them first.
- Calabar. This is our province to jump north into the Africa and claim Benin land. Coring the Benin lands actually doesn’t increase our colonial range (they all share the same sea province), so we can just give them all to a vassal. If so, owning this province is critical.
- Cape. Very valuable province, great trade power, and if we colonize it, we will hold a monopoly over the trade node for quite a long while. The colonizers never really take this trade node after Cape is taken by us. Get it after the first 2 ones in this list. We will need to take the provinces in the southern shore to get the range to reach Cape though.
- Cape Coast and Gold Coast. These have estuaries in them and are easily reached by the colonizers. Get these before the colonizers for extra trade power.
- Any province north of South America to extend your coring range. We need to reach all the way around eventually to Canada. No colonial nation shall escape us!
- Rukwa. This is the interconnecting province between Kongo and Zambezi trade regions. If our luck goes south and we don’t have a vassal there, colonizing this province is the way to open our rush towards the Mutapan gold mines. This province will also provide a pathway for the Sunni rebels to convert our massive lands.
- Benguela province. It has a Coastal Center of Trade and therefore qualifies for spawning Colonialism. We will most likely not finish the colony, but that’s ok; we just need to colonize the province, as having a core isn’t a requirement for spawning Colonialism; it just needs to be in a state. Luckily, we do have a province that is in that state that we own.
- Any province that borders a native. We need to conquer them as finishing colonies without full exploration and expansion ideas will be slow. Conquering natives is much faster. These can be temporary colonies to get the border to claim them (this won't be needed after full Exploration ideas). However, for inland native conquests, we need to finish these colonies to keep the land connection to build cores.
- Any empty province bordering the North-western African powers like Mali, Jolof and Fulo. We don’t exactly need to finish these colonies, just get them for claim building.
- Any province that extends our colonial range towards South Africa to loop aroud the continent and reach the other side. This isn’t as important as extending the range north because while north is contested with limited areas in many colonial regions, south is not: it has few colonial areas with many provinces.
- The provinces at the west coast of Africa between your lands and Cape. They are all required to eventually finish the “Unite Home Region” mission.
- Any province at Ivory Coast, Cape, Zanzibar, Kongo; in this order.
Colonialism institution strats:
This time, we have a shot at actually spawning colonialism or acquire it naturally if that fails. If we don’t spawn it, our coastal provinces will automatically get the institution after we have established our first colonial nation. Colonialism has “Port or capital of an Old World country that has colonial subjects in the New World” spread modifier” (highest spread modifier actually) that we should have fulfilled by now, which means we can embrace colonialism without developing for it. This will cost quite a lot of gold though, as we should hold a lot of land by now. Take some loans if needed.
When you have colonialism, try to slow the spread of it as much as possible. Having a vassal between your lands and your enemies slows the spread of institutions quite a lot, making you keep a local tech advantage.
After the institution spawns and colonizers arrive at Africa, move our capital over to Gold Coast (or wherever the closest colonizer is) to acquire the border bonus for tech cost reduction. The way it works is that we automatically have tech cost reduction from everyone in our culture group and any nation that has any cored province that has a land connection to our capital. Colonizing the entire desolate colonizable land in the Ivory Coast this early in the game is difficult: it’s much easier to move our capital (again) to somewhere north in Ivory Coast, where colonizers always settle and get the border bonus this way. This time it’s definitely worth moving our capital as we should be behind by 3-4 tech levels in admin/diplo trees at this point, and that’s a 20% reduction, which already redeems the moving the capital admin cost in 2 techs.
Government and religion shift pain times:
Prepare for Sunni switch:
About 10 years before the final government reform (check the expected time in the reform progress bar, should be around early 1530’s) is the time we spawn our Sunni zealots and slowly let them convert our lands. Start this spawning of rebels only after taking crownland, as taking crownland requires you to have no rebels (and be at peace).
Trail a bit behind the rebels and free the provinces, we will lose prosperity and it will take a couple years to recover it, but we need to go below the 50% religious unity threshold that we need for our merchants to pick the “Propagate Religion” trade policy. Of course, the more they convert the better, as religious unity will be a huge factor when we stab up to 4 TIMES after we convert to Sunni.
If your capital is taken by rebels (let them as it’s a 30+ dev province and will be difficult to convert later on), let the rebels walk away and then start unsieging it. If the rebels challenge you, that’s fine; kill them and wait for new rebels.
The conversion option only opens after we reform away from tribal, hence our mandatory wait until this year to convert. By the time we change government to Republic, try to have at least half your lands as Sunni. Making your vassals go completely passive is the best option to keep them from killing the rebels during a war, as it happened in a run of mine.
If we don’t have enough lands converted, we can opt to wait a bit more while trying to spawn more zealots (this was difficult with the unrest reduction my nation had stacked, but provoking them if you have the expansion speeds things up) and wait for 100 republic tradition.
Switch government type:
At around 1530’s, you should reach the final government reform at the tribal tree and get ready to complete goals #1 and #4. My preferred pick was republic for republics let you experience a more relaxed game. If you want to get the Afrikan Power achievement as fast as possible, reform to horde and plunder your way through everything. If you want to go for the easy and standard absolutism power spike, choose Monarchy. If you want flexibility and no rebels, choose republic. Basically, any govenment type works, so choose one you are most confortable with. The following is written with Republic as it was my choice.
After the switch, the most painful parts of the run start: devastating stability cost, low crownland, low republic tradition, low religious unity, few mana.
The general goal is to get to near 100 republic tradition, convert to Sunni, get a young leader, and keep him there as long as possible. For mana points, it’s better to take the reform that gives random candidate +1 bonus, and go for frequent elections to reach higher mana generation faster. Credit to Arumba and his Kongo essay for this strategy.
To arrive to that point, just keep switching leaders for a while. Using military points for republic tradition is a good trade, so if you need to stab up, don’t hesitate to bump up your republic tradition with mil points.
Switch to Sunni:
Before clicking the decision, make sure you have admin points banked up. The more, the better. The amount depends on the stab you have, but should never be less than 500 as we want to immediately jump back to +1 stab to protect our prosperity.
If we have done everything correctly, we should have religious unity above 50%, meaning that we can select every trader we have any spam the Propagate Religion trade policy. However, this is the ideal; the reality is that we will have about 40% Sunni in our lands when we swap religion. In my run, I had to convert some of my land and take land from Kilwa to push my religious unity above 50%, then used my traders in Kongo, Great Lakes, Zambezi, Zanzibar, Cape and Ivory Coast to convert religion, effectively giving me 6 more missionaries.
As we are closing to the year 1550, we should pick the school that gives us development reduction (Maliki), as we will be developing for Printing Press asap.
When we switch into Sunni, we will lose a lot of crownland for some reason. Keep that in mind.
Colonial empire building via aggressive takeover:
Now that our first colonial nation has been formed, you got a taste of the future. Now it’s time to get our hands dirty, reach far and wide, towards EVERY SINGLE colonial nation except the Caribbean. Look towards extending your colonial range and getting more colonial companies established, preferably at 10 provinces. Our goal isn’t to build a massive colonial empire, it’s to build colonial companies with 10 provinces, earning the merchant and them leave them to themselves. There aren’t any critical goals to accomplish now, just general rules of thumb and advices:
- Follow the previously stated colonization targets and pick them all up if you haven’t yet.
- We should have the economy to go over the colony limit by 2 at this point. If you don’t have troubles with your economy, do so immediately.
- Get the Hollhavai island colonized to get range to jump to Malacca trade node, which we can steer trade directly into Cape. We can also use this to claim the Maldives and start conquering Coromandel trade node as well. This is especially important if we want to spawn Global Trade ourselves in Ivory Coast, as this trade node has lots of local trade that we can divert. This is hard though, as most of the time Vijayanagar will have total control of the node.
- Following Hollhavai, colonize next to Brunei or Majapahit to get claims on them.
- Since our first rush towards South America, the Colonial Brazil company should be up and running with 10 provinces already. Now, focus on Colonial Colombia (establish colony towards Muisca and conquer them to finish the company) and Mexico (just conquer whomever) as they have easy targets. In Mexico, look to get the coffee provinces to have the trading in coffee effect on you.
- Do not get into Colonial Caribbean! We have no way to divert trade from there to Ivory Coast anyway and it has no natives to beat up and conquer. It also is a hot spot for the colonizers and is very much prioritized. Add in the fact that it has few provinces in it means that it’s just not worth it to try to get a 10 province trade company there. Leave it alone.
- Snag a portion of Colonial La Plata before the colonizers get it all. They either go all out or avoid the region for a long time for some reason.
- Beat up Inca and get their land for an easy Colonial Peru trade company.
- Remember that only 5 provinces are required to form a colonial nation. After that, all lands on the colonial region automatically fall under your newly formed colonial nation. Therefore, if you beat up natives, you only need to core enough to get the area to have 5 cored provinces: the rest will be cored by the newly formed colonial nation. Save some admin this way.
By this point, we have enough power to switch our main trade node from Kongo to Ivory coast. Collect from Ivory Coast, set all your light ships to protect trade there, then transfer trade from Kongo, Great Lakes, Zambezi, Zanzibar, Cape trade nodes. If you have taken a foothold in Coromandel or Malacca trade nodes, transfer trade from there as well. Keeping a small light ship fleet in Zanzibar is also preferred as the conquest there isn’t finished yet.
If possible without angering your vassals, ask for transfer trade power and nothing else. We don’t have the diplomats or the time to improve relations with the many vassals that we have.
Estates:
Now that we have converted to Sunni, we have unlocked the all powerful Dhimmi. Get their loyalty above 60% whenever possible, as the tech cost reduction is massive for us as we are trailing behind in tech until 1570’s. Pick the loyalty giving privilege and the government capacity one; both are needed at this point.
Continue seizing crownland after timing some teching ups with Dhimmi, as crownland will start to drastically drop with your continued conquests everywhere. However, the rebels will now be difficult to determine where they will spawn, since your country is huge in area now. If you stack enough privileges, you should be able to occasionally seize crownland without angering any of your estates. Time your diets accordingly.
Developing (for the last time):
This is the last hurdle our Kongo run will have. There is no easy way to get this institution, and it’s spread in Europe is very slow too. As we have flipped Sunni, there is no way for us to get a natural spread like we had with colonialism, or any way to acquire it (must be Protestant or Reformed for provinces to naturally spread). Luckily, we have recently switched to Sunni and picked the dev cost reduction school. This time, we can stack a nice 55% dev cost reduction with ease:
- 10% state edict
- 10% prosperity
- 10% Islam school (Maliki)
- 10% burghers
- 5% renaissance
- 10% world port (lvl 3 coastal center of trade) or 5% with lvl 2
If you haven’t, now is the ideal time to develop all your gold mines to 10 production. Some may not have prosperity (rebel problems in the area); you may choose to wait to develop these but since we aren’t developing that much, it should be fine to develop without prosperity. By now their autonomy should be low enough to massively profit from these gold mines. Waiting for flipping to Sunni and getting Maliki school and/or upgrading the trade centers to lvl3 would lower the dev cost by 20%.
Nigh unstoppable:
This is the point where we can finally go all out. No more saving points for developing or stability, no more rushing a critical colony, no more income problems, no more government or religion change problems. Counting our colonial nations and vassals, we should have roughly double the dev of the #2 great power by now. By the year 1570, you should have caught up in tech with the colonizers and finally see the red ahead of time percentage on your tech costs. If you have made it this far, congratulations! Nothing should stop you now. The only limiting factor we have is governing capacity.
Now you should always be 2-3 above colony limit and completing the remaining Colonial nations. By now, only Canada, east coast and Australia should remain. These are all non-competed Colonial regions, so we can take our time and fill out the remaining parts in Ivory Coast first. Leaving some provinces to the colonizers works since we can get the neighbour bonus from them.
Integration:
By now, we should have many vassals around the world:
- 1 vassal for the areas north of Ivory Coast that we are slowly expanding
- 1-2 vassals at the Zanzibar node (conquering and releasing opm nations with many cores on enemy non-owned lands is what I generally used in my runs. Reconquest cb cuts down on potential coalitions, not that I ever got one)
- 2-3 vassals at Malacca trade node area. These are very valuable lands and if you can give them to a vassal you can even state them instead of assigning all to a trade company. The reason we have so many vassals here is because the lands are very disjointed. Threatening war and releasing a vassal from these lands is ideal.
Humanist ideas:
We can’t pick diplomatic or influence ideas yet. That would put us at a massive diplo deficit as we need to integrate vassals first and ideas second, just to hang out until the age of absolutism starts. Also, if we don’t pick humanist ideas, our admin points will overflow. The best way to spend admin points is coring, but overextension also reduces our diplomatic reputation to the point where diplo annex process stops. Therefore, humanist is the way to go.
- Humanist is great at controlling your lands; mostly by dealing with unrest. Now we will have zero unrest for the rest of the game from religious disunity, finally getting rid of that problem guaranteeing +5 max absolutism from religious unity.
- Humanist full completion will give us a great 10% loyalty bonus to Dhimmi estate, meaning we can remove their loyalty giving policy for more max absolutism.
- +2 promoted cultures idea is critical to getting a golden age at the age of Absolutism. We can’t fulfil an age objective without this idea.
Trade, buildings and ships:
All these are interconnected so I’m writing them together. By now, we should have more merchants than we require, having 8-11 traders just from colonial nations. Now, it’s time to establish the great trade route of Ivory Coast. Use all merchants to make a long chain that ends in Ivory Coast. Following the reverse path is the easiest to plan out: Cape, Zanzibar, Kongo and Zambezi, Malacca, etc…
To spawn Global Trade, you need to siphon as much trade from Malacca and India trade nodes as possible. Malacca is the easiest to enter into, divided by many nations while India is mostly dominated by Vijayanagar. We won’t have total or majority control of both nodes as that’s way too much claims and development to conquer, even with vassals. If you can’t conquer it, or even if you conquer it, send light ship fleets to divert trade from both these trade nodes. Do the same for Zanzibar and most importantly Ivory Coast, as European powers will siphon off some trade by diverting it.
The only buildings you make should be sailor increasing ones. We don’t need max ship limit as every colonial nation gives us +10 ship limit, totalling to 120 naval limit increase before the 25% navy limit increase from exploration ideas. Therefore, we will never reach that without first encountering the monthly sailor problem first. Otherwise, spend your money on upgrading all trade centers to lvl 3 on Ivory Coast. We will develop these later on by building universities on these provinces when we hit admin tech 17.
Just before the year 1600, use the state edicts everywhere to protect trade, giving us a needed edge. In my playthrough, I was barely beaten by Portugal with Sevilla trade node by less than a ducat, forgetting the use of the edicts. It may save you!
By now, we should have close to 100 ducat trade income, with massive multiplier bonuses from our merchants, plutocratic and national ideas and 10 province colonial nations. The huge light ship fleets help us retain most of it in Ivory Coast or transfer from India and Micronesia. Combined with a respectable gold income, we will have so much money that we can afford 3 over limit colonies, +4 advisors, force limit army and still have a decent net gain.
Absolute madness:
The age of Absolutism prep:
Starting right off the bat with a golden age helps. We can easily fulfil the following 3 requirements:
- 3 trade companies (we should have 5 or more at this point)
- 5 universities (easy)
- Multicultural Nation (promote 5 cultures)
The following part is written for Republics. Other government types can skip some parts of this prep work, as they don't have a natural absolutism penalty with their government types and thus, getting the +20 max absolutism should be easy. Getting golden age is critical for the Court and Country event. Actually, for republics, every single step is critical; there is only 5 max absolutism to spare in this plan. It’s very tight, but doable.
We have made most of the absolutism preparation by getting rid of the Amirs with parliament reform. While we wait for 1610, the start of absolutism, keep removing policies while keeping an eye for the loyalty balance of 50%. Since parliament gets rid of calling a diet, we need to have natural 50% loyalty threshold in our 3 remaining estates. Full Humanist ideas gives Dhimmi loyalty, high Legalism (Muslim piety) gives Clergy loyalty (trading Dhimmi with Clergy in this case), Republic government type and full Plutocratic ideas gives Burgers loyalty. Thus, we can easily keep seizing crownland without having many policies. If it happens, don’t hesitate to seize land even if it causes rebels; getting crownland above 75% is much more critical than prosperity and dealing with small rebel stacks.
Our goal with estates is to get rid of every single policy. There must be zero max absolutism reduction when we trigger the event. Removing the monthly admin and diplo policies is necessary at this point, especially since removing them gives 5% loyalty limit, making it easier to seize crownland. If necessary, take the parliament decisions to grant loyalty to estates (they need to be pissed off at you though for this decision to appear) and take their policies away. At this point, since the influence increase from diets have started to run out, we can easily achieve more loyalty than influence. In fact, the influence should be so low that the penalties from pissing off the estates should be the minimum ones.
When the age starts, and we have built up to current max absolutism, switch from short election cycle reform to the long one, giving us an effective +20 max. Totally worth the 50 progress cost.
Then, do the same for switching into Noble Elites from Oligarchy. This will net us +20 more max, getting us just above the 65 limit. Do this last, as the 8 year election cycle sucks.
DO NOT FOLLOW the standard absolutism plan by having unrest enough to trigger particularist rebels and accepting them, then lowering autonomy everywhere for cheap absolutism start. This causes you to lose a massive amount of crownland when we accept rebel demands: about 18%. This means that we have to resort to more passive means of getting to 50 absolutism to start the crisis:
- Take the passive monthly increase for the first age power. Take your time.
- Crownland above 60% passively increases absolutism yearly, like the age power. Take your time.
- Lower autonomy after stating new lands and coring them. The same applies with vassals after integration, therefore it’s best to time integrations to take place just after absolutism starts. Lower autonomy wherever basically.
- Use military points to strengthen government. We have lots and lots of military points without much use for them; this is the best use. Also use mil points for harsh treatment for small rebels that cost base 50 mil points.
When we arrive at >75% crownland and zero estate policies, it’s go time.
The Court and Country event:
Tank your stability by switching your colonization policy repeatedly, then no cb someone you can beat easily that’s far away. This should be enough to trigger the disaster.
The following sections are written under the assumption that we will hit our absolutism cap at the end of the event, for this is very simple to achieve with the events in the crisis.
The largest max absolutism we can have is:
- + 65 Base absolutism
- - 20 Noble Elites government type (tier 1)
- + 10 Consolidation of power reform (tier 3, long term election)
- + 5 Empire rank
- + 5 Great Power Status
- + 5 Religious Unity
- + 5 Golden Era
- + 15 Above 75% crownland
- - 20 During the event
- - 65 The ultimate goal for the end of the event for +20 max absolutism
- = 5 Tolerance
If this is too tight, you can easily achieve the +10 max ending (it requires above 30 absolutism) without switching into Noble Elites and having some estate policies active or not having above 75% crownland. You do need to switch into longer elections though, it really helps.
At the end of the event, with the tight but achievable +20 strategy, we will have 110 max absolutism. Now, we can switch back into Oligarchy and get our 4-year election cycles back for mana, ending with 90 max. I wouldn’t recommend switching back into the shorter election cycles, the -20 max drop isn’t worth it; 5-year election cycle is good enough. When our golden age ends, we’ll drop to 85 max, but at that point the final government reform won’t be too far away to get and that’s +25 max. After that, we can swap into shorter elections again.
With the relaxed +10 strategy, we will have a respectable 80 max absolutism during our golden age, without any estate effects.
Now, we do have some alternative methods if we want to mix things up…
The end
You have made it! The world is your playground, there are no crises to manage and no natural enemies. Now, we have enough gold income to afford max force limit army and navy, +5 advisors, any number of mercenary replacements as we want. Now we can start going after the “Afrikan Power” goal a lot faster.
The only real limit is governing capacity. Therefore, build as many courthouses/town halls and State houses (we have lots of gems to optimally build them) to reduce the usage. Build universities at your world ports (coastal lvl3 trade center) to have truly ridiculous developing costs and dev them with your spare mana. Once, the 20% reduction in an area event hit one of my lvl 3 trade centers, resulting in a 90% reduction. Keep building the sailor increasing buildings of any type.
I recommend taking influence ideas, as diplomatic ideas aren’t as critical after getting the +1 diplomat government reform. The full influence gives the reduced extra demand cost, which we will use a lot.
Religious ideas aren’t as helpful for conquering African and Indian lands as a significant part of those are the same religion as ours: Sunni.
The only long term advice I can give is about seeking to conquer Coal owned provinces if possible, for the global 5% goods produced modifier we get per coal owned province. This can easily skyrocket our massive trade income even higher.
I don’t have much experience with revolutions, so I will also skip that part.
This is the point where the guide stops, as there is nothing more to write about. We have achieved our finances, our power base, our religion switch, our government switch, embraced institutions, caught up with tech and ideas and got +20 max absolutism. There is simply nothing left other than the classic war and vassal ideas that everyone has tons of stuff on. All other institutions can be triggered or acquired naturally, so I don’t see the need to write about those.
Thank you for reading my optimized guide to Kongo. I hope everyone learns something about this guide project I’ve endeavored on, as I have learned a lot while writing this.
Good luck out there, and don’t forget to enjoy this brilliant game.
Determinor
Timeline
1458 Integrate both starter vassals, developing Feudalism
1465 Attain prosperity, developing Renaissance
1475 Great power status
1480 First colonist, unite Kongo region
1500 Achieve colonial range to South America
1510 First colonial nation
1515 Attain Colonialism from port provinces
1530 Government reform to republic
1545 Religion flip to Sunni, near max republican tradition
1560 Develop Printing Press
1570 Catching up to date in technology
1575 10 merchants from Colonial nations
1580 Empire rank
1600 Potentially spawn Global Trade, 15 merchants, 100 ducat trade income
1610 Age of absolutism start, immediately start golden age
1628 75% crownland, start Court and Country
1638 Finish Court and Country with +20 max absolutism bonus
Last edited:
- 3

- 2
- 1