Now that my first AAR - Who put the stranded admiral in charge? - A Siberian White PBEM - is approaching its end, I have started writing my next one. This is another multiplayer match, it has been going on for two months now. This time I am in control of the Southern White. Probably the easiest faction to play. My Red opponent (Highlandcharge) is an experienced player and usually very defensive-minded. Finding openings in his defence won't be easy. Highlandcharge is also hosting this game. My Siberian ally (Ashtray) is rather new to PBEMs (I believe this is only his third) but he is learning fast.
This AAR will be very different from my first one. I will focus less on the gameplay and instead concentrate on the story.
Obviously my strategies won't match those the White movement historically developped. In many ways this will therefore be a "what if" AAR: What if the White leaders, all men of the tsarist past, had given into key popular demands, especially land-reform, rather than spread White Terror? What if the Southern White had developped an efficient administration and command rather than squabble over posts and influence? What if Makhno's Anarchists had fled from the Ukraine? ...
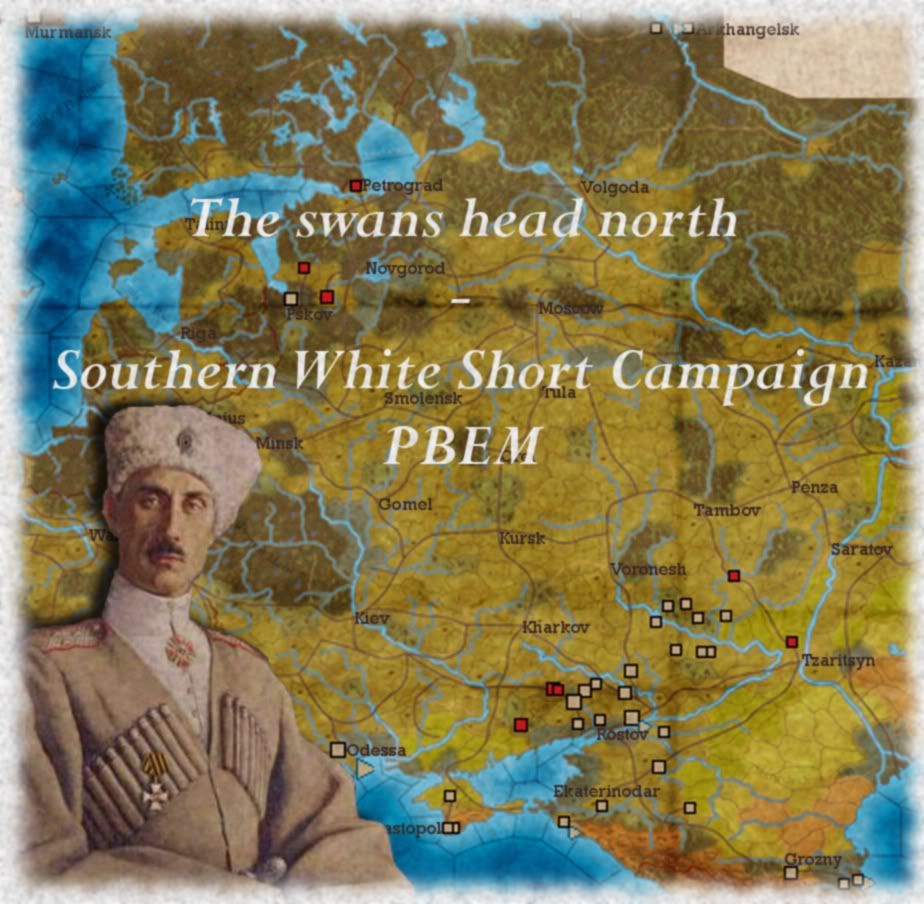
The Short Campaign starts in May 1919 with the Southern White movement at the height of its power. Earlier in the year, the Red Army has invaded the Don area. Red mass terror against the local cossacks has led thousands of them to enlist in the Volunteer Army. Now Mai-Maeivski's Volunteer Army and Wrangel's Army of the Caucasus are ready to strike back. The swans are ready to head north.*
Index:
Chapter 1 - Denikin's gambit: Don front, May - June 1919
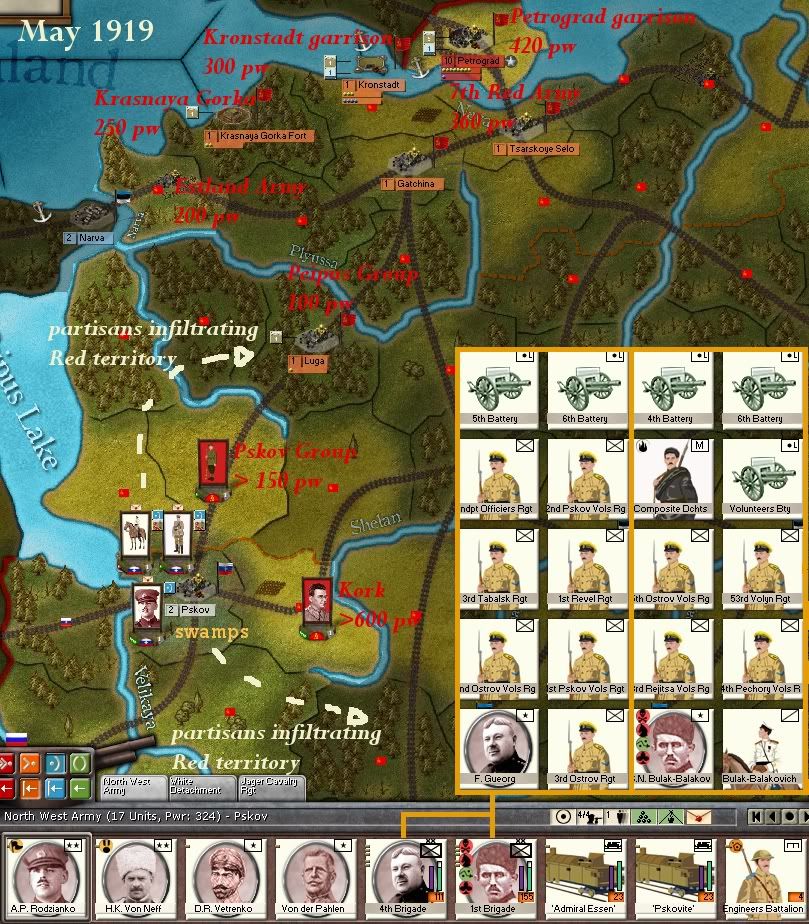
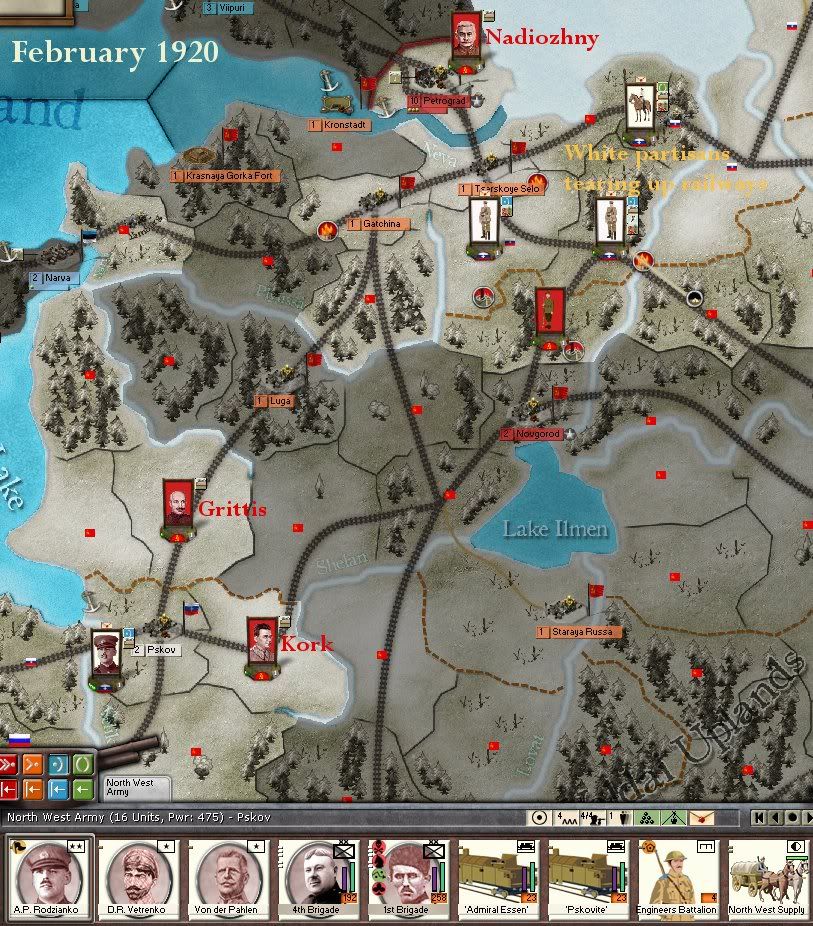
Chapter 2 - Spades and a miracle: Pskov, May 1919 - February 1920
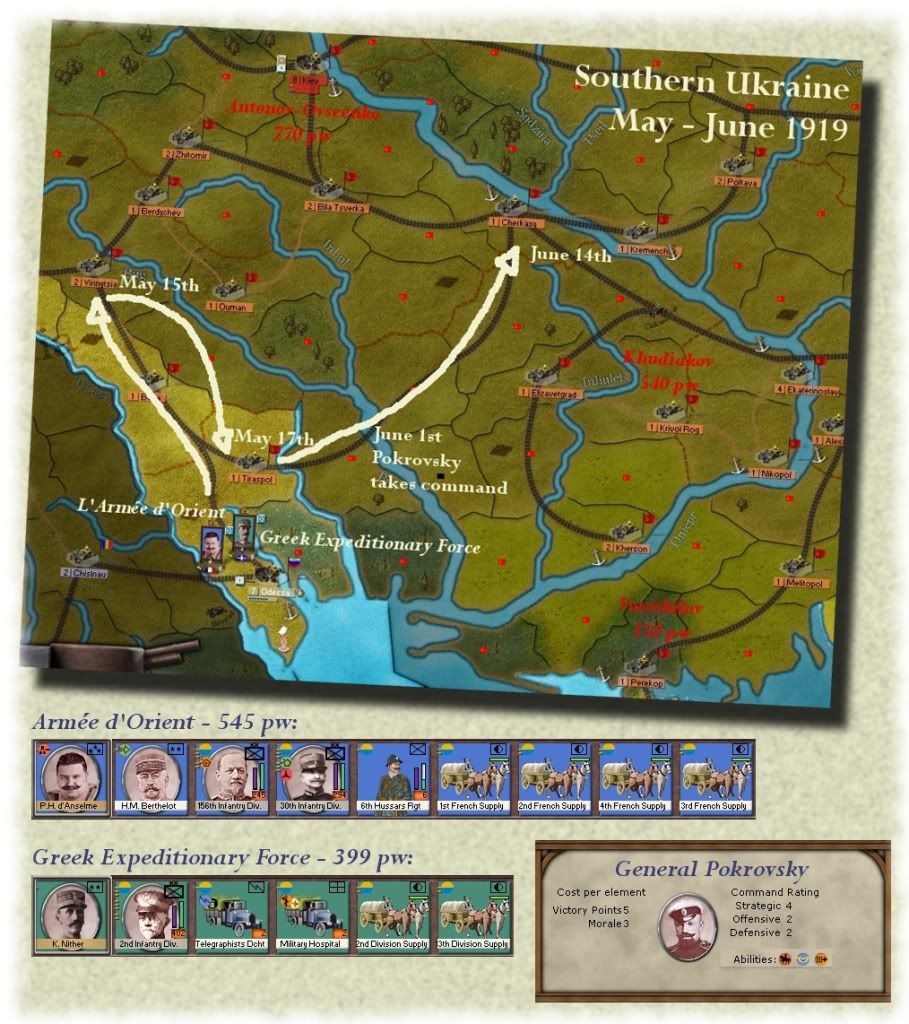
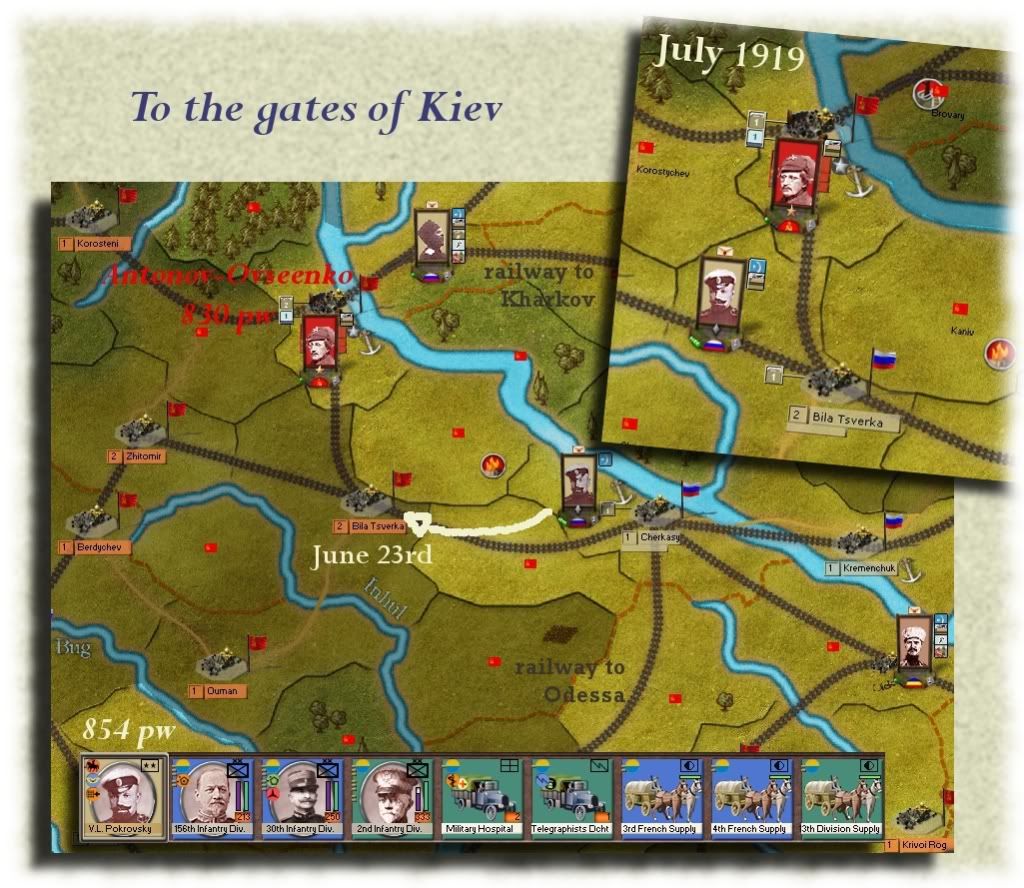
Chapter 3 - To the gates of Kiev: Ukraine, May - July 1919
Chapter 4 - The hares cook tortoise soup: Don Basin, June - September 1919
Chapter 5 - Restore, ransack or reform? June - July 1919
Chapter 6 - Makhno's lament: Orel, October - November 1919
Chapter 7 - And quiet flows the Don: Tzaritsyn, October - December 1919
Chapter 8 - Through the Golden Gate: Kiev, December 1919 - January 1920
Chapter 9 - Much Ado about Nothing: Arkhangelsk, May - October 1919
Chapter 10 - Shkuro's rampage: Central Russia, January - February 1920
Chapter 11 - Budyenny's last charge: Kursk, March - May 1920
Chapter 12 - The ace in the hole: Petrograd, February - June 1920
Chapter 13 - Stalin's stand: Moscow, March - June 1920
Chapter 14 - "Black nails in the ribs of the Antichrist": Russia, June - July 1920
Words of caution:
- Since this story is told from a Southern White view, the White might appear in a very forgiving light. In my humble opinion, the Russian civil war was shaped by despicable men on all sides (obviously there may be some exceptions who they are depends on you own moral and political point of view). The Southern White leaders weren't exactly idealists fighting for a better future but rather men of the old order struggling to restore it. Red and White both terrorized Russia - some groups suffered especially from one side (Bolshevics, workers, Jews in the case of the White terror; aristocrats, bourgeois, cossacks in the case of Red terror) but to the average peasant both Red and White were equally a scourge.
- I am not a native speaker, please don't judge my mistakes too harshly.
Strategic overview:
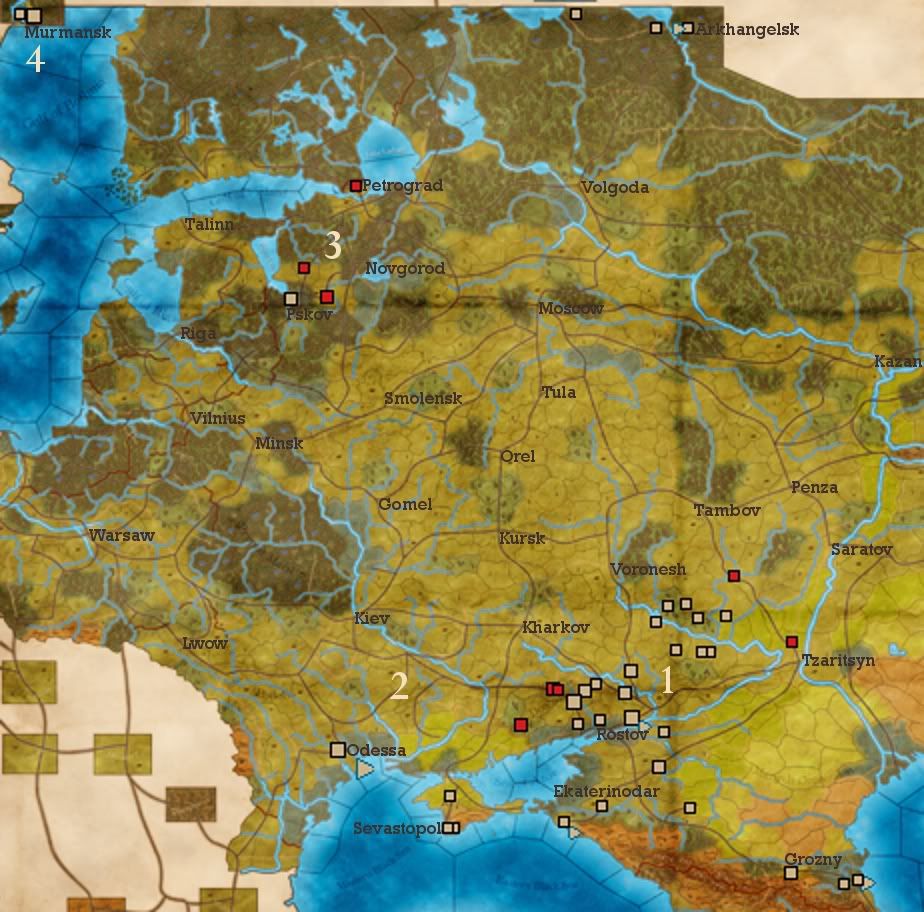
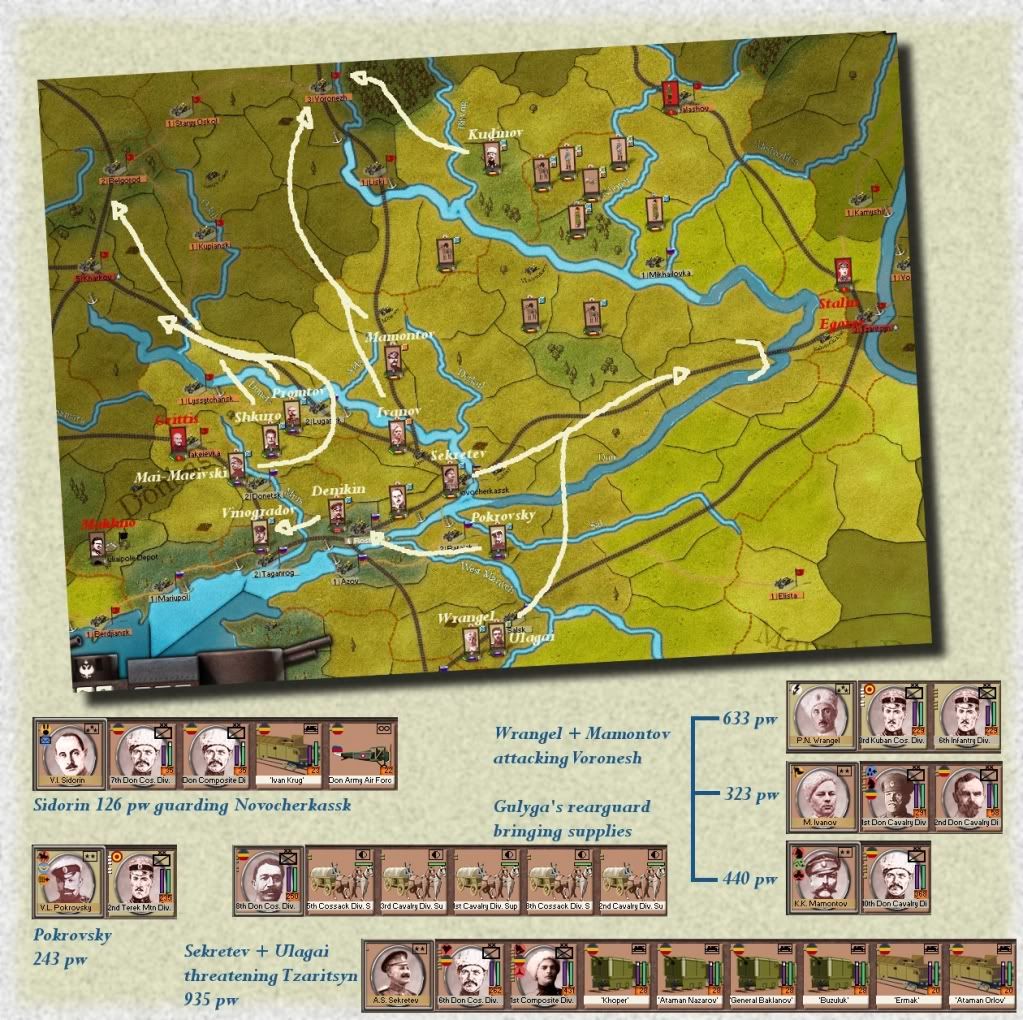
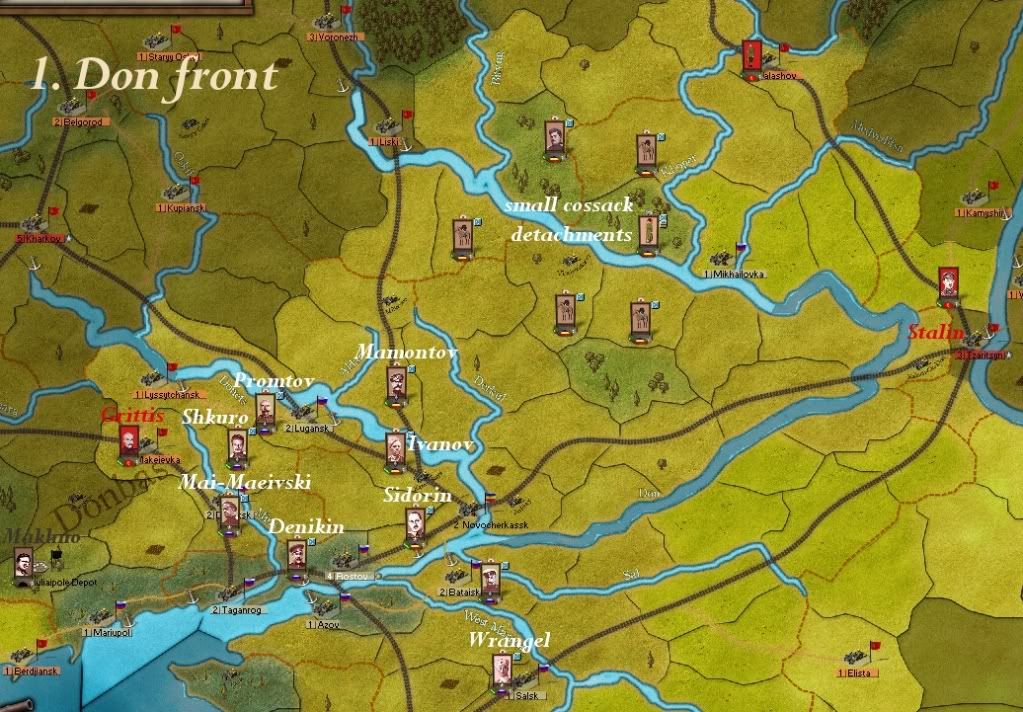
Don front: The White heart beats at the Don. Thousands of Don Cossacks have swelled the ranks of the White armies. To the South the Kuban and the northern ranges of the Caucasus are firmly in White hands. Should this area ever be lost, it would doom the White cause. Unfortunately, the White heartland lies wide open and strong Red forces are already periliously close: to the West several Red corps have entered the Donbas. Grittis corps is already within striking distance of Rostov. The situation is aggravated by rumours of an alliance between the Reds and Makhno's Anarchists. To the East 50.000 Reds have assembled at Tzaritsyn. But there is also opportunity here: scouts report that the Red Army is weak to the North.
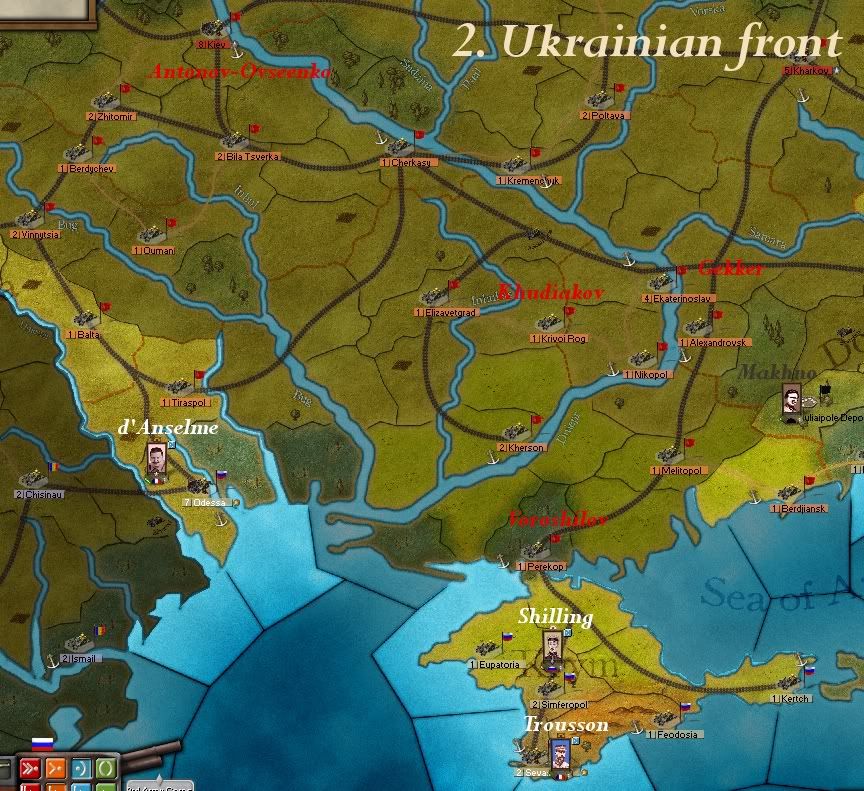
Ukrainian front: Currently the Southern White have only two small bridgeheads in the Ukraine: Odessa is occupied by a strong Greco-French intervention army while Shillings small corps protects the Krim. The rest of the Ukraine is securely in Red hands. Half a year after the end of the Great War, the governments in Paris and Athens are already drawing up plans to bring their troops home. Once they abandon the White cause, the situation in the Ukraine is likely to become unsustainable.
Pskov: Rodzianko's 20.000 men are in a dangerous position. With their back against the Estonian/Latvian border they have nowhere to retreat. Even worse, they are badly outnumbered: Kork's force alone counts more than 35.000 men, a couple of smaller Red corps raise the total numbers the Red Army can unleash upon this ill-fated expedition to 70.000.
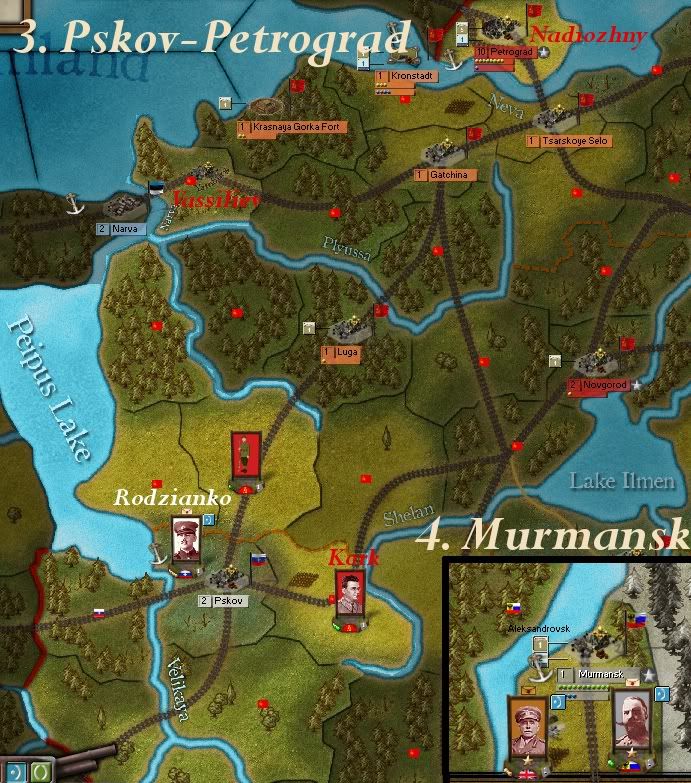
Murmansk: There is a small hope that Rodzianko could join forces with Miller, though. At Murmansk Miller has assembled a force pompously called "North Army". In reality it's little more than a single division. But they are supported by Ironside's British Expeditionary Force. In total 18.000 soldiers are stationed at Murmansk. The way to Petrograd will take them months. There are several river crossings where Red gunboats could stop the North Army alltogether. Most likely the British will have evacuated their forces before Miller can even get close to Petrograd.
Arkhangelsk: Another isolated, disorganized patchwork "army". Stewart's 5.000 men strong American Polar Expedition is already busy loading its equipments on the ships that are supposed to bring them home. They refuse to participate in any operations outside Arkhangelsk. 1.500 British (mostly artillery) are more helpful but lack a capable leader. The main force consists of 9.000 White soldiers under Durov. Theoretically they could venture South to occupy Volgoda and even threaten Moscow but the weakness of these troops makes this distant dreams.
Navy and river fleets: the Western allies have sent powerful naval task forces that control the Black Sea as well as the White Sea. Of the great rivers the Dnejper is firmly in Red hands while the Don is controlled by a few White gunboats. In the Caspian Sea a White fleet slightly outnumbers its Red counterpart. Unfortunately the most powerful ships of this force aren't capable of navigating the Volga which therefore will remain under Red control.
Warplans:
- The ultimate object will be Moscow.
- Only the forces assembled at the Don are strong enough to carry out an offensive against the Bolshevik heart.
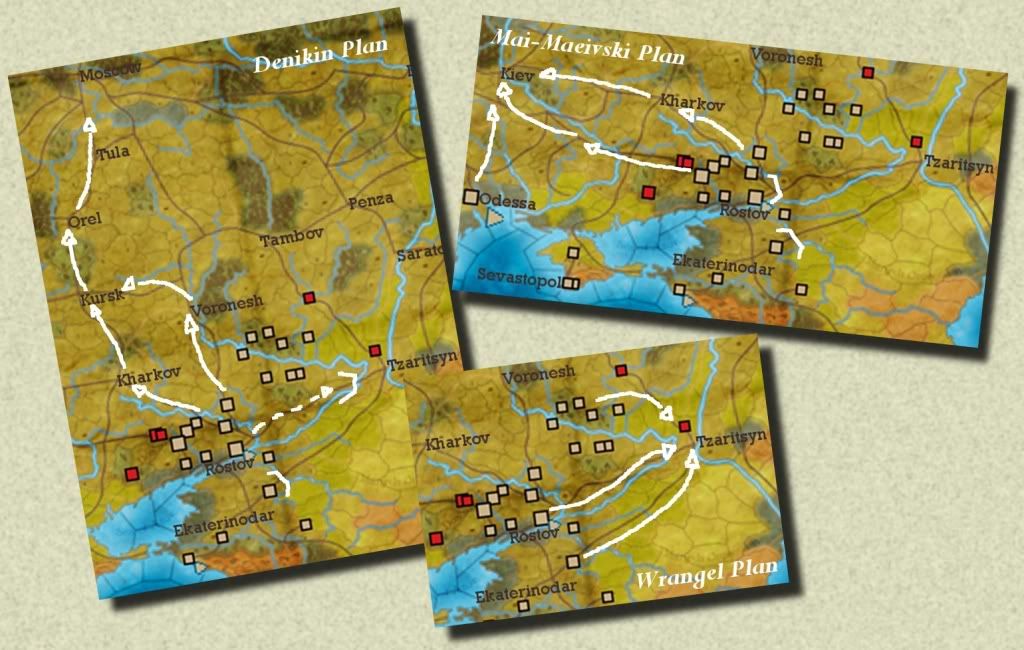
Wrangel believes that Tzaritsyn has to be taken before the White forces can push north. Otherwise their base in the South will be perpetually endangered and their flank vulnerable. Moreover this would enable the Volunteers to link up with Kolchak's Siberians finally creating a unified front against the Bolsheviks. Naturally it would be his Army of the Caucasus - already facing Tzaritsyn - that would play the key part in such an operation.
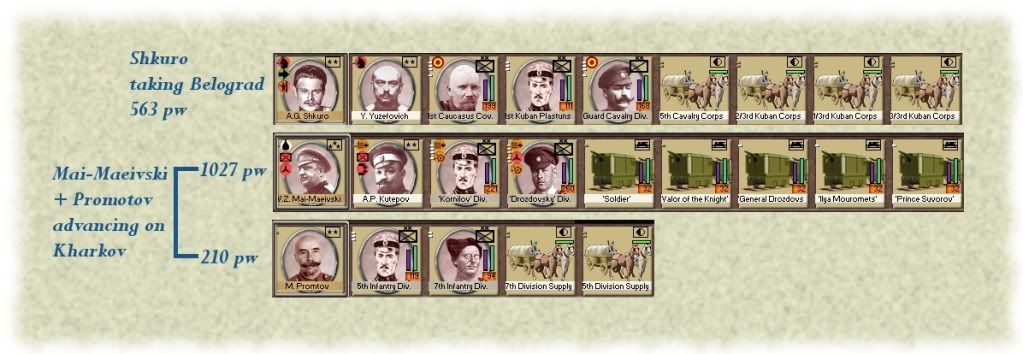
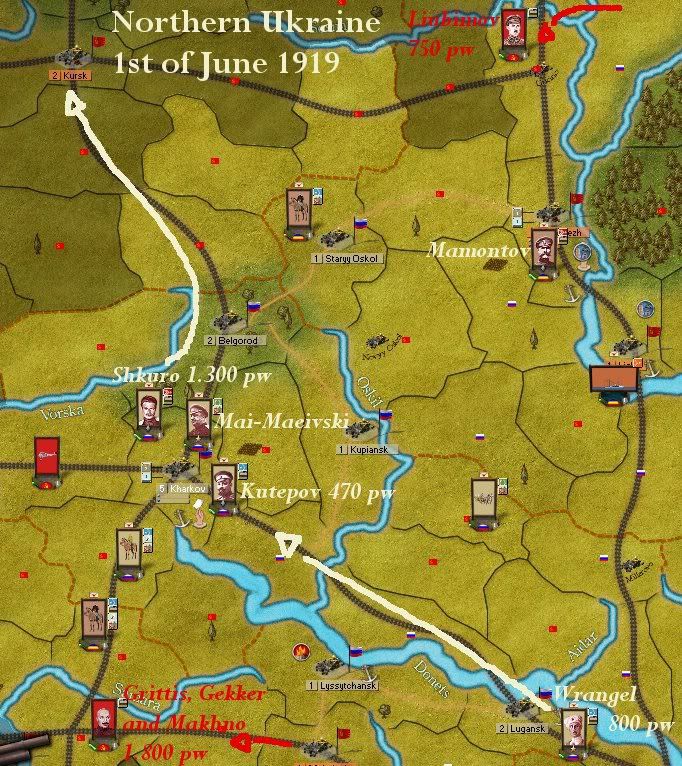
Mai-Maeivski - in command of the Volunteer Army guarding Rostov against Red forces approaching the Don from the West - advocates a complete conquest of the Ukraine before a march on Moscow is undertaken. According to Mai-Maeivski's warplan his Volunteer Army would lead an offensive westward taking Kharkov and finally linking up with the Greco-French intervention forces at Kiev.
Denikin doesn't want to waste time. The Red forces to the North are weak. In the meantime the Siberian advance has already stopped, Samara has been lost. If this war is to be won, an immediate push to Moscow is necessary. His idea is to throw both, the Volunteer Army and the Army of the Caucasus, north and leave only the Don Cossack Army behind to guard Rostov. It would take positions behind the Don river close to Tzaritsyn - threatening the city without actually attacking thus pinning down superior Red forces.**
Who will emerge victorious from this argument amongst White generals?
----------------------------------------------------
* A reference to Marina Tsvetaeva's poem series "The Encampment of Swans". Swans are one of the metaphers Tsvetaeva uses to idealize the White Guards.
** To some extend this reflects the real controversies amongst the White leaders prior to Denikin's disastrous Moscow Directive. Wrangel always was a proponent of attacking Tzaritsyn and once this was achieved wanted to link up with the Siberians rather than march on Moscow. Denikin's Moscow Directive (3rd July 1919) had a much broader scope than the plan proposed here, though. He ordered an advance along three railway lines: Tzaritsyn-Saratov-Penza-Nizhnyi Novgorod-Moscow; Voronesh-Mosocow; Kharkov-Kursk-Orel-Tula-Moscow. Wrangel thought it to be the "death sentence" of the White Army.
Last edited: