• We have updated our Community Code of Conduct. Please read through the new rules for the forum that are an integral part of Paradox Interactive’s User Agreement.

TheBearIsHere

Dijkgraaf
59 Badges
Dec 8, 2013
91
21
  • Crusader Kings II: Charlemagne
  • Europa Universalis IV: Pre-order
  • Europa Universalis IV: Third Rome
  • Victoria 2: Heart of Darkness
  • Victoria 2: A House Divided
  • Semper Fi
  • Europa Universalis IV: Res Publica
  • March of the Eagles
  • Crusader Kings II: Jade Dragon
  • Hearts of Iron III: Their Finest Hour
  • Hearts of Iron III
  • For the Motherland
  • Europa Universalis IV: Call to arms event
  • Europa Universalis IV: Wealth of Nations
  • Europa Universalis IV: Art of War
  • Crusader Kings II: Legacy of Rome
  • Crusader Kings II: The Old Gods
  • Crusader Kings II: Rajas of India
  • Crusader Kings II: The Republic
  • Crusader Kings II: Sons of Abraham
  • Crusader Kings II: Sunset Invasion
  • Commander: Conquest of the Americas
  • Europa Universalis III
  • Europa Universalis III Complete
  • Crusader Kings II
  • Europa Universalis IV: Conquest of Paradise
  • Crusader Kings II: Sword of Islam
  • Crusader Kings Complete
  • Hearts of Iron IV: Cadet
  • Hearts of Iron IV: Colonel
  • Crusader Kings II: Reapers Due
  • Europa Universalis IV: Rights of Man
  • Stellaris: Leviathans Story Pack
  • Crusader Kings II: Monks and Mystics
  • Europa Universalis IV: Mandate of Heaven
  • Europa Universalis IV: Rule Britannia
  • Steel Division: Normand 44 Sign-up
  • Europa Universalis IV: Cradle of Civilization
  • Stellaris
  • Europa Universalis 4: Emperor
  • Crusader Kings II: Conclave
  • Europa Universalis IV: Cossacks
  • Crusader Kings II: Horse Lords
  • Europa Universalis IV: Common Sense
  • Crusader Kings II: Way of Life
  • Europa Universalis IV: El Dorado
  • War of the Roses
  • Victoria 2
  • Europa Universalis III Complete
  • Europa Universalis III Complete
De Staten Generaal
A Historical Holland AAR


Front.jpg


Table of Contents

Chronological Chapters:
The Buildup to the Revolt
The Dutch Revolt
La Déluge de Bourgogne

Introduction


Hello dear forum readers, and welcome to this Holland AAR. You may know me from a previous Friesland AAR that I have worked on, yet not finished. This will be an attempt to rectify that, and to write an improved story. I strongly, strongly hope that I will get myself to finish this one, and not quit halfway through, as I tend to do with a great number of projects.

So what can you expect from this AAR?For starters, it will be written as a history book. Chapter will be posted in a more or less chronological order, yet will focus on a specific aspect of the game. When the reformation fires, for example, that will be discussed in its own chapter, instead of a side subject in another chapter. Another thing I will be doing is write about Dutch culture, geography and economics in separate chapters, which might be based slightly on gameplay, but will mostly focus on the real life timeline of Holland. Some of the things happening in the chapters will not be based on in-game events, but based more on real life events in Holland and the Netherlands.


As you quite likely already know, I shall be writing about Holland. In game, my goal is to mimic Dutch history as closely as possible, whilst still trying to play an enjoyable run. European expansion will therefore likely not be very commonplace, but colonial ventures may end up being more successful than in our timeline. If Holland, for example, goes to war with Friesland, the chapter might end up looking a lot like the actual Frisian-Hollander war of 1515-1524.

As always, feel free to criticize in a respectful manner and to leave suggestions and comments. Thank you for reading this AAR and I hope you’ll find it enjoyable.


-Bear
 
Last edited:
The County of Holland
In contrast to its southern counterpart, the Northern Netherlands and Holland were a region of minor significance. This was in no small part due to the regular flooding of the area; before the 13th century there was little organized effort in constructing dykes and polders, meaning that western provinces such as Holland, Zeeland and Friesland were scarcely populated. It is therefore no surprise that the biggest cities of the Northern Netherlands were located in the middle and east part of the region, Utrecht being the largest of the bunch. The major players of that time, the County Flanders and the Duchy of Brabant, were located in the south, and exerted little control north of the great rivers.

Only from 1200 A.D onwards did the Dutch start large land reclamation processes and coordinated construction of sea dykes on a wider scale. Previously, inhabitants of Friesland and Zeeland would build their houses on so called ‘Terpen’, artificial hills that provided shelter in the event of a flood. Dykes, however, caused for a more safe environment, and the population started to increase from there on out. The 13th century accordingly saw migrant waves towards the newly created land in the west, mainly Holland and Zeeland, thus increasing the prosperity of those provinces. The new lands often lacked the feudal centralization that could be found in other parts of the Low Countries, like the south.


1648_Leo_Visscher.jpg

The Lion of Holland, with her most important cities portrayed next to her.

So throughout the high and late middle ages, Holland became one of the most prominent powers in the Low Countries. The sea clay lands of in the polders of Holland and Zeeland proved to be much more fertile than the soil in the rest of the north and much of the south. An agricultural surplus allowed many Hollanders to move to the cities, and by the start of the 15th century, Holland boasted seven (relatively) large cities. These were, in declining order of population,
  • Dordrecht (8,000)
  • Haarlem (7,000)
  • Delft (6,500)
  • Leiden (5,000)
  • Amsterdam (3,000)
  • Rotterdam (3,000)
  • Gouda (3,000)
These cities individually are not great in size. None of them were able to obtain an economic or political monopoly in Holland, or even their own small surroundings, as was the case in Flanders and Brabant. But the urbanization in Holland was very large. 45% of people in Holland lived in a city. In Brabant, for example, this number was only 30%. Indeed, these cities were not large, and were easily outdone by cities to the south and even to the east; the IJssel river possessed some large Hanseatic cities.
  • Brussel (25,000)
  • Brugge (20,000)
  • Kampen (12,000)
  • Deventer (10,000)
  • Utrecht (10,000)
These cities, and the states they were part of, were usually internally fractured (except for the southern cities). In Holland the situation was different. Due to their relatively small size and their similar interests in trade and politics, the cities often banded together to fight outside threats, most of the time against Frisian privateers hindering trade in the Zuiderzee. Maritime trade was a huge factor in these conflicts; the herring trade was one of the, if not the biggest industries in Holland. To protect said industry and interests, and to capitalize on them, the Hollander fleet grew to humongous sizes, nearly equalling that of England.

The situation in the Northern Netherlands became more and more focused on the expansion drift of Holland. In comparison to Holland, the other Northern Dutch states were unstable and internally fractured. Multiple wars were fought with Flanders concerning the possession of Zeeland, a struggle from which Holland would emerge victorious. Famous counts like Willem II and his successor Floris V tried successfully to add West-Friesland to their domain, also known as the northern tip of Holland. The counts and nobles of Holland were also eager to mingle in the politics of the Bishopric of Utrecht, which was a large, but fractured realm. The elections were usually coupled with widespread bribing.


V4E.NL-HlmNHA_53012912.jpg
25b5873518bfdb3923c2cc66130563c2.jpg

Counts Floris V and Dirk I, two of the most important rulers of Holland, and men who played vital roles in the expansion of Holland

The lack of a centralized feudal state in Holland becomes apparent during the Hook and Cod wars, a struggle, often called a civil war, that lasted for a century and a half. The cause of these conflicts were the title Count of Holland, which became disputed after the death of Count Willem IV. The Cod League, named after North Sea fish important to the Hollander fishing industry, consisted mainly of middle class citizens from the cities; The Hook League had a membership of noblemen, and their name is derived from the instrument used to catch Cod. It is suspected that the expansion of the middle class was an underlying cause of this conflict. The Hook faction initially triumphed, and managed to get Willem V as Count of Holland.

Fighting continued throughout the 14th and 15th century, though it was usually on a small scale. The Cods would eventually come out on top of the conflict, as their candidate for the throne came to power in 1432. This candidate was Philip the Good of Burgundy, who added Holland and Zeeland to the Burgundian Netherlands. In this new state it became truly clear who were the major players in the Netherlands; Flanders, Brabant and Holland. These three provinces combined amounted to 52% of the population and their economic output was unmatched by any of the other provinces in the Burgundian state.
 
Last edited:
Wonderful! Nice writing. I love playing to form the Dutch. Looking forward to how you develop this further. Plus, I'm a sucker for "historical" or semi-historical AARs rather than curb stomping conquests. It adds a flavor of realism that is pleasant to read, and to see how you're trying to manage the broader macro developments from the AI's actions.

Good luck. Will be watching.

Cheers!
 
The Buildup to the Revolt

The Rule of Philip the Good
The epicenter of Burgundian power in the Low Countries was located in the south, or more precisely, Brussels, where Philip the Good had moved his court in 1441. This court was a gathering of chivalrous ideals and aristocratic manners, and was often seen as the cultural heart of Western Europe, by both foreign nobles and by the Burgundians themselves. Fashion and art displayed in Brussels would quickly spread throughout the castles and palaces of the continent, greatly boosting Burgundian prestige and economy, as everyone now desired Flemish and Dutch cloth and products. The production of luxury goods such as tapestries, silk, paintings, jewelry, sculptures, and music increased dramatically during the 15th century.
One of the most prestigious knightly orders of the time, the Order of the Golden Fleece, was the brainchild of the duke, after being denied entry to the Order of the Garter by the French king. This order gives a good insight of the atmosphere at the Burgundian court, as it was inspired by classical tales like King Arthur and Jason's quest for the Golden Fleece. Noblemen were desperate to be granted membership to this prestigious order, which was considered to be one of the grandest of the time.

Philips entourage however, was not merely an exhibition of the trends of the time, but held very real power. The duke’s actions during the Hundred Years War, for example, would prove to be vital for its outcome. During his rule, Philip had been an ally to both the English Henry VI and the French Charles VII, orchestrating actions such as the capture and subsequent burning of Jeanne d’Arc and the siege of Calais. His switching allegiance had made him an enemy of both England and France, however, but neither of them would undertake action against Burgundy in fear of being attacked in turn by the other. Philip's marriage to Isabel of Portugal, although leading to minor dissent amongst the Dutch nobles, further consolidated his power in Western Europe.


Van_der_weyden_miniature.jpg

A painting of the court of Philip III, nicknamed 'the Good'

During the early 15th century, Philip had acquired a staggering amount of titles, counties, duchies and lordships through both inheritance, purchase and conquest. In the year 1444, the titles he had acquired for himself since his birth in 1396 were; Duke of Burgundy, Duke of Brabant, Duke of Limburg, Duke of Luxembourg, Count of Flanders, Count of Artois, Count of Franche Comté, Count of Holland, Count of Zeeland, Count of Namur, Count of Hainaut, Margrave of Antwerp. This humongous realm was too much to govern for a single man, no matter how intelligent or capable. Therefore, multiple institutions were created, including. the States General, or Staten Generaal, was established. Instead of multiple regions governed by a single ruler, each region in the Netherlands would now be governed by a Stadtholder, or Stadhouder, a representative of the Duke. The Stadhouder was head of the regional estates, de Gewestelijke Staten, a council representing the nobles, clergy, and the bourgeoisie. Whereas the Gewestelijke Staten would operate on a regional scale, the Staten Generaal would have authority over all the Burgundian Netherlands.

The flourishing that occurred in the Low Countries during Philip's rule were most noticeable in the south, especially in the Walloon, French speaking provinces. For Flemish and Brabanter patricians, for whom Dutch was their native language as well, this was not a problem; they were used to conversing in French. But the language barrier led to more problematic situations in Holland. Stadtholders in Holland and Zeeland were often Walloon, Flemish or French, and practically no Dutchmen were members of the Order of the Golden Fleece.
This led to a less efficient integration of Holland; noblemen from Holland and Zeeland would be excluded from the political life at court in Brussels, and often had a disadvantage over their southern counterparts in strifes for important positions, such as that of Stadhouder. The rich mercantile cities of Holland often felt frustrated with the lack of attention and care that the rulers in Brussels displayed when it came to governing the north. The Hanseatic cities of the IJssel, namely Kampen and Deventer, were long time rivals in the Zuiderzee trade, and would often interfere with Hollander trading interests. The Burgundian Crown cared very little for this. To the southern aristocrats, the North and Baltic sea trade was unimportant compared to the booming textile trade in Brugge and Antwerp. Conflicts north of the great rivers were often settled by the Estates of Holland themselves, not by the Duke.

Nevertheless, Philip the Good was a charismatic ruler, capable of keeping his fractured realm in one piece. He was on good footing with many of the Dutch nobles, as in order for him to influence events above the rivers, he needed the support of the local powers. One fashion with which he accomplished this was appointing friendly noblemen positions in the Estates of Holland and Zeeland, in the town councils and waterschappen. Cities like Haarlem and Amsterdam would see patrician families excluded from the upper circles of the political circuit, being replaced with aristocrats instead. It goes without saying that the merchants class was unhappy with these methods. In an attempt to quell the growing dissent with Philips administration, he expanded the infrastructure in many Hollander and Zeelander cities, such as Amsterdam, where the market square was expanded and smaller merchants received funding by the state. Rotterdam, Dordrecht and Leiden saw similar measures being taken. In Zeeland, the bureaucracy was expanded by constructing several new churches, which were granted the right to collect tithes. A large part of these tithes would be returned to the Estates of Holland, and the court in Brussels.

f7165f1fb1369eff179f912857f178ac.jpg

The expanded marketplace at Haarlem

Growing unrest in the North

The situation rapidly changed when Philip, after a long period of illness, passed away in Bruges in the year 1451. His son and heir Charles, nicknamed the ‘Bold’, proved to be less skilled at diplomacy than his father. During much of his reign, Philip had tried to maintain cordial relations with the King of France, Charles VII. He was, for example, willing to negotiate over disputed lands along the Somme river. Charles had inherited none of the calm that had made his father's rule so prosperous. On the orders of his father, he had taken the French princess Isabella de Bourbon as his wife, but she was merely a distant cousin of Charles VII and relations between the French and Burgundian monarchs deteriorated rapidly, in no small part due to the complete lack of diplomatic skill that Charles I displayed. Charles was a militarist by heart, and would rather fight than talk.

Charles reign proved to be a failure in domestic politics as well. The cities in Holland and Zeeland, already dissatisfied with the policies of Philip, were outraged with Charles, a man who they saw as a warmonger. His support in Holland strongly rested on the backs of multiple loyal noblemen, the most important being Willem van Hagen. Willem, a childhood friend of Charles, was the lord of Hagen, a town in the Rheinland, as well as being Lord of Duivenvoorde and Wassenaar and Viscount of Leiden, titles he had inherited at the death of his cousin René van Wassenaer. At the time of his death Willem was a boy of four years old, so duke Philip offered to tutor him at Brussels, in the hopes of gaining a noble ally in the North. The young Willem looked up to Philip as a father figure, and respected his policies. Over the years, he became a fervent supporter of Philip, which led to him being appointed Stadhouder of Holland and Zeeland in the year 1449. During Philip's final speech in the Staten Generaal, he was resting on the shoulder of Willem van Hagen, a clear sign of the trust he had in the man. "Keep this man in honour," Philip alledgedly spoke to Charles, "he may be your most valueable advisor and support."

Willem-van-Oranje-geschilderd-door-Anthonie-Mor-omstreeks-1554.jpg

Willem van Hagen, Stadhouder of Holland and Zeeland

Things took a turn for the worse when Charles the Bold showed his aggressive nature by marching of to war against duke René de Valois of the Provence in 1451. Though the campaign in Barrois were astonishingly successful and the Provencal troops had been smashed at the battle at Nancy, various merchants and figures could see the clouds gathering. René de Valois had connections all over Europe; the duke himself was a relative of the French king, and although Charles VII sad idly by, it was clear that he was displeased with the war on his eastern border. More importantly was the entry of England into the war, as Henry Tudor was married to the daughter of René, Margaret of Anjou. At the time, it was seriously doubted wether or not English troops on the continent could turn the tide of the war. Especially the cities of Holland and Flanders were concerned, as the Royal navy was capable of causing serious damage to their economies, and their beaches would be the most likely to be the landing place of an English invasion force. The Estates General believed that it would be wiser to seek peace; Charles would have none of it.

He did not seem concerned with these any of these factors. In fact, he once again showed his lack for diplomacy as Hagen had to announce his decision to the Staten Generaal, something he would take as a slight; Charles himself had already left with his armies. This had caused a disagreement between the two men, right before Charles left for Barrois. Van Hagen had warned Philip that it was unwise to show such discare for the matters of state, and that it could very well anger the Estates of Holland and Zeeland. Charles, who had not missed the growing influence van Hagen had gained over Holland in the past decade, lost his temper. "Not the Estates, but you, you, you!", he had yelled, implying that the Estates were puppets of Prince Willem. It was also up to Willem to announce the new tax Charles had come up with to fund the ongoing war, the so called ‘Tenth Penny’, or Tiende Penning. This put huge pressure on the Estates of Holland, Zeeland and Flanders, who already suffered from the English blockade, and were quite unwilling to tax the people for a war that would not benefit them in the slightest. The situation became nearly unholdable in Holland, as many nobles, van Hagen included, were turning their backs on Charles; the cities already had.

Two very prominent noblemen, the counts of Egmond and Horne, raised their voices in opposition in the States-General. These two men gathered a great deal of support amongst the Dutch representatives, but were denounced by many of the Flemish and Brabanter nobles, who were greatly favoured by the duke. In anger, Egmond and Hoorn resigned from the States-General, and instead founded the Compromis of Nobles, a group of approximately 200 nobles from Holland and Zeeland. Together, they created the so called Petition of Nobles, a document demanding the abolishion of the Tenth Penny and peace with the English. Much of the Dutch nobles signed the Petition, including Willem van Hagen. Condifent with the power behind their petition, Horne and 43 other nobles traveled south to Bar-le-Duc, where duke Charles and his armies were encamped. On the 5th of April 1452, the men managed to enter the tent of Charles, and presented him with the Petition. Charles read the document in dissaproval, and like the rest of his generals, he was not impressed by the band of Dutchmen in front of him. One of his loyal noblemen, Lord Berlaymont, proclaimed the following; "N'ayez pas peur, Monseigneur, ce ne sont que des gueux,", translating to "Don't fear, milord, they are but beggars." Accusing them of high treason, Charles had every nobleman present arrested and sent to Brussels to await further punishment. He sent an army led by Lord Berlaymont north to deal with the upstart rebels in Holland and to quell any further unrest in said province.

resolve.jpg

A drawing of the Petition of Nobles, a trigger event in setting of the Dutch Revolt

The news spread like a wildfire. In Holland, mobs rose in the streets of the large cities, picking fights with the Burgundian sympathisers, if there were any. In many cases, the city watch refused to take action against the rioters. Members of the Compromise of Nobles either left the organization or took swift action. Willem van Hagen started to gather a host of mercenaries and men at arms from his own holdings, expecting the worst. As Stadhouder of Holland and Zeeland, and the only figure able to keep order in the chaotic situation, he ordered the cities to prepare for war and deny Lord Berlaymont entrance. Count Lamoraal van Egmond shared Willems pessimistic views, and sent our riders to king Charles VII of France and the Holy Roman Emperor, requesting support against the Burgundian duke, in the event of full blown revolt. Both rulers agreed, hoping to curb the ambitions of duke Charles. In a last attempt to reconsile with Duke Charles, van Egmond rode to Brussels with 50 riders, demanding the release of Horne and the other noblemen. Unfortunatly, the States-General in Brussels had recieved strict orders from Charles, and send out soldiers to meet Egmond, who, in the ensuing fight, was captured as well. Both Horne and Egmond were executed on the great market of Brussels on the 15h of August 1452, along with the other 43 noblemen who had accompanied Egmond to Barrois. The powder keg exploded. On the 17th of August, Willem van Hagen and the Estates of Holland and Zeeland declared open revolt against the Duke of Burgundy.
 
Last edited:
Wonderful! Nice writing. I love playing to form the Dutch. Looking forward to how you develop this further. Plus, I'm a sucker for "historical" or semi-historical AARs rather than curb stomping conquests. It adds a flavor of realism that is pleasant to read, and to see how you're trying to manage the broader macro developments from the AI's actions.

Good luck. Will be watching.

Cheers!


Thanks for following! Next chapter will be quite a large one, so it might take a while before it'll be posted. On another note, how long do you prefer these chapters to be? Was last chapter of a pleasant size or could it be better?
 
Very nice scene setting. Looking forward to the resolution
 
The Dutch Revolt


The Campaigns of 1452-1455


At the outbreak of the conflict, Willem van Hagen was situated in the Hague, trying to gather support in the Estates of Holland and Zeeland for a combined army with the intention of fighting Charles. Although the majority of the cities and representatives had already turned against the Burgundians, a small number of nobles, patricians and landowners scattered across the provinces had not. Various nobles, with influential positions in the councils of the Hollander cities, exercised their power in the Provincial Estates, trying to impair van Hagen’s ability to raise an effective fighting force and consolidate his power in Holland. Despite not being pleased with it at all, Hagen had expected this. Ever since he had heard of Horne’s imprisonment at Bar-le-Duc, Willem had been raising a host of levies from his Dutch and German estates, a force of around seven thousand men, and positioned them in strategic locations. allowing him to put pressure on the more indecisive cities. Through sometimes unorthodox measures, Willem successfully managed to suppress the Burgundian loyalists left in the country.

Feeling his support in the Provincial Estates was adequate, Willem proposed a bill, called the Delft Pacification. This act comprised of the following closures; Burgundian troops were to be expulsed from the Netherlands, Holland and Zeeland would establish an Estates General of their own, separate from that in Brussels, the cities of Holland and Zeeland would be obliged to provide monetary support to the Dutch armies in the field, the cities would be able to elect their own representatives in the city councils and Provincial Estates, and most importantly, Willem van Hagen would be inaugurated as Duke of Holland and head of state. The Estates was heavily divided on the act, especially the last closure, basically giving van Hagen the same power duke Charles had possessed and abused. Debates raged on throughout the months of August and September, and the political situation became stagnant during this period. The situation only changed when word spread of Lord Berlaymont marching an army north, and it changed drastically.


mor_portrait%20of%20a%20gentleman%2C%201569.jpg

Lord Berlaymont, commander of the Burgundian forces in the Netherlands
Lord Berlaymonts army, a force consisting of twenty one thousand Flemish, Brabanter and Walloon forces, outnumbered the forces of van Hagen nearly three to one. It had been send to Holland with the intent of beating the rebels back in line. Lord Berlaymont had therefore been appointed Stadhouder of Holland and Zeeland by duke Charles, whilst those provinces themselves chose to keep Willem van Hagen in that position. However, Berlaymont was supported by the Stadhouders of Flanders and Brabant, gathering a larger host than the Dutch could ever muster. The newly formed Dutch army stood little to no chance fighting the Burgundians in a pitched battle. Willem and his army of seven thousand men were forced to evacuate Holland, threatened by the superior royal forces, and promising to return to rout Berlaymont from Holland. Several garrisons were left behind in fortified towns, with the intent of slowing down the Burgundian advance until help could arrive from the French, Austrians or Willem’s forces. These fortified cities and the attempted sieges thereof would come to be the image of the war in Holland and Zeeland. Battles between armies were scarce, and the focus instead shifted to the capture of strategic fortresses and cities in the countryside.

On September 17th, Hagen’s forces successfully crossed the Zuiderzee and started their march through the Rheinland for Strasbourg, where they would meet up with the French armies, who had already begun their invasion of the Bourgogne and the Franche-Comté. Throughout this march, noblemen, often ex-members of the Compromise of Nobles, joined van Hagens forces along with their retinues. These exiled noblemen referred to themselves as Geuzen, a nickname Lord Berlaymont had given the aristocrats of the Compromise, as a sign of pride and to show that they did not care about the opinions of the Burgundian nobles. The Geuzen allegedly brought another three thousand to the forces of van Hagen, making it a more significant force.

Meanwhile, Berlaymonts army had arrived in the Northern Netherlands, and set up his encampment in Bergen op Zoom, from where he would direct all offensive operations in Holland. In may 1453, he send out a force of nine thousand Flemish and Brabanter men to take the scattered cities of Holland, most importantly the fortified city of Leiden. Pillaging its way through the countryside, the Flemish troops reached Leiden on the 15th of may, cut of its supply lines from Amsterdam and the other cities and prepared for a siege. The Brabanter troops, under command of Lord Champagny, were a mess; due to the war on multiple fronts, the Burgundian state had been unable to pay them for nearly a year. Their lack of discipline had become apparent during their raids throughout Holland, and thus ensured the unwillingness of Leiden to surrender. Palisades, ditches and temporary fortifications were quickly erected by a garrison force of five thousand citizens, and every demand for surrender was firmly rejected.

Neither side was willing to give in; for the loyalist forces, a quick victory in Holland could severely impact the provinces war enthusiasm, and would prove a valuable asset on the negotiation table with Willem van Hagen. For the Dutchmen, the loss of Leiden would open the gateway into the entire province, which would have huge implications for trade and the war effort. However, the non besieged cities of Holland could not help beleaguered Leiden on land, as their armies were off fighting in Germany and France. So another solution was found. A quickly assembled force of merchant vessels were equipped with early cannons and send out to the Schelde. As a response the Geuzen in the army of Hagen, the naval forces called themselves the Watergeuzen. In a combined effort with the English fleet, the Watergeuzen managed to defeat the Flemish and Brabanter navies, allowing a blockade on Antwerp, Ghent and Bruges, and a naval supply line for the defenders of Leiden.

01leiden.jpg

Leiden at the time of the Dutch Revolt

The siege rapidly turned into one of the most brutal affairs in the war. One good example of this is when the Brabanter besiegers launched a decapitated head towards the city wall. In response, the defenders murdered eleven Burgundian loyalists, crammed them into cag and rolled it to the Burgundian camp, with a letter stating that this was their payment of the Tenth Penny. The extra corpse should be seen as a complementary gift. But exchanging insults and starving out the defenders wasn’t sufficient for Champagny, as he needed a quick victory. Flemish soldiers tried to tunnel their way under the city walls, intent on making them collapse. The defenders responded by digging tunnels to blow up the Burgundian tunnels. As attacks on the walls continued to fail, raids on the countryside became more common, in the hopes of luring out the defending garrison and to help keep the demoralized besiegers in check by allowing them to loot and plunder. These raids only aided the Dutch propaganda effort greatly, displaying the brutality of royalist forces and the need for a strong leader.

After three months, the defenders were in a dire state. Food supplies began to run low, and much of the garrison had succumbed to starvation and disease. Many of the citizens begged the Lord Mayor to surrender to the Burgundian forces outside, as nothing could be worse than the suffering they were currently undergoing. The mayor steadily refused, exclaiming that ‘If you would be so relieved by my death, then feast on this body; carve it to pieces, share it, as far as it may go’. This would not be necessary. On the 21st of August, a dove from Emperor Friedrich reached the city, informing the population that his army was nearing the city, and that it merely had to hold out for a few more days. So it did. On the 24th, the Burgundian troops had abandoned the siege, retreating from the superior Austrians forces closing in. In an event that would come to be known as 'het Leids Ontzet', citizens scavanged the abandonded camps of the Burgundian army and found stew, herring and white bread, and August 24th is still celebrated in Leiden each year.
Three days later, the Burgundian forces underwent yet another defeat, likely the most decisive in the entire war. The French Armée Royale, lead by Jean Bureau, had led an incursion into Barrois, threatening Charles very own army. Initially, Charles managed to fend of French regiments from lifting the siege of Bar-le-Duc during skirmishes along the Marne. Bureau, a patient man, saw that he could not break the siege by an assault on the dug in Burgundians, and waited for reinforcements, which he received in the form of the Dutch army. Hearing of the fighting in the Barrois, Willem van Hagen ordered his army to turn west at Strasbourg and cross into Lorraine. His forces were able to sneak up on the Burgundians from the west, as French attacks continued from the east and the Provencal garrison led incursions into the besieging camp.
I
n cooperation with General Bureau, several attacks on the Burgundian army had been organized by the Dutch cavalry units, led by Gabriël van Nijmegen. Their purpose was to cause as much chaos in the camp and then retreat, only to strike again shortly after. These harassments would last for a week, and were brutally efficient, as the dense forests of Barrois proved an excellent landscape for such tactics. They only ceased when duke Charles send out his own cavalry to counter the less disciplined horsemen of the Dutch. The Burgundian Knights indeed had some success fighting the Dutch, but were soon forced to pull back west as news reached them of the French having crossed the Marne. The Burgundian army had trouble reorganizing, as the Dutch infantry now advanced on their eastern flank. Already outnumbered and intimidated by the rising number of casualties, Charles withdrew his forces north. The Burgundian army was able to retreat in a somewhat organized manner, and the French and Dutch failed to pursue and destroy it, but the defeat at Bar-le-Duc signalled the beginning of the end for the Burgundian cause. Recovering behind friendly fortifications, the Burgundian troops were now essentially trapped between the Austrian armies in the north and the French in the south.

battle.jpg

Tapestry depicting the battle at Bar-le-Duc, the decisive victory that turned the tide in favor of the Dutch

Whilst the French and Dutch armies prepared for an invasion of the Southern Netherlands, and the Habsburg forces lay siege to Antwerp and ‘s Hertogenbosch, there was one last obstacle in the way of a full blown attack on the Burgundian lands; duke François of Brittany had led raiding parties into Maine and Anjou, captured multiple cities including Angers and Tours, and now threatened the entire Loire valley. Charles de Valois himself took command of l’Armée des Flandres, marched along the fertile plains of Loire and smashed the Breton forces at the battle of Saumur castle. Charles made the decision to not chase the Bretons, instead wanting to join up with l’Armée Royale and the Dutch at Compiègne. The Duchy of Brittany would only play a role of minor significance in the Revolt, as English and Provencal now besieged Nantes and Brest.

In February of 1454, the final push into the Burgundian Netherlands began. Attacking from bases in the Champagne and Vermandois, a total force of twenty six thousand French and Dutch soldiers launched an offensive into the border regions of Artois and Cambrai. As Jean Bureau and his armies laid siege to Arras, Richard Plantagenet occupied Amiens and raided Picardie, the Dutch forces took control of the siege of Namur. At the intersection of the Meuse and Sambre rivers, the Citadel of Namur was the most important fortification in the Burgundian Netherlands. Should it fall, then the way to Brussels would be open, allowing the French and Dutch to crush the remainder of the Burgundian forces. Command of the siege was handed to Gabriël van Nijmegen, the officer who had led the cavalry charges in Barrois. Van Hagen himself travelled back to Holland by ship, as he deemed the situation safe enough.

On the 4th of July 1454 Willem triumphantly entered the Hague, being cheered upon as he made his way to the Estates General. Supported by some very prominent nobles, such as Floris van Egmont, the son of the executed noble, he once again called for a vote on the Delft Pacification. Although large beforehand, his support in the Estates General had grown significantly over the course of the war. His victories in Barrois and the unsuccessful siege of Leiden had bolstered van Hagens reputation as a military commander. But more importantly, contrary to Charles, he was a diplomat. Willem was a well spoken, clever man, with connections ranging all over the continent. But it was not merely what he said that made him famous; it was what he did not say. Willem had a tendency to keep his opinions to himself, and to weigh every word he spoke, which lead to him being nicknamed ‘the Silent’. His relations with the Holy Roman Emperor and the King of France made him an even more favourable candidate for head of state.


266px-WilliamOfOrange1580.jpg


eu4_72.png

Willem van Hagen, Duke of Holland, was a perfect statesman, and vital to the success of the revolt


On the 5th of September 1454, the Estates of Holland and Zeeland signed the Delft Pacification, electing Willem van Hagen as Duke of Holland. However, his power came with severe limitations, as the Estates General in the Hague would maintain a lot of their power. The duke would have a lot of restrictions on his domestic power. He would not be allowed to appoint Stadhouders and councilmen, nor was he able to pass acts and laws without approval from the Estates. However, the most important aspect of the Delft Pacification was that the Dutch army would be property of the Estates General, not of the Duke, although he would have a very influential position it. The Delft Pacification and its ensuing government would form the basis for its successor, the Republic.

Van Hagen could celebrate for long, as word reached the Hague that Namur had fallen after five months of siege. Antwerp was expected to fall soon after, allowing for the final destruction of the Burgundian army in Brussels. Willem promptly left Holland for Brussels, hoping to negotiate a peace deal with his childhood friend Charles before the inevitable defeat of his armies. With fifty riders he arrived at the gates of Brussels, resembling the Count of Egmond two years earlier. He was denied entry into the city. Charles refused to even meet the man who he saw as a traitor to the state, as he notified Willem through the Lord Mayor of Brussels. Willem was furious. “The French may strangle you for my part! And may you choke on your pikes, on your cannons and swords!” He yelled over the city walls, before riding off again.

Sure enough, the Austrians took the citadel of Antwerp a week later, and Emperor Friedrich marched his entire host down to Brussels, intent on defeating Charles on final time. Unbeknownst to Friedrich, the Burgundians had retreated from Brussels shortly after Willems departure, only to encounter a French army of twice their size at the city of Loon. Panic erupted in the Burgundian lines, and soon their famed Ordinances deserted, those deciding to stay and fight were either captured or killed by the French Gendarmes. Charles himself managed to escape with only seven of his Household guards. This total annihilation of the Burgundian forces spelled the end of the war, as even Charles saw no more use in continuing the fight.

In December of 1454 the four warring parties came together in Reims, to discuss the future of Holland and the Burgundian lands. The Dutch delegation consisted of Willem van Hagen himself, as well as representatives from the Estates of Holland and Zeeland. The French Dauphin Louis de Valois showed up as representative of the French crown and the Austrian Emperor Friedrich attended in person, due to being in the field anyway. Both men were accompanied by large numbers of nobles. Duke Charles was present as well, but the negotiations were handled by his much more capable mother Isabel de Avis. The first discussed issue was the independence of Holland, which, under pressure from the three other delegations, duke Charles agreed upon. The following issues were more complicated. First of all, the Burgundian Crown would be forced to give their entire treasury to the allied factions, most of it being received by France. In a mockery of the Burgundians, they were forced to concede ten percent of their national income to the Estates of Holland, an arrangement the Dutch named the Tenth Penny.


The territorial changes caused the most friction. The Estates of Zeeland had their eyes set on the Burgundian cities of Bergen op Zoom, Breda and ‘s Hertogenbosch, as annexation of those cities would not only secure the Schelde estuary from Burgundian interference, it would also secure the Rhine trade from Brabanter robbers and pirates. Whilst the Dauphin was not opposed to this, Friedrich was, as North Brabant was a state in the Holy Roman Empire, and was likely to become a point of friction in the Netherlands if annexed by Holland. Dutch troops, however, firmly controlled the area, and the French were willing to back the Dutch on this issue as they would receive support from the Dutch in their own annexation of the county of Nevers. The negotiations would not progress if both the Burgundians and the Austrians opposed the deal, and neither side wished to see another large conflict. Therefore, Friedrich was offered the county of Franche Comté, in exchange for backing of the French and Dutch annexations. Naturally, the Burgundian delegation was outraged, but stood powerless against the three states. On the 25th of December, Christmas day, peace was signed at Reims Cathedral, marking the end of the Dutch revolt.

eu4_74.png
 
Last edited:
Very nice scene setting. Looking forward to the resolution

Great start. Subbed!

Thanks everyone! I've decided to split last chapter into multiple parts, as I think some things could be discussed in more detail, and didn't want to create overly long chapters. So in the coming week you can expect one side chapter and a short chronological chapter.
 
Last edited:
Thoroughly enjoyable. A really strong start and I'm really intrigued to see where this goes. I think you got the description of the campaign down beautifully enough detail on the movements and reasoning behind them without getting bogged down in minutiae. Really looking forward to the next chapter!
 
Now that is a very good war write-up. Gives the impression of quite a struggle, but I especially liked the climatic episodes around Leiden. It helped make the account of the war seem quite focused and local, even with the glimpses of the wider war (like the Breton charge up the Loire).
 
Thoroughly enjoyable. A really strong start and I'm really intrigued to see where this goes. I think you got the description of the campaign down beautifully enough detail on the movements and reasoning behind them without getting bogged down in minutiae. Really looking forward to the next chapter!

Now that is a very good war write-up. Gives the impression of quite a struggle, but I especially liked the climatic episodes around Leiden. It helped make the account of the war seem quite focused and local, even with the glimpses of the wider war (like the Breton charge up the Loire).

Glad you liked it! Thanks for the extensive feedback, I do appreciate it.

Altijd mooi om een AAR van Nederland te zien ^^. (In English: Always nice to see an AAR starring the Netherlands ^^)

Fijn om hier een Nederlander tegen te komen ;)
 
  • 1
Reactions:
La Déluge de Bourgogne

The Christmas peace at Reims, which had redrawn the map of the Low Countries, satisfied the three victorious states, but left the Burgundians themselves bitter. The noblemen from Brabant and Flanders especially felt anger towards their liege, as their interests suffered most from the war and subsequent peace. In the backrooms of the States General in Brussels, discussions raged about the future of Burgundy and duke Charles, who had by now fallen out of favour with much of the Dutch elite. The defeats at Leuven and during the Barrois campaign had shattered the faith in Charles, his ordinances and the military might of the state as a whole. Secession from the Burgundian state was not a taboo issue, as many Flemish and Brabanter patricians and noblemen were sympathetic towards the newly formed union of Holland and Zeeland.

portrait-of-charles-the-bold-1.jpg

Charles de Borugogne, the last independent Duke of an independent Burgundy

These talks were secretive, of course, but that did not stop rumours trickling into the ears of duke Charles, a man who had shown increasingly clear signs of paranoia after the war. His officers and advisors had been blaming the catastrophes of the last few years not on themselves, but on betrayal from all sides; first it were the Dutch, who stabbed Charles in the back when he was doing god's work by battling René de Valois, then came the French and Austrians who saw their chance to molest an already broken Burgundy, and lastly, the Flemish and Brabanter nobles, who had tried to hinder Charles his endeavours from day one.

Something clearly had to be done if the Burgundian state was to be saved. Ideally this would have been striking a peace with the Anjous as quickly as possible and start to rebuild the dukedom that had been ravaged after years of war. However, Charles mind had proven far from ideal over the last decade, and went a different road. In his mind, a swift victory over the enemy forces would restore his authority over the unruly nobles and allow him to broker a favourable peace with England and the Provence. Whilst a good plan in theory, the Burgundian army and its famed ordinances had been utterly destroyed, and what was left of the forces was naught but a few regiments of mercenaries and feudal peasants, often lacking equipment and spirit. It is estimated that in December of 1454, no more than eight thousand men were under Charles his command.
Whilst Charles desperately continued to build up his forces, messengers from Flanders started reaching the court in Brussels. The cities of Brussels and Ghent were under siege by the English armies, and pleaded for Burgundian aid. In what is now seen as one of the biggest military blunders in Western European history, Charles ignored the advice from his staff and marched his disunited army of ragtag soldiers west to Flanders.

The situation in Flanders during the winter of 1454-1455 was as follows: an English army under command of Richard Plantagenet, the duke of York, had disembarked at Calais nearing the end of the year, and rapidly pushed into Flemish territory. His reputation travelled quicker than his men, ensuring the surrender of smaller towns like Oostende, Duinkerke, Nieuwpoort and Ieper, . The rich trading city of Brugge proved a tougher nut to crack, but after twenty one days, she opened her gates to York as well, as any aid from duke Charles seemed improbable. Ghent struggled with the same issue. As York and his army approached from the west, some patricians considered capitulating to the English, in the hopes of preventing unnecessary bloodshed. The majority of the council rejected such thoughts, instead choosing to fortify the city even further.

The city was in dire straits when Burgundian forces were finally spotted approaching from the east. Whilst the sight of royal banners may have raised morale at first, it dropped once more when the size of the Burgundian army became apparent. The English outnumbered the royal army almost two to one, not to speak of their superior troops. To the people in Ghent, it was clear that duke Charles did not stand a chance. To duke Charles himself, this was less obvious. He rapidly deployed his forces facing the English camp, hoping to catch them off guard. Unfortunately for him, English billmen and archers were already moving into position, ready to make a charge of their own against the Burgundian host. What Charles had believed, wished and hoped to be his redeeming battle, similar to Achilles slaying Hector, turned into nothing less than a complete slaughter. No imaginative or tactical maneuvering was put to use by any side. All it took for Charles his hopes to be shattered was a walking pace advance by the English forces. The undisciplined Burgundian lines rapidly crumbled before the arrowstorm of York’s archers and the relentless advance of his billmen.

Historians today still wonder whether the Duke of Burgundy was ever aware of his defeat. His final charge into the English lines, together with his royal household, may have been a suicidal last charge or it may have been a desperate attempt to break his enemies morale. What is certain, however, is that it was unsuccessful. The day after the battle, a mangled body dressed in Charles’ black armour was found by commoners in a ditch along the Ghent-Brugge road. His death is likely to have been a gruesome one, as his mare was found five meters away from him, a spear pierced through her head and several arrows sticking from her side. Lord York displayed the corpse to the besieged citizens of Ghent, and send messengers across the Low Countries, claiming victory over the deceased Duke.


pic_burg05.gif
pic_burg06.gif


Burgundian battleflags, which were most likely used by the cavalry and the Charles' Royal Household


The death of Charles ‘the Bold’ left the Burgundian state in precarious situation; Charles had not fathered a male heir. He had taken Isabella de Bourbon as his wife numerous years prior, but none can say that it was a loving relationship. Charles had spent most of his time away from the court in Brussels, and thus away from Isabella. The only issue to come of their union was the young Mary of Burgundy, soon to become the most desired woman of feudal Europe. Any gentleman able to wed her would have his line inherit the Burgundian lands. The foremost noble wishing to exploit this situation was of course, Charles VII. According to feudal law, the Duchess of Burgundy was his vassal, and if he were to get his son and heir Louis to marry said Duchess, his dominion would grow significantly.

So in the autumn of 1456 a French delegation arrived at the court in Brussels, at the head of which was the French crown prince, or Dauphin, Louis de Valois. Dressed in his most imposing armour and saddled on his proudest stallion, Louis rode into Brussels and approached her city hall. He likely expected a grand welcome by the Burgundian nobility and Mary herself, as was custom for a man of his status. Instead, he found the building in a rather usual state: citizens casually strolled across the plaza, and the town hall itself looked desolate, save for the two knights guarding the entrance. Upon demanding entry, Louis was outright refused. “The Duchess has business of more importance,” the guards simply replied. Outraged at this slight, Louis marched out of the city at once, back to Paris, where he would tell his father about the grievous injustice bestowed upon him.

His father listened. Over the next number of months, French incursions, led by prominent French noblemen and sometimes Charles himself, penetrated far into Burgundian territory, reaching cities such as Amiens, Charolais, Lille and Rethel. To make matters worse, the two large Flemish cities, Brugge and Ghent, rose in revolt against Brussels, demanding a so called “Grand Privilege”. This document was handed over to Mary in Brussels, in a similar way the Dutch had handed over the Petition of Nobles, and demanded the creation of a council in Brugge, which was to replace the French dominated States General in Brussels. This council would have the power to veto any war, marriage or taxes. Furthermore, letters of state in the Flemish provinces would have to be written in Dutch, law offenders could only be trialed by the province in which they had commited their crime, and officiaries in a province could only be from said province. In short, this demand would largely decrease the power Mary had over her domain, and instead give more power to the Dutch nobles in Burgundy; unacceptable for Mary. Common perception was that these revolts had been funded by the French, although some speculated that the Dutch had had a hand in it as well. Mary saw her ancestral realm collapsing around her, and turned to the only Lord able to save her and her lands, disregarding her personal feelings for him; Frederick III, Emperor of the Romans and Archduke of Austria. A messenger offering her hand to Frederick reached Vienna in winter of 1457, and the marriage feast happened not long after.


Groot_Privilege_van_Maria_van_Bourgondie_NL-HaNA_3.22.01.01_683_03.jpg

The Grand Privilige, or Groot Privilege in Dutch, which was handed over to Mary de Bourgogne in an attempt to advance the position of the Flemish provinces

The following year saw large numbers of Austrian and German troops arriving in the Low Countries, deploying garrisons in towns along the border with France. As Charles VII was not willing to let this dynastic squabble erupt into a full scale war with the Holy Roman Empire. He did, however, hold on to the territories he had already occupied, such as Dijon and Lille. An uneasy stalemate took stage in the south, but it was evident that neither side would strike the other. That left Fredericks hands untied and able to deal with the Flemish. Ghent and Brugge were amongst the most wealthy cities in Europe, but after half a decade of war, had most of their resources depleted. To add onto that, the cities were unable to form a solid block against the Burgundians and now Habsburgs, as they were mostly focused on competition between each other. Frederick was therefore able to begin the siege of Ghent without interference from Brugge. After the inevitable fall of said city and the subsequent looting, the defenders of Brugge did not see much use in putting up futile resistance. The Lord Mayor of the city handed over the keys of Brugge to Frederick and saw his privileges stripped from him. Both cities had come out in a worse economic and political position than they had been in before. Some Flemish merchants decided to pack up and relocate to more prosperous and thriving cities, such as Antwerp, Den Bosch or, perhaps most importantly, the upcoming port of Amsterdam.

Frederick had successfully subdued the resistance in the Low Countries and enforced peace upon the French. The acquires he made in the Low Countries made Austria, even discounting the Emperorship, on an equal footing with France. Fredricks expansion into the Southern Netherlands was looked upon with nervous eyes by the Dutch. After all, Frederick now held claim to all Burgundian domains, including those north of the Rhine. True, Austria was a signatory of the Reims treaty, and the alliance between Holland and France would likely deter Frederick from taking any true action, there was no doubt that should the Franco-Dutch alliance show weakness, the hungry eagle that was Austria would ruthlessly plunge on its prey.
 
Last edited:
My apologies, it has been a while. I have had quite a busy period which, sadly, is not yet over, but I decided to post a relativly short chapter just to get into it again. This one might be lacking in quality as I wrote it in multiple sessions, which means that you could notice some difference in writing . I hope to get back into a more regular posting schedule soon.

Thanks for reading,
Bear
 
Only just started reading this AAR, I am liking it. Doe zo verder! (Keep it up!)

I'd just like to mention and meanwhile spread the word amongst other readers, that I've put your AAR on my ballot for the Q3 & Q4 2016 ACA's. Feel free to post your own ballot with your favorites of the past six months.
 
A nice meaty update is well worth the wait.
 

State of the Northern Netherlands at the eve of the Frisian Wars

Though she had been the centre of politics north of the Rhine since her formation, Holland and her sister province Zeeland saw themselves achieve dominance after the peace at Reims. The capture of ‘s Hertogenbosch and Breda increased the already large influence Holland held over the Rhine, demonstrating her desire to further her interests across the Low Countries to the other Dutch states. What was the most worrying to the Dutch states however, was the political union between Holland and Zeeland. Whereas in previous decades Holland had been unable to exert her influence over the rest of the Netherlands due to political instability, take the Hoek and Kabeljauw wars, the strong leadership of van Hagen and the process of centralization the country had undergone during and after the war enabled ‘s Gravenhage to focus her attention outwards. It is therefore of importance to note the response and situation of the Dutch states after the Revolt.


Prince-Bishopric of Utrecht

As the state sharing the largest land border with Holland, the Prince-Bishopric of Utrecht, also known as the Sticht, had plenty stimuli to start worrying about his upstart neighbours. Before the rise of Holland as the economical, and therefore political powerhouse of the Netherlands, the Bishops of Utrecht had occupied that position. In fact, Utrecht was still the most populous city north of the great rivers, and not only did the Bishopric possess the city’s surrounding areas, the so called Nedersticht, she also held lands near the mouth of the IJssel river, the Oversticht area. Her religious authority extended even further
Despite her territorial size, Utrecht suffered from political instability and an unfortunate geographical position. It goes without saying that the Sticht was governed by a religious head, who gained his position from a college of supposedly neutral clergymen, and needed approval from the Papacy. In reality, this system worked far from ideal. The electoral college was strongly influenced by neighbouring feudal lords, like the counts of Holland and the Dukes of Gelre, but also by secular nobles from within the Bishopric, all of whom had something to gain from a weakened Utrecht. To add to that, Utrechts two parts were separated from one another by the hostile Duchy of Gelre. Authority over Oversticht was dubious and contested, almost non-existent near the Frisian border.
Prince-Bishop Gijsbrecht I was slow to react, but reacted nonetheless. Shortly after Dutch troops marched into ‘s-Hertogenbosch and thereby isolated the Sticht from the southern Low Countries, plans for a new fortress in the centre of Utrecht were drawn up. The fortress, aptly named Vredenburgh, was meant to prevent raids or excursions from both the states Holland and the Duke of Gelre, but also to preserve inner stability. It was the most advanced defensive structure in the Netherlands at its completion in 1457.

The state recognised however, that even the Vredenburgh would not be able to hold out against a determined attack from Gelre, but especially Holland. She needed allies, which she found in the Lega Genovese, a trade league lead by the rich Italian city-state Genoa, but by then had its members located almost exclusively in the Holy Roman Empire. By signing off trading privileges along the IJssel river with cities like Deventer and Kampen, the Prince-Bishop managed to squeeze his theocratic state into a mercantile organization such as the Lega.

The Duchy of Gelre

Further east, at the border of Germany, lay the Duchy of Gelre, which had been the staunched opposition of both Holland and Utrecht. Simultaneously, she was mingling in the affairs of German states such as Cleves and occasionally took sides in Frisian politics. Compared to the political instability of Sticht, and the lack of authoritarianism in Holland or Friesland, Gelre could be viewed as the only true feudal state north of the Rhine. The current duke, Jan van Egmont, had, at multiple occasions, stated his desire to form a Low-Saxon state, comprising of Gelre, Oversticht and the Frisian lands. His policy proved to be overwhelmingly anti-Hollander, obstructing trade along the IJssel and on the Zuiderzee.

Ever since her foundation, Gelre had been split into four regions, the so called “quarters”. These were, in increasing order of population; the Quarter of Nijmegen, the Quarter of Arnhem, the Quarter of Roermond, and the Quarter of Zutphen. The quarte
rs of Zutphen and Arnhem were both situated north of the great rivers, whilst Nijmegen was situated in between and Roermond completely south of them. Roermond was therefore often referred to as Upper-Gelre, whilst the other three Quarters were very rarely called Lower-Gelre to contrast them with Roermond.

pic_spanish02.gif

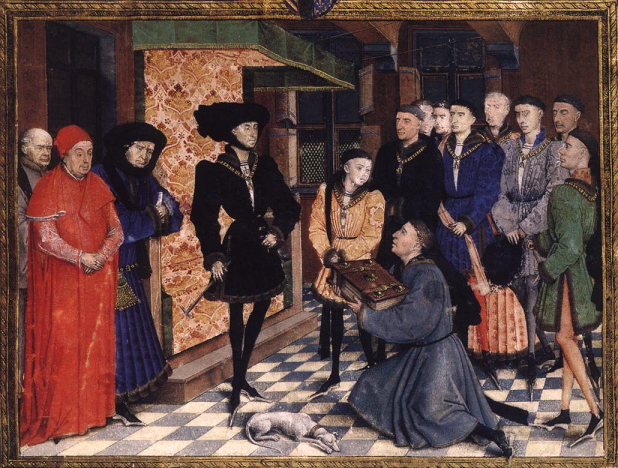
Gerlrian troops after the army reforms during the 1450's and 1460's

One of the benefits that come with being a strong, centralized state in the middle of an uncentralized Netherlands, is the advantage of a strong military force. Following the Burgundian model, Gelre had started to field a standing army, which was unprecedented amongst her peers. Her army depended on a fluent coorperation between her four quarters, each of whom were obligated to deliver a number of troops relative to their population; the bulk of the Gelrian forces came from Nijmegen and the areas along the Rhine and Meuse, whilst the quarter of Zutphen mustered only a small fraction of the total amount of troops. Each of the 'armies' fielded by these quartes could be seen as an ordinance, but on a larger scale. At the head of this fairly modern army stood Johan van Isendoorne, who had a reputation as a northern condotierri captain; his words "Blazing and Burning are the jewels of warfare" would come to symbolize his career.


Much like the Bishop of Utrecht, Arnold van Egmont had noticed Dutch boots marching along the Rhine. This was especially worrying for Arnold, as his two regions were now separated from one another. Looking for ways to counter the Dutch aggression, he too joined the Lega Genovese, at the request of Bishop Gijsbrecht himself, but Arnold did not stop there. To prevent the balance of power tipping in favor of Holland, he formed a pact with Matthias von Habsburg, who was eager to accept for obvious reasons. In return for his armies and influence, he would have a strong ally with anti-Holland, and more importantly, anti-French sentiment, which he hoped could prevent the Northern Netherlands from falling into the hands of the Valois, and drift away from the Empire.


Friesland
Friesland was a peculiar region, even for the already peculiar Netherlands. As Holland was defined by its lack of feudalism in the usual sense, so was Friesland, only in the case of Friesland, there was no central authority at all. From the 13th century onwards, the Frisians had enjoyed the so called Fryske Frijheid, or Frisian freedom. Just like in Holland, multiple towns vied for influence over the region, yet none of them were able to do so successfully, with perhaps the exception of Groningen, who, in the power vacuum that remained after the Bishopric of Utrecht declined and Holland came under Burgundian rule, started to exert herself as the protector of the Frisian freedom.

The similarities with Holland go further than the lack of feudalism. Much like the Hoeken and Kabeljauwen in Holland, Friesland had been ravaged by conflict 30 years prior due to two factions competing for influence; the Schieringers and the Vetkopers. It is incredibly unclear what these two sides actually fought for, but the consensus is that the members of both factions only wished to further their own wealth and influence, instead of having a vision for Friesland. These conflicts did never really reside, but during the 1460’s Friesland went through a period of relative peace.

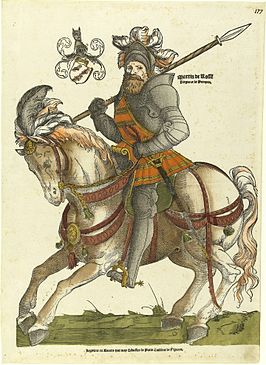
Over the course of the 15th century, the political landscape of Friesland became more and more characterised by the city of the Hanseatic city of Groningen. The city had bought Oosterwolde, along the mouth of the Eems, had taken direct control of the lands surrounding her, and exerted economic and military dominance over Friesland and the Ommelanden. In a brilliant turn of events, Groningen had subdued the twists between the Schieringers and Vetkopers by launching an offensive against the Bishopric of Munster, taking both the city and her surroundings by force. This sent a shockwave through Northern Germany, as no one, not even Groningen herself, had expected the war to be such a decisive victory for Friesland. The success of the campaign could be found in a man named Pier Gerlofs Donia, alias ‘Grutte Pier’, and his mercenary band ‘Arumer Zwarte Hoop’. Donia was said to be seven foot tall and wield a claymore the size of a full-grown man.

266px-Maarten_van_Rossum.jpg

Pier Gerolfs Donia, leader of the 'Arumer Zwarte Hoop'
The victory over Munster placed the now somewhat united Friesland as a major player in the Netherlands, and therefore a major contender of Holland her power. Due to her tensions with Holland, the Holy Roman Emperor decided to grant the city of Groningen the Podestaat over Friesland, which meant that the city would have official control over the Frisian armies. Once again, this was a measure to counter Hollander, and therefore French, influence over the region.
 
Last edited:
I love the detail.