Hello everyone,
In this thread I’ll be talking about the process of planning and production of my content creator pack; Skyscrapers.
As a little introduction; I’m known as Feindbold on the Steam Workshop, where I’m an active content creator since the release in 2015. While I created some buildings from the 50s to 70s, the overwhelming majority of my releases are from the timeframe of 1870 to 1920.
My focus in particular is residential buildings from the US, Germany and France. So it might come as a surprise to many, who are familiar with my work, that I made a CCP that is so centered around modern architecture. I specifically choose to make something entirely different from what I’m known for, as I like the challenge of learning something new and adopting my workflow to new parameters.
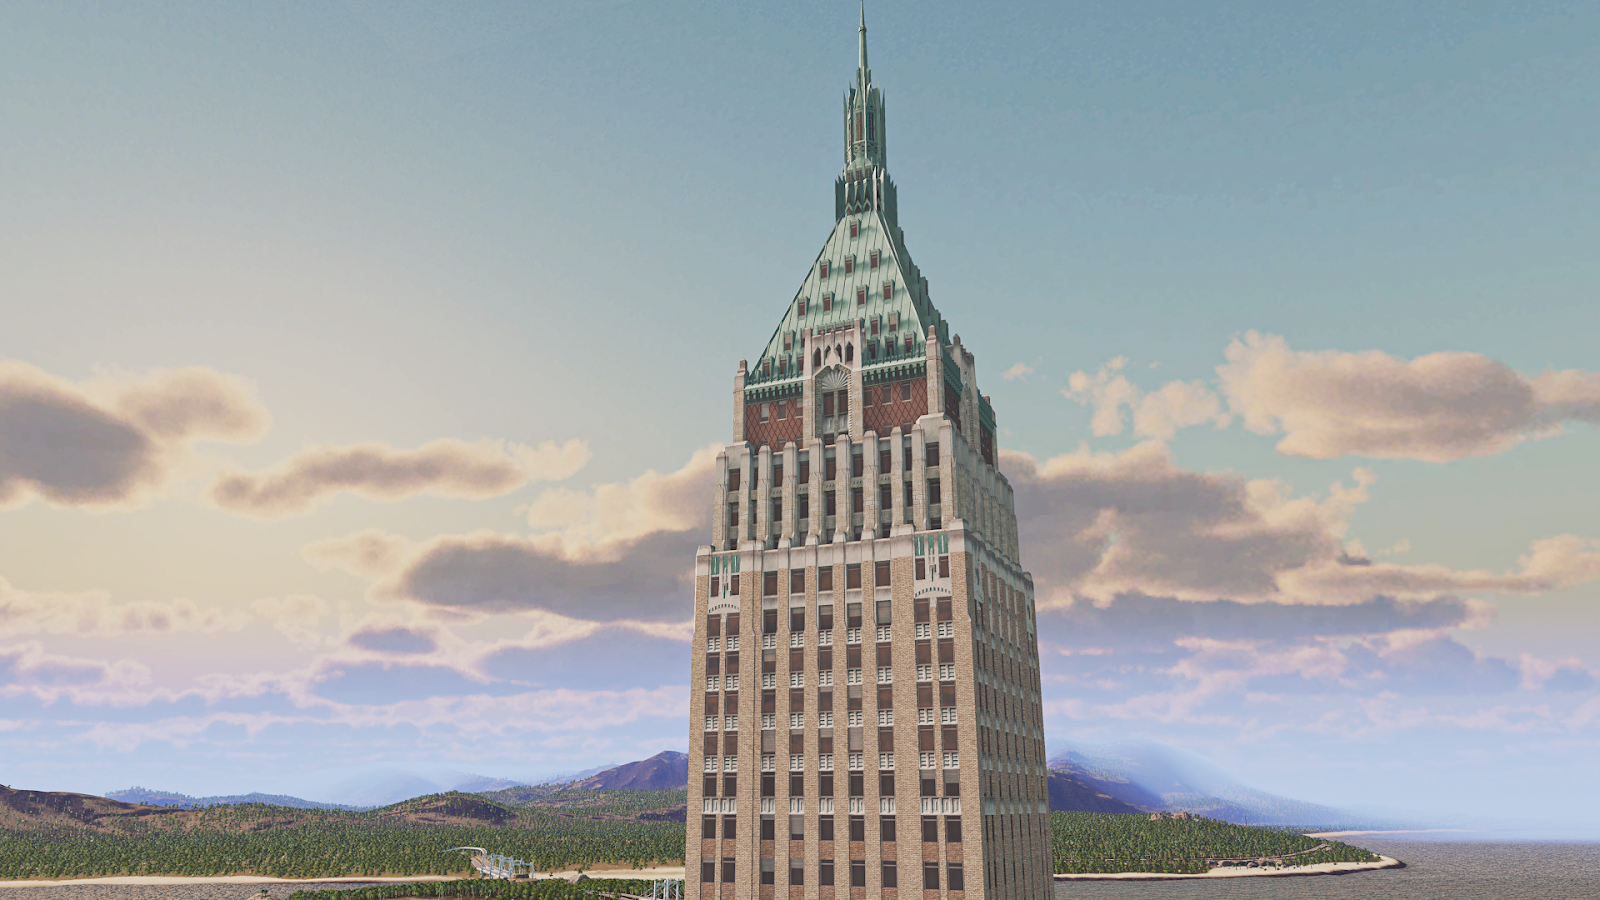
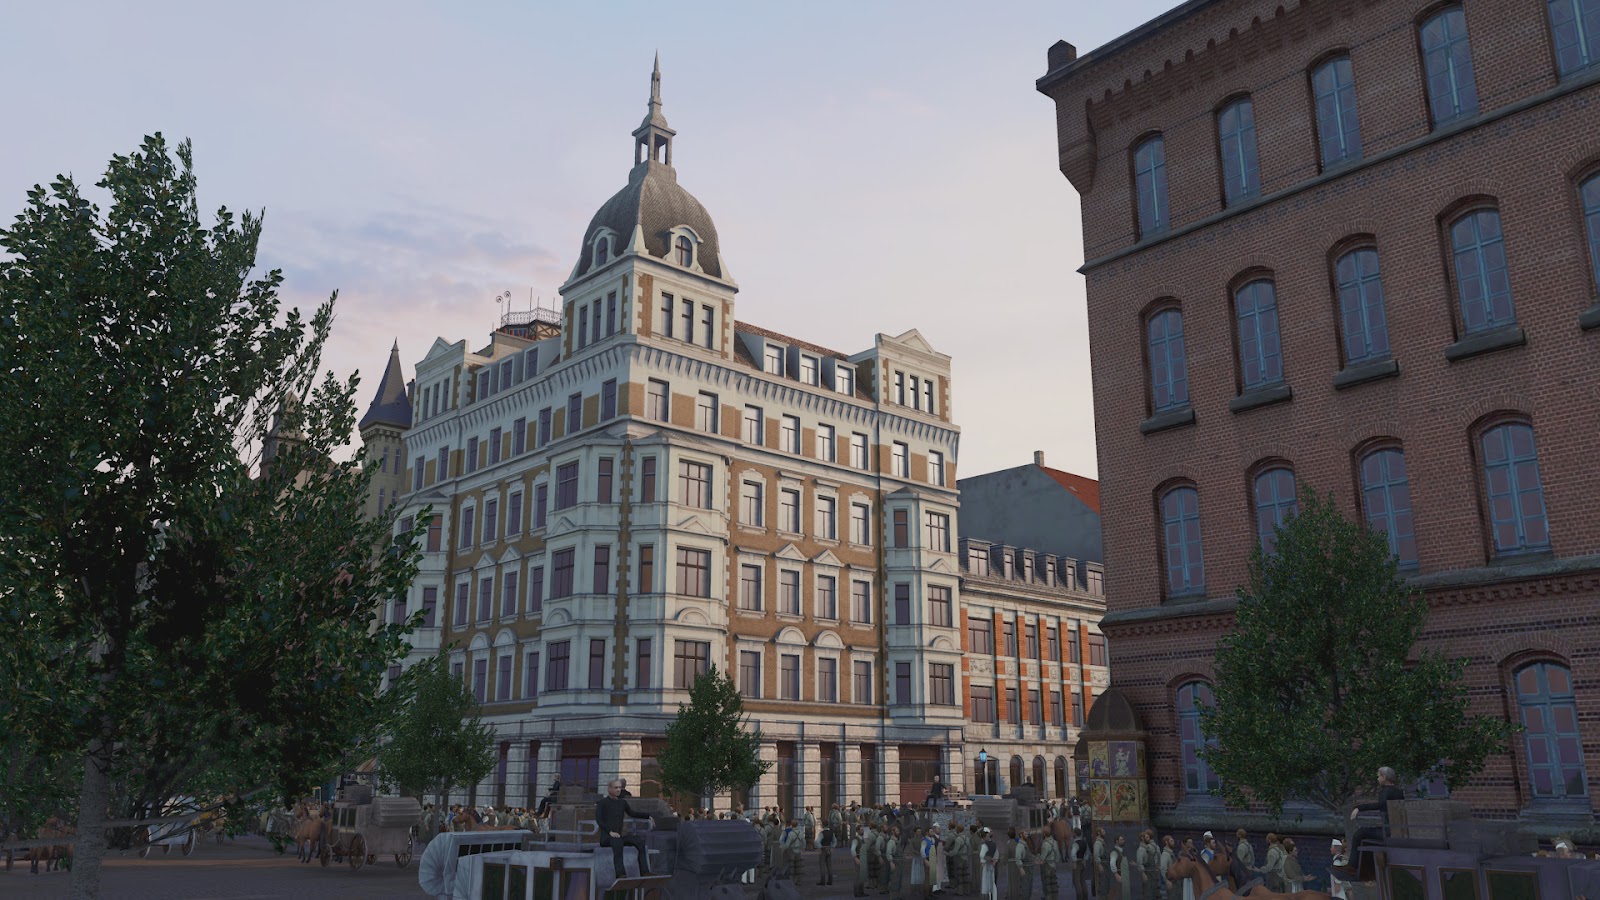
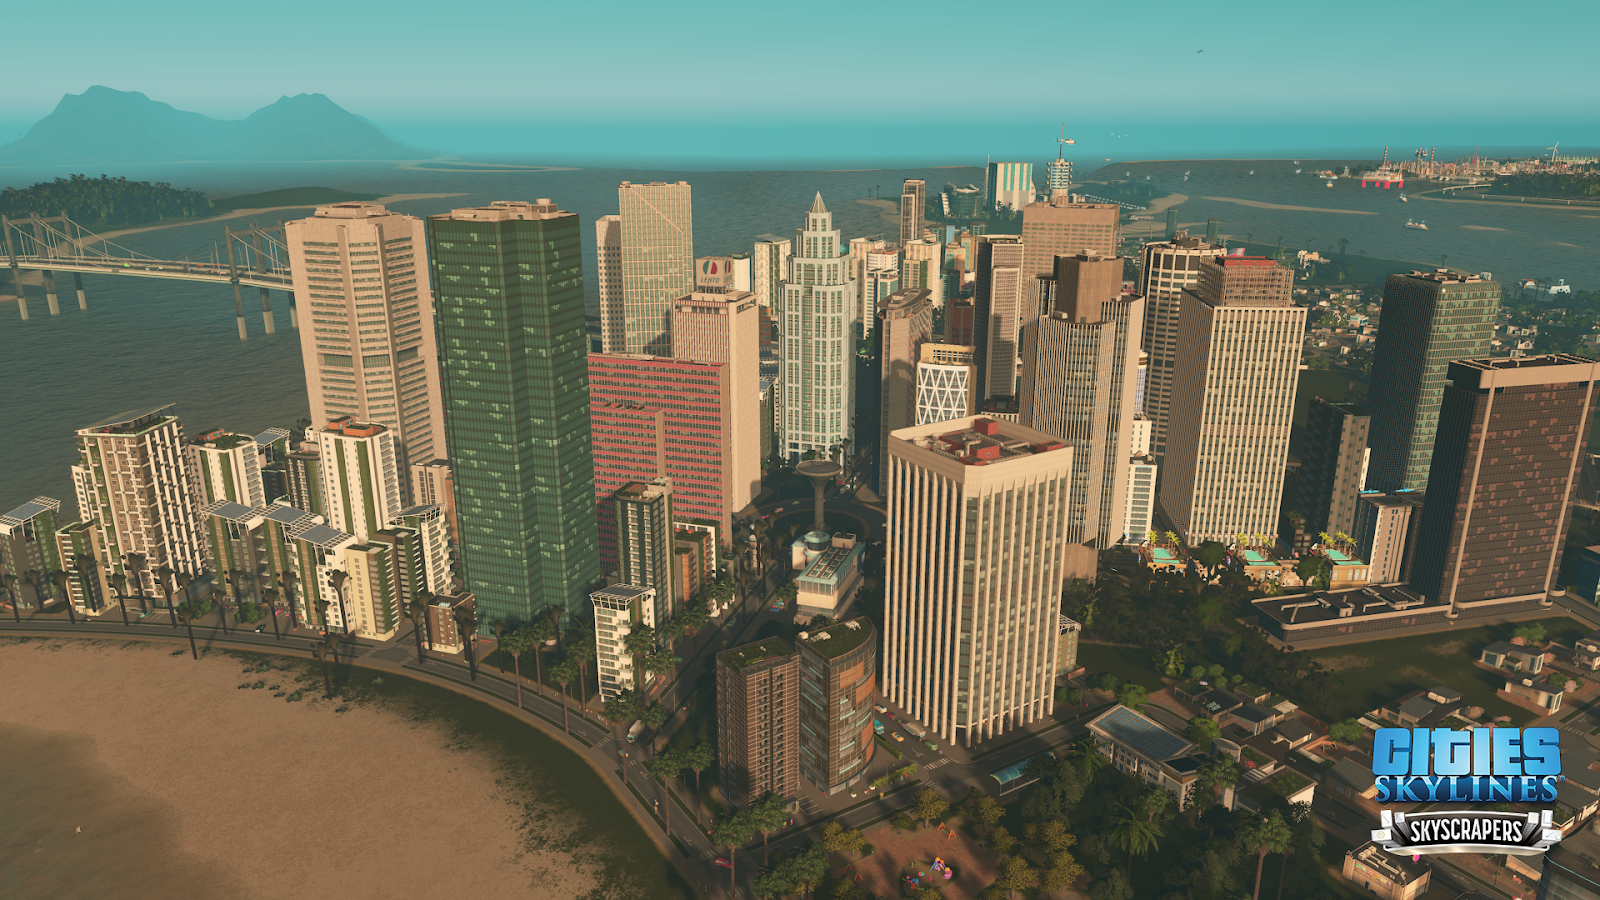
Here are two examples of my work on the Steam Workshop, the first one shows the 40 Wall street Building from New York and the 2nd screenshot shows a german corner building.
Content Pack Roster:
The pack contains 44 ploppable skyscrapers, high-rise buildings and 47 rooftop props.
Making of: Skyscrapers
Origins
The idea for creating a pack, that is centered around skyscrapers, was essentially the result of me taking a hiatus of creating modded content for Cities Skylines in 2021. I was very busy with my university courses during that time and only played a bit of entirely vanilla Cities Skylines. During this phase, I realized that there are actually very few vanilla options, to create an actual skyline and thus the idea was born, to make this pack.
Planning: Technical and Artistic Preparation
In the very early planning stage of this project, I tried to set some general rules regarding what kind of content should be part of this pack. One of these ideas that got eventually scrapped, was the simultaneous implementation of ploppable and growable assets. There are multiple good reasons why growable highrises and skyscrapers were eventually ruled out:
- With the exception of a few examples in New York and Hong Kong, the height of buildings is usually tied to the general dimensions of the plot. Really tall buildings quickly reach dimensions that overtake the biggest possible growable plot size of 32x32 Meters, or 4 by 4 tiles in Cities Skylines.
- Limiting myself to mostly buildings with growable dimensions would essentially mean that I have to limit myself to buildings around 80-120 meters. These buildings would not stand out much against the already existing buildings in the game, which would undermine the entire idea of this CCP.
- Both the base game and the Green Citys DLC, already offer these kinds of growable highrise buildings.
- Another reason for ruling out growables were limitations of time and content. There is a maximum number of large buildings that can be part of a CCP and growable sets need a large amount of buildings to work correctly. Making growables would mean that I had to compromise on the amount of ploppable buildings.
- Defining a range of heights was very important. I needed buildings that are significantly taller than anything in the game, but at the same time not too tall to entirely dwarf the surrounding neighborhoods. Initially I set a range of 150 to 280 meters.
- Selecting popular skyscrapers as landmarks was another important topic. While it seemed interesting to recreate well known landmarks at first, people often directly connect the landmarks with the cities they are from. When I think about the Empire State Building, I immediately think about New York and the US and I would be more reluctant to place this building while recreating a city from Europe or Asia. Based on these observations, I decided to only select a few landmarks and mostly select less known but interesting buildings.
- The history of the skyscraper spans over almost 140 years so far. I ruled out the first 70 years of this history, as the decorative styles of these early skyscrapers would stand out too much from the general looks of buildings in Cities Skylines. In accordance with this decision, I limited potential buildings and styles to the 1950s-2020s.
- Another rule I set for myself was the inclusion of buildings from as many countries and continents as possible. Initially PDX agreed for a pack of 18 buildings, therefore I set a rule that at least two buildings should be selected from each continent.
- At last, I also set myself a rule to offer as many interesting shapes and styles as possible.
At first I researched some more well-known buildings for each continent, but in the end I spent most of the time flying around in Google maps 3D layer, always on the hunt for interesting looking buildings that fit the rules that I have set for this pack.
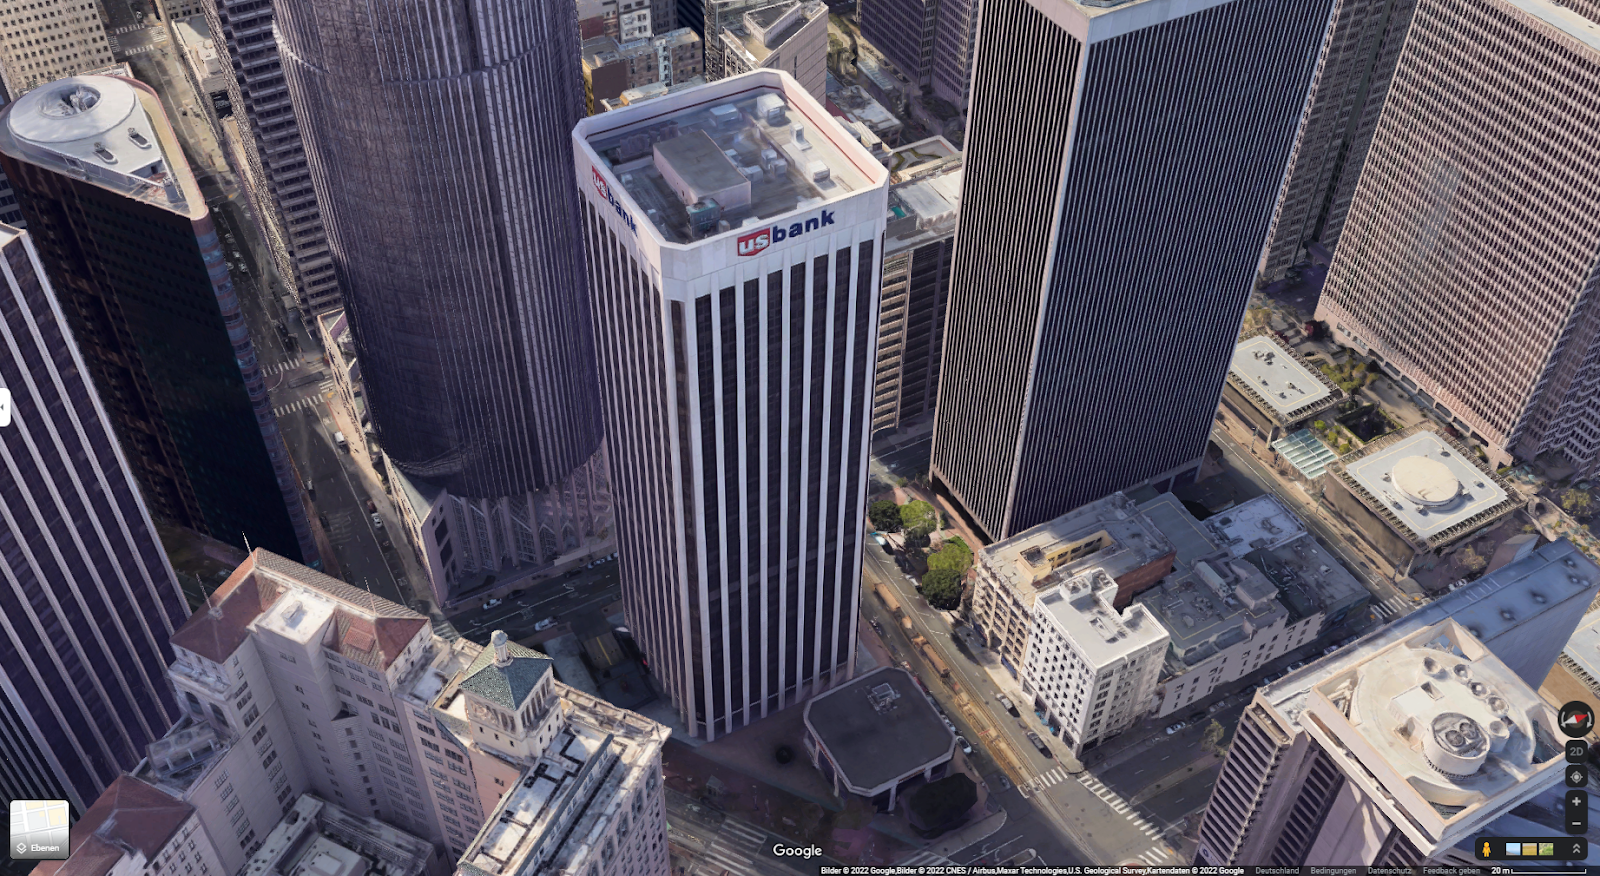
Lesser known buildings are often hard to find, unless you already know what you are searching for. Using Google Maps to find interesting looking buildings that fit my rules and then researching these buildings proved to be a lot more efficient.
To keep track of my progress, I created a sheet very early in the development progress. Initially I only listed potential candidates for each continent, noted some general information, like the year it was built and the country it was built in and added a few photos from multiple angles.
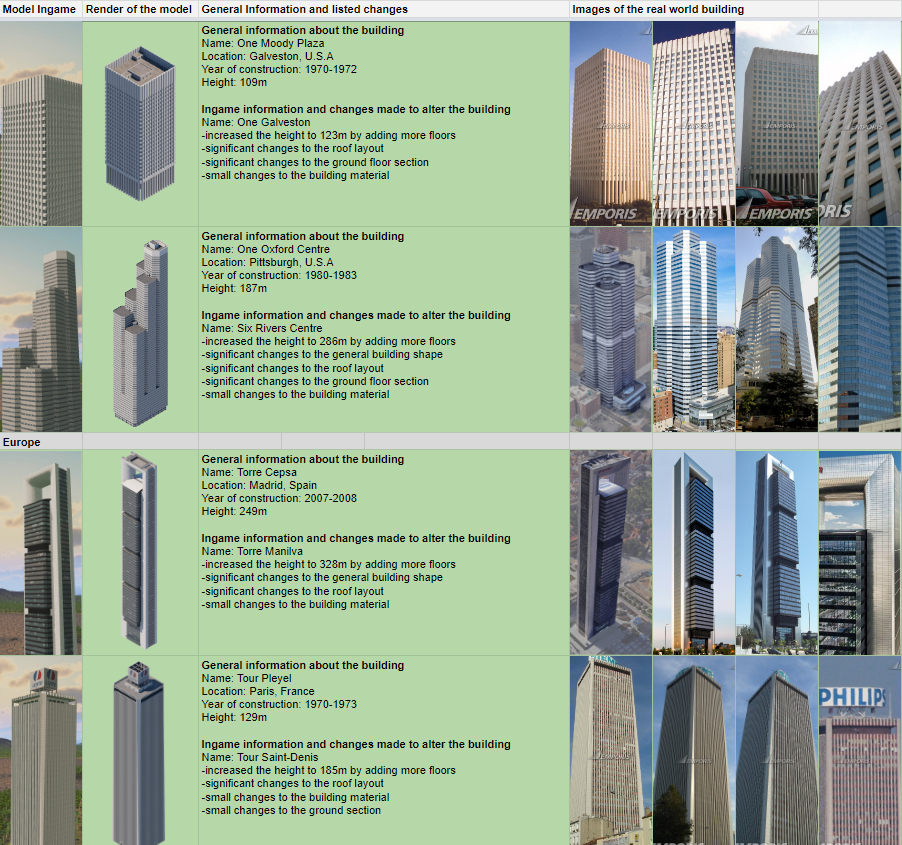
Throughout each development phase I updated the sheet, to keep track of my progress. As visible in this finished state, I added renders of textured models, ingame screenshots of imported buildings and additional information, like the changes done to each model.
Production
As I had 4 months or 16 weeks for the completion of the entire pack. I divided my available time into six stages of asset production:
- 1 week for research and selection of buildings
- 3 weeks for the modeling of all buildings
- 4 weeks for the creation of all textures and UV mapping of all buildings
- 2 weeks for illumination maps and randomized blinds for windows
- 1 week for modeling and UV mapping of the prop set
- 1 week for LOD creation and LOD baking
3D Models
3D modeling started based on the collected reference material in the sheet as well as additional collected photos of each building. Using Google Street View can be another very useful tool, as you can “walk” around the building and get a better sense for the proportions. Another great service for getting references and some additional information is Google Earth, there is a function in the measurement tab, where you can measure 3D Geometry. Using this tool meant that I could simply take measurements for ceiling heights or general proportions of buildings.
All 3D models were made with empty white materials at first, but I relied heavily on the use of instanced components. A building is made of multiple different components, each component is linked to each copy of that component. Later on in the texturing stage, only one copy of each component needs to be textured, all the other copies will be textured automatically, as they are instanced.
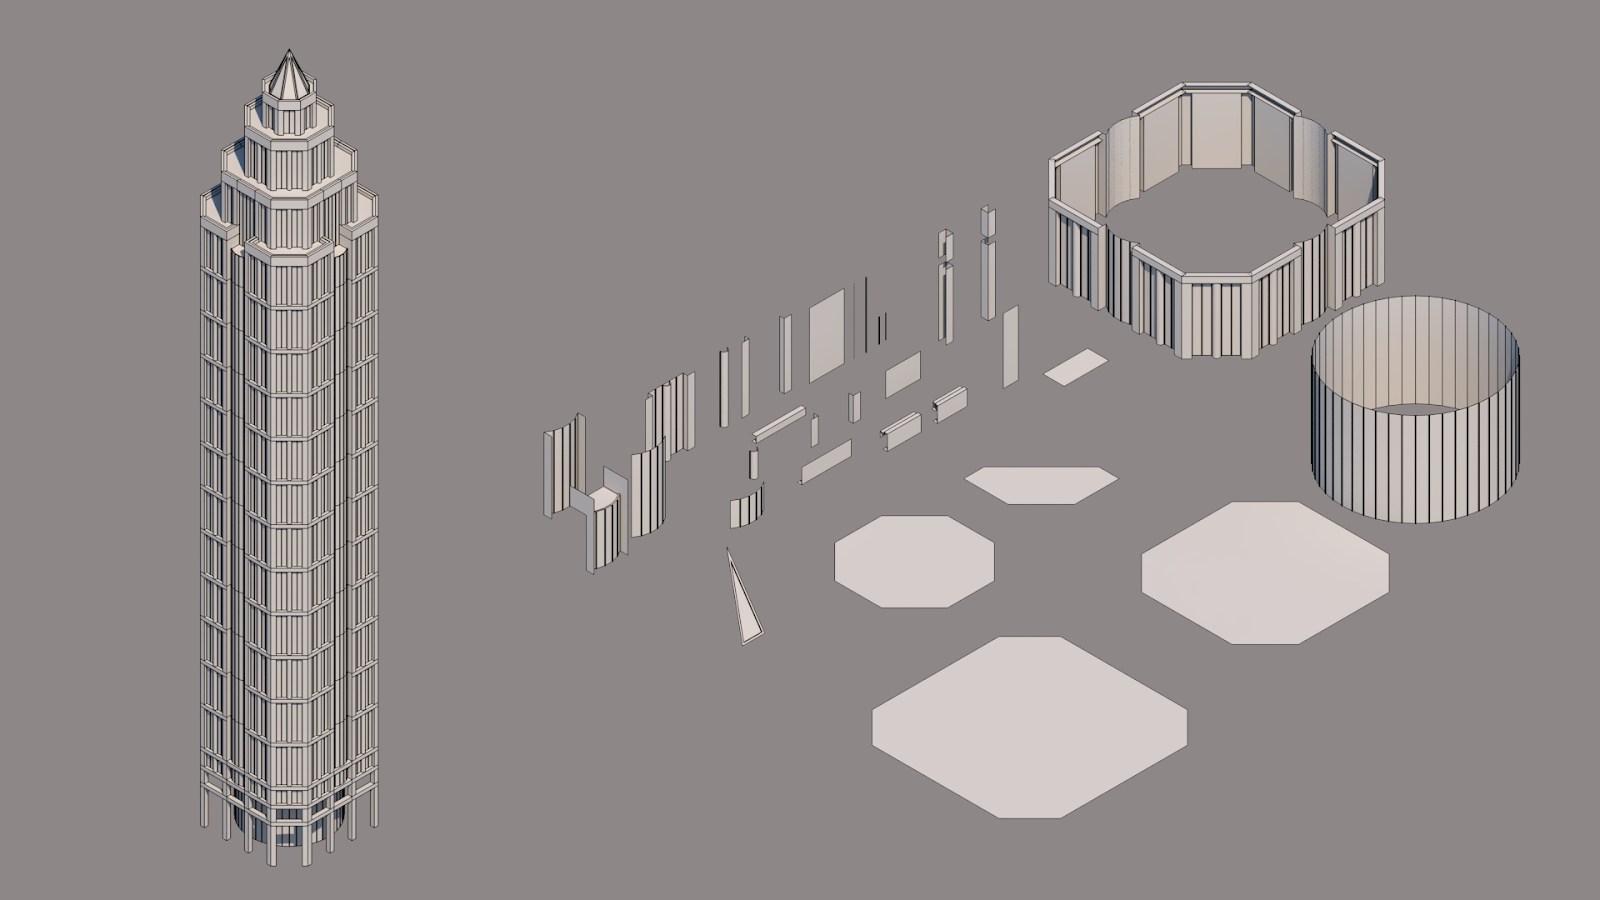
Here is an example render of a building with empty grey material on the left and all the different components that this building is made of on the right.
Another important aspect during the 3D modeling was to alter the design and appearance of each building enough, not make them direct copies of original buildings.
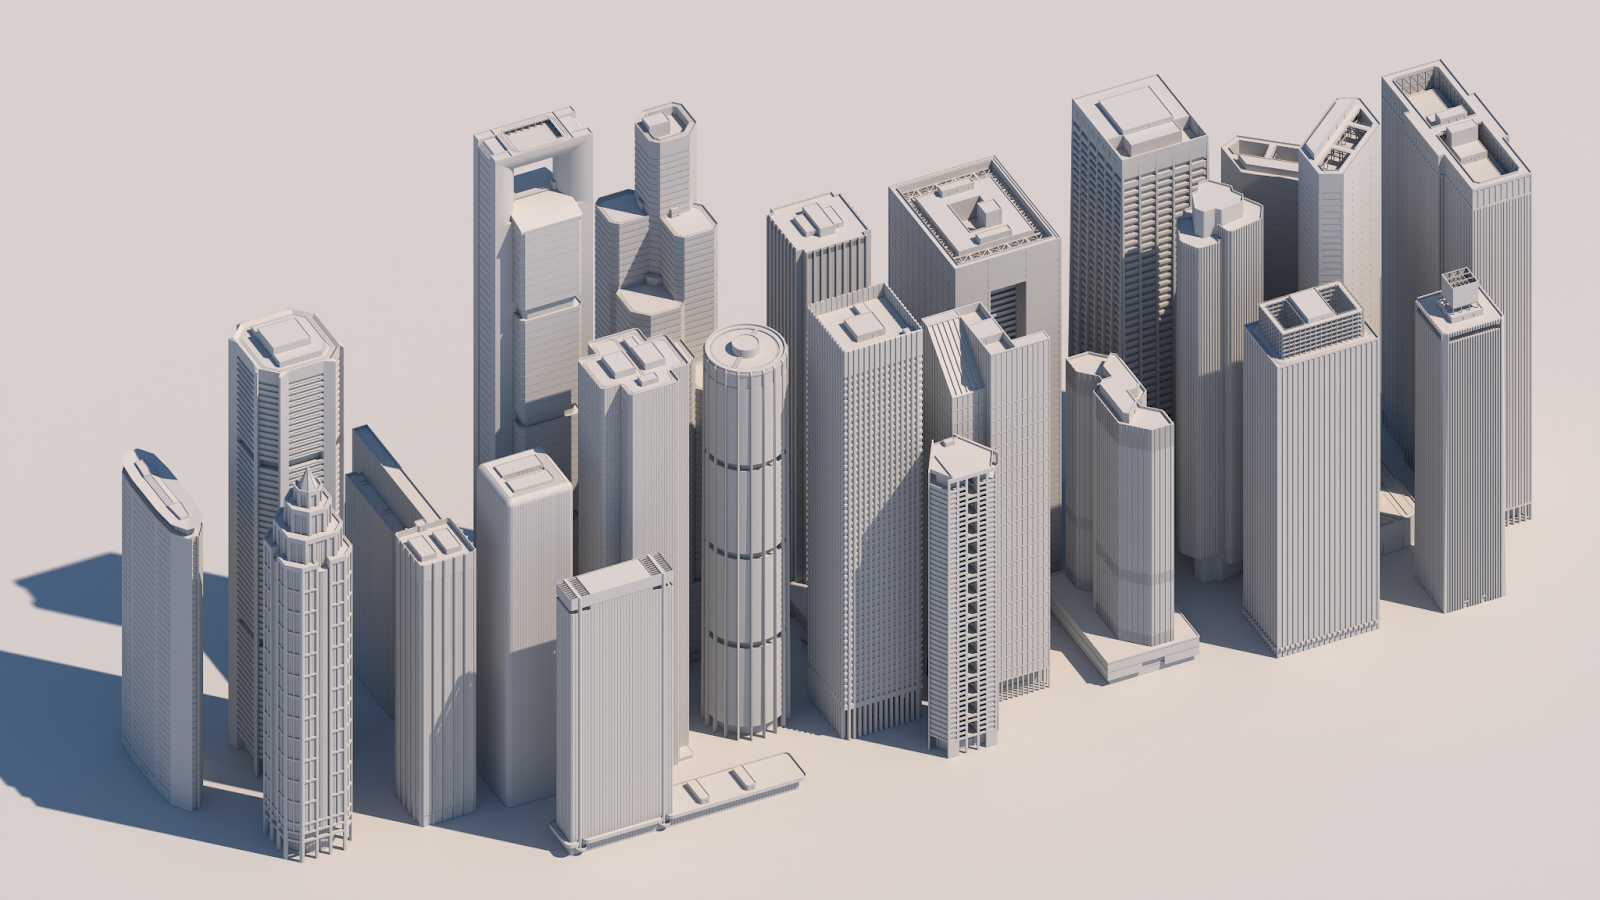
Apart from files for each model, I also used an assembly file, where I pasted a copy of each model. This was very helpful to get a sense of how these buildings look as a set:
Textures
Based on the set of rules that I set for the selection of my buildings, I did not expect or plan to rely on texture sharing for any of my buildings. After all, one of the goals of the pack was to create very different looking buildings. Using texture sharing would reduce the visual uniqueness of each building. However, creating entirely different textures for so many buildings is an incredibly time-consuming process. That’s why I used material sharing.
Before the actual creation of textures started, I made a selection of procedural materials that can be used with as many buildings as possible. These procedural textures can be changed and it is possible to save, load and edit changes made to these procedural textures.
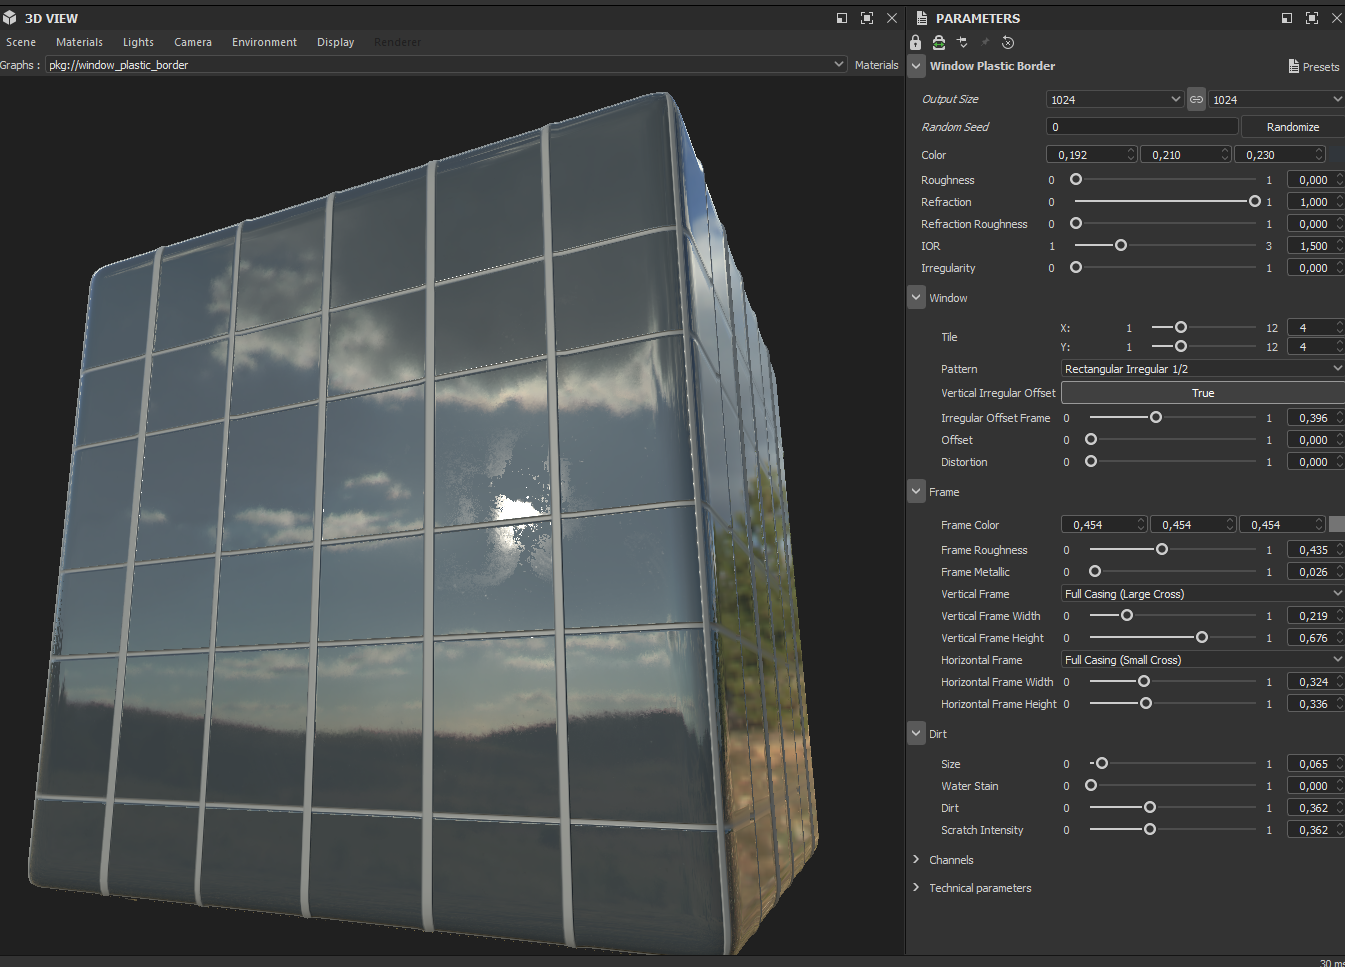
As you can see on the right side, many things like the amount of frames, the shape of frames, the amount of windows or the color of any of the components can be easily changed with this procedural material.
Using procedural materials is an incredible time efficient way of creating textures. Instead of having to create more than 20 different window frame textures, or having to use the same window frame texture for all my buildings, I was able to simply change the preset and generate a texture that fits each building individually.
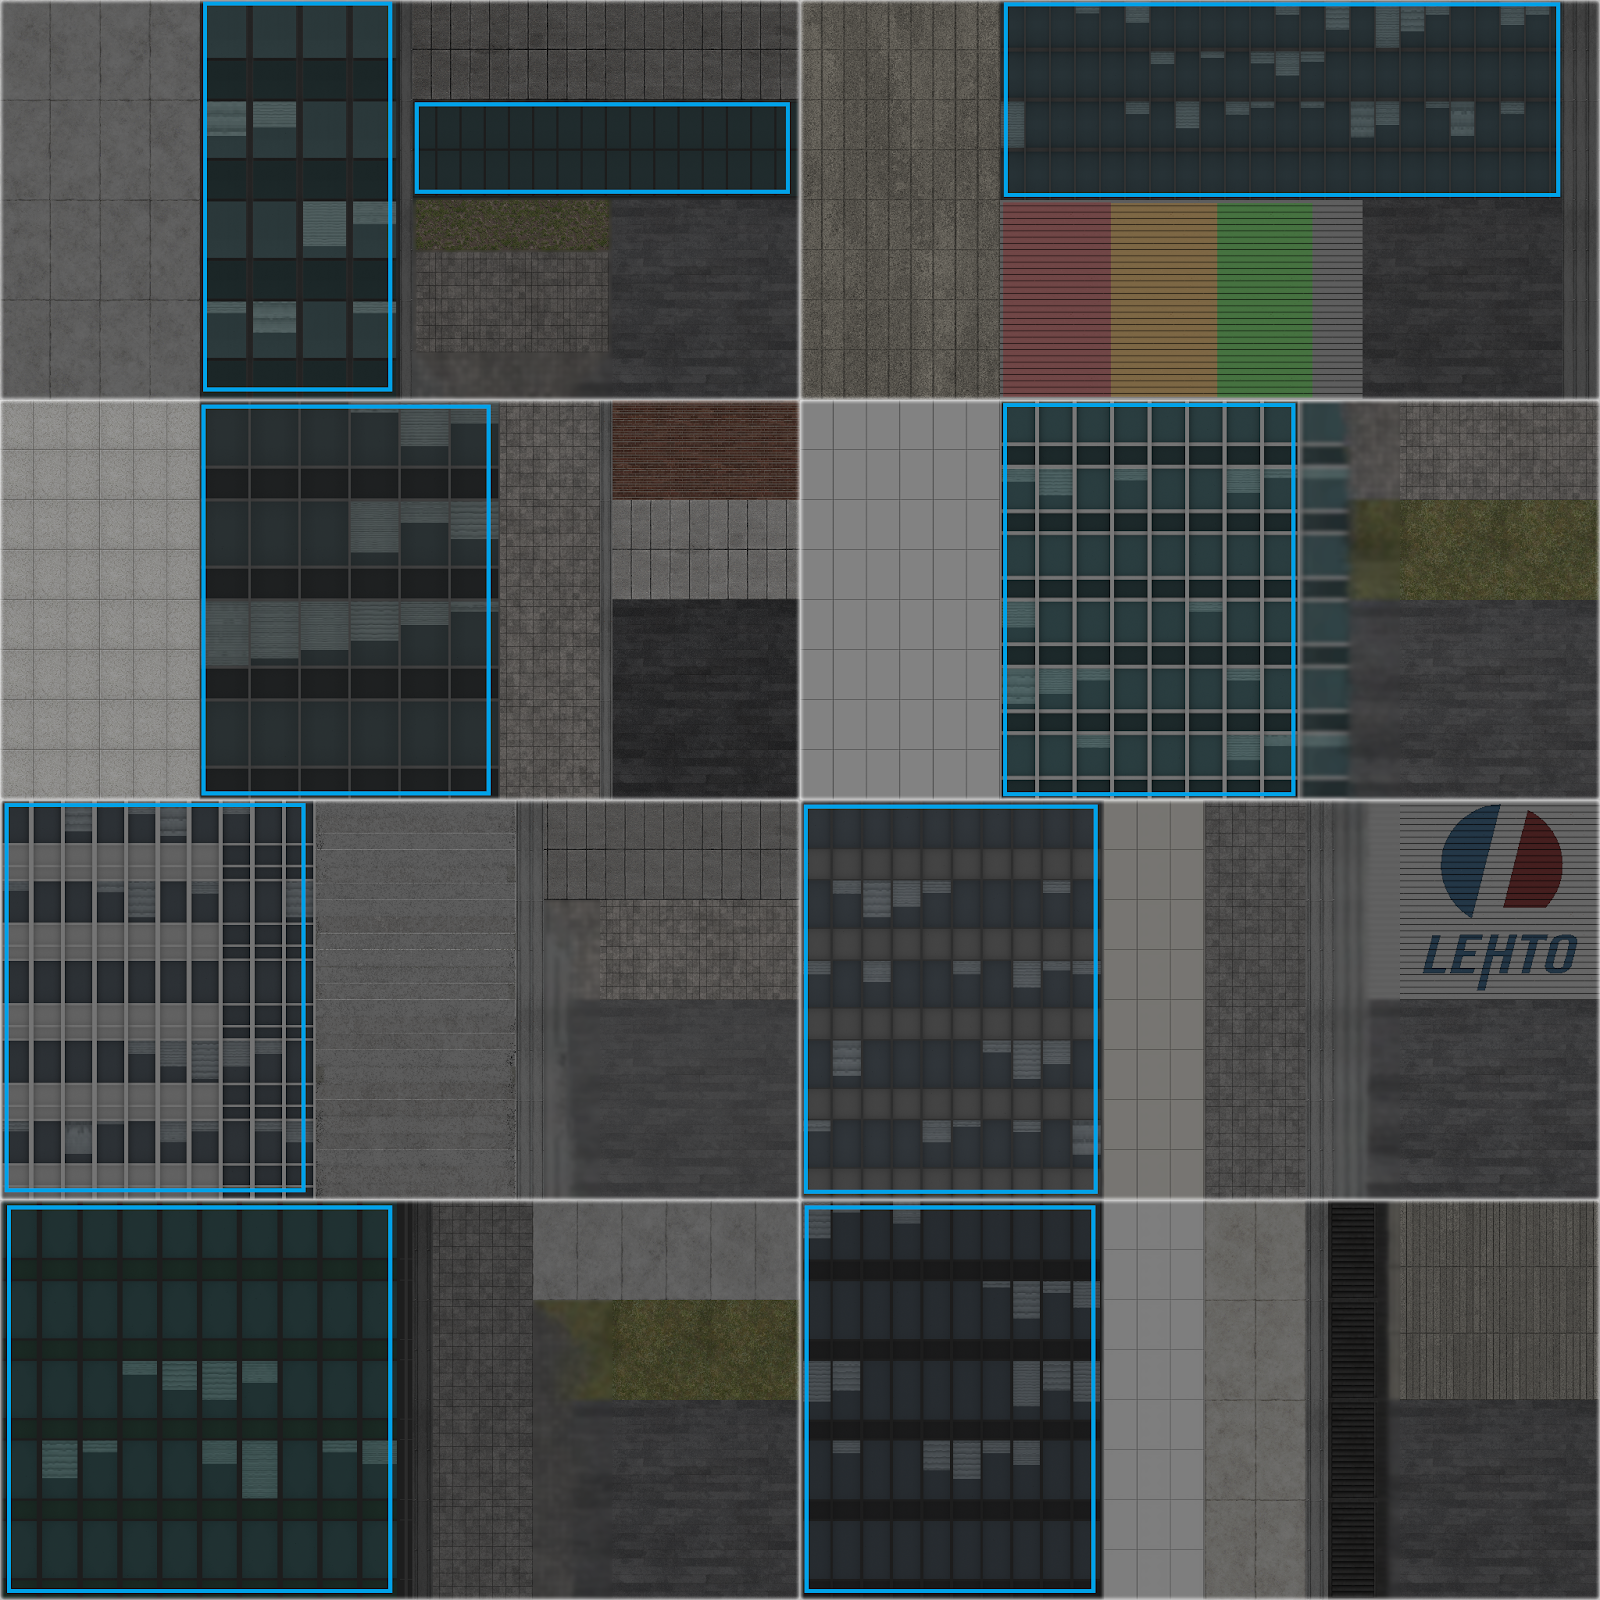
As you can see in this selection of some of my textures, each relies on the same procedural material, yet they look very different from each other.
Prop Set
Most of the buildings in this pack have rather big roofs, so to make sure that these roofs are interesting to look at, I decided to make a roof prop pack. I planned out a roof crane, 4 differently sized HVAC Units and a total of 42 modular air duct props. The air ducts split into two subsets, a larger air duct and a thinner one. Each of the subsets come with curves, straight pieces and elevated variants, to give me a maximum of flexibility while decorating the roofs.
Unlike with the buildings, relying on texture sharing for the props made a lot of sense. All of the air ducts are sharing the same texture. As the geometry of these air ducts is much simpler, I was also able to use shared LOD textures for them as well.
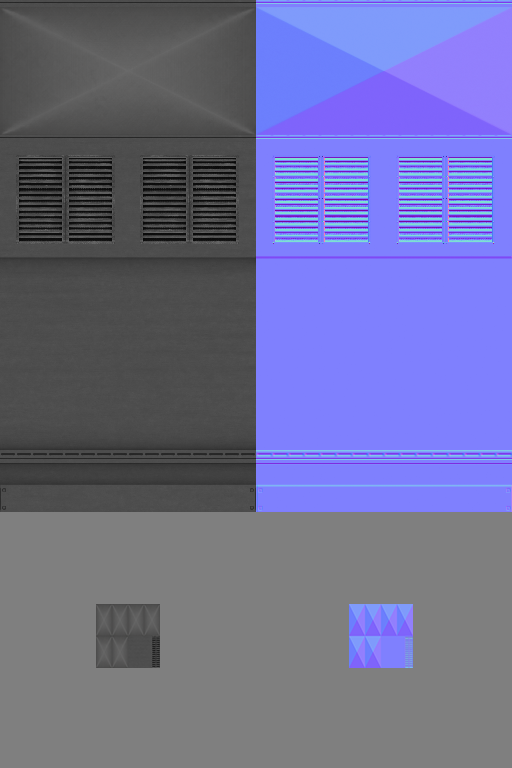
On the upper part, you can see the shared diffuse and normal map for all air ducts, below is the shared diffuse and normal LOD map.
High-rise buildings
Since I managed to finish my production goals in time, I was left with the reserved additional 4 weeks. This meant I could create some additional content. While I was brainstorming ideas with REV0, I talked about the idea of cutting multiple floors from one or two of my buildings, to create a smaller high-rise building. REV0 essentially suggested to me “Do that with all of your buildings, people would love more smaller towers”. That was indeed a really good idea, so I contacted PDX to ask them if it is possible to add more buildings, which they thankfully agreed to.
Since I modeled the buildings in segments of 3-5 floors, cutting away multiple of these segments to create shorter variants took only a few minutes for each building. Another advantage of this method is that these high-rise variants can rely on texture sharing, as they are simply shorter versions of the already implemented skyscrapers.

Here you can see a simplified process of how these smaller variants were made
Here you can see a skyline that was built entirely with high-rise variants.
Import
During the import process, all buildings were tagged with the keyword "Skyscraper" for ease of convenience for users, via their description section. All air duct props were tagged “Airduct” and all AC Units were tagged “ACUnit”. Custom thumbnails were made for all buildings:

Some of the thumbnails/tooltips, used on assets.
During the production, a total of 2052 raw files have been created (this includes textures, main and LOD models, thumbnails). The final size of the delivered asset pack is about 620MB, however since texture share is partly used on high-rise variants and props, the final load on RAM use is expected to be about half of the pack size.
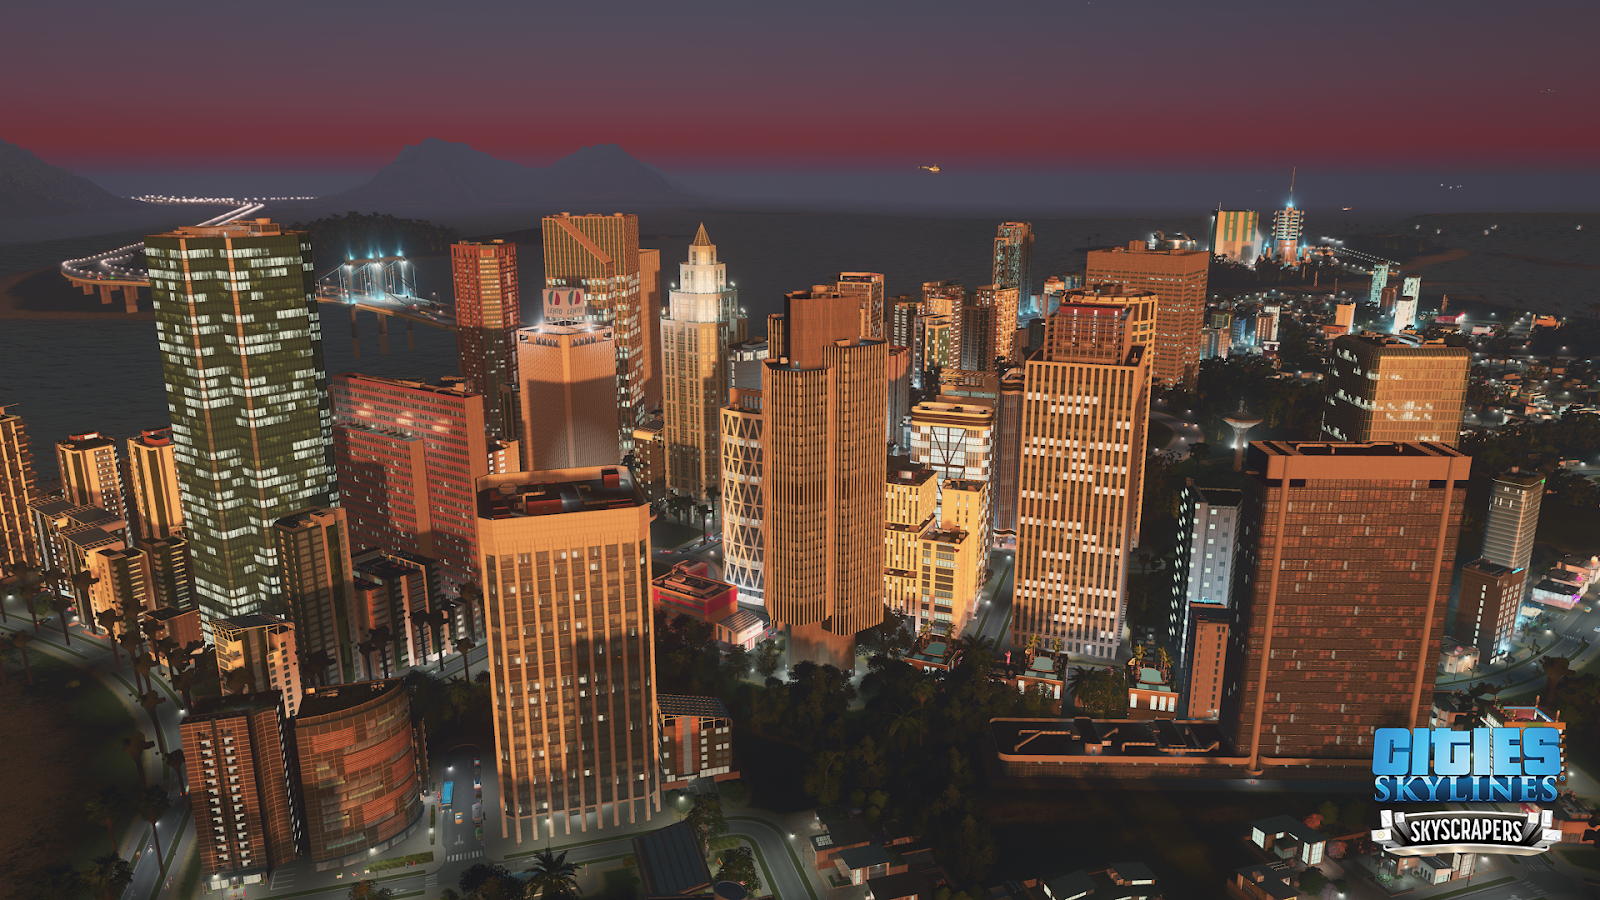
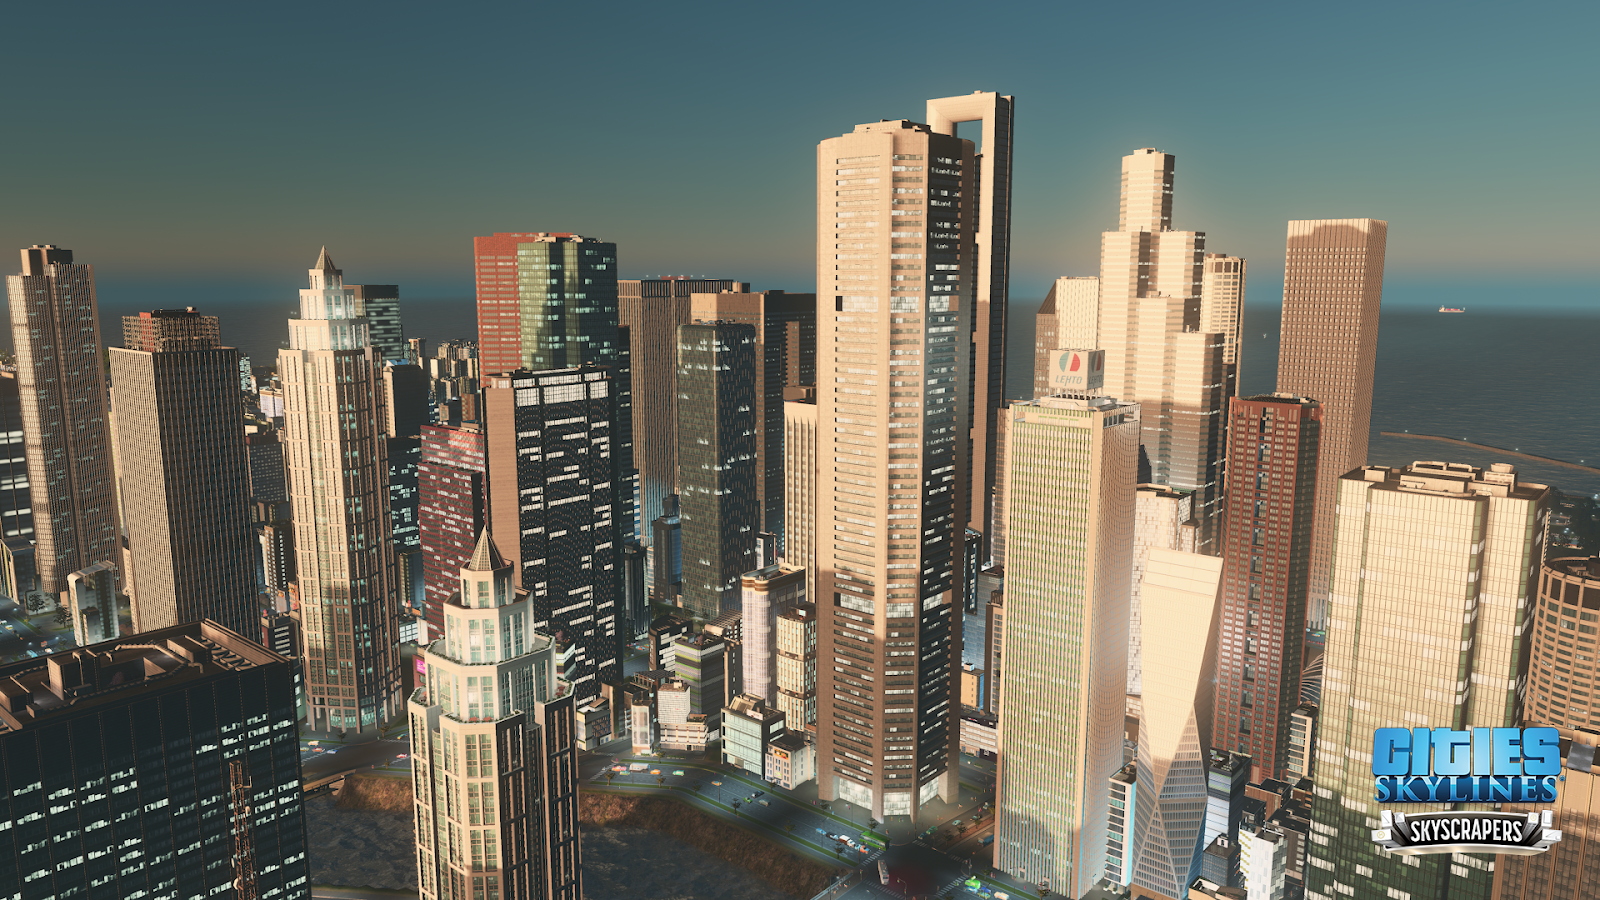
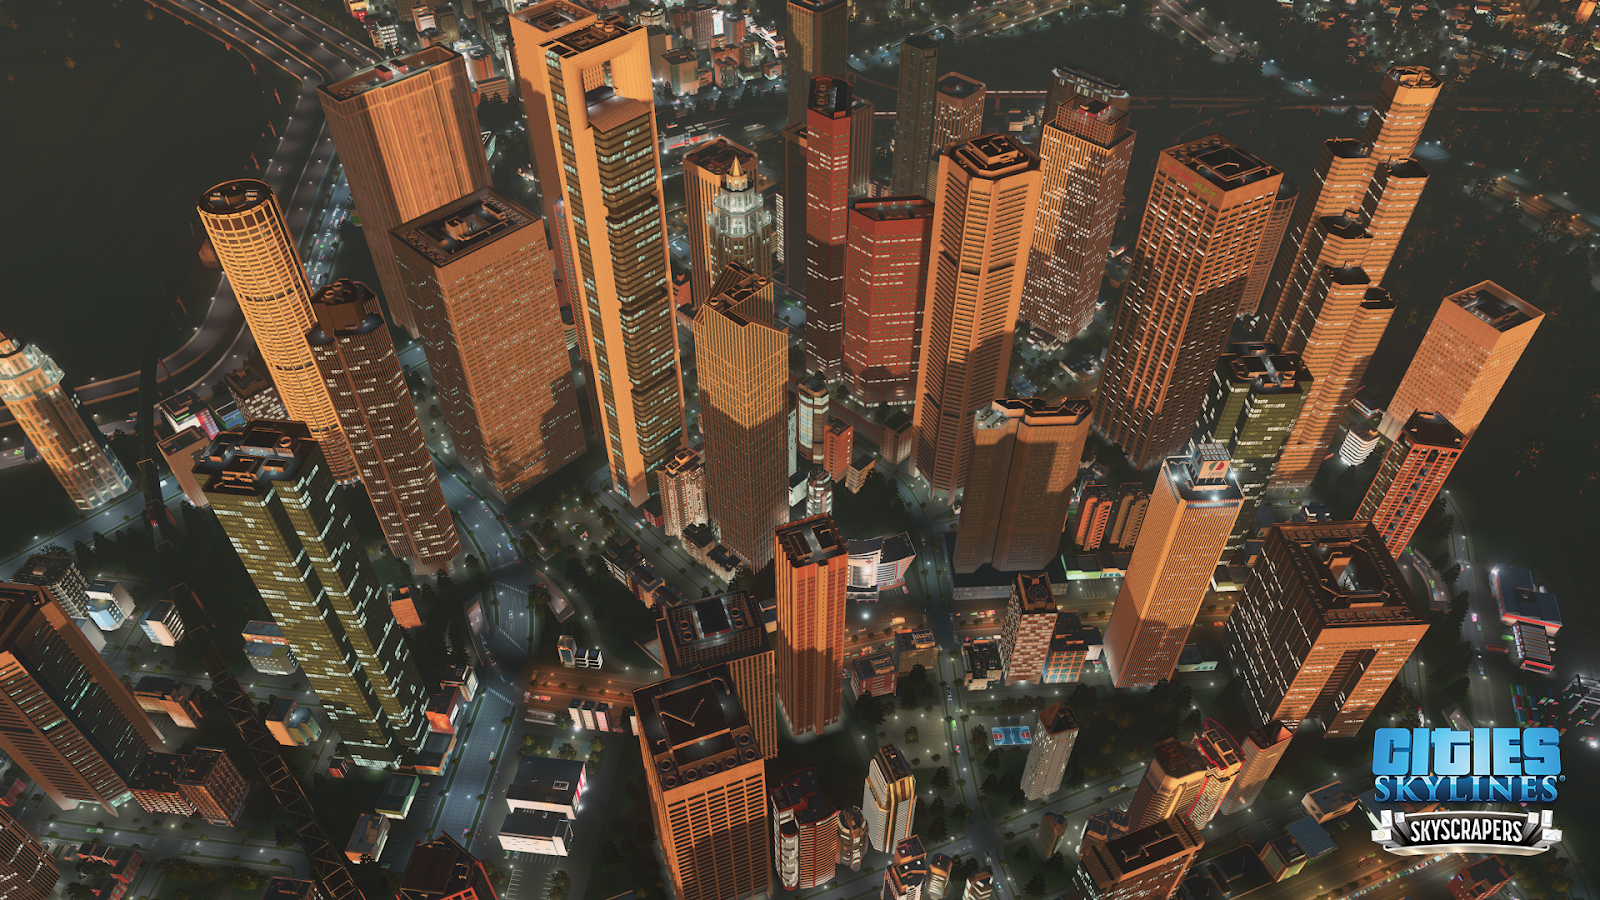
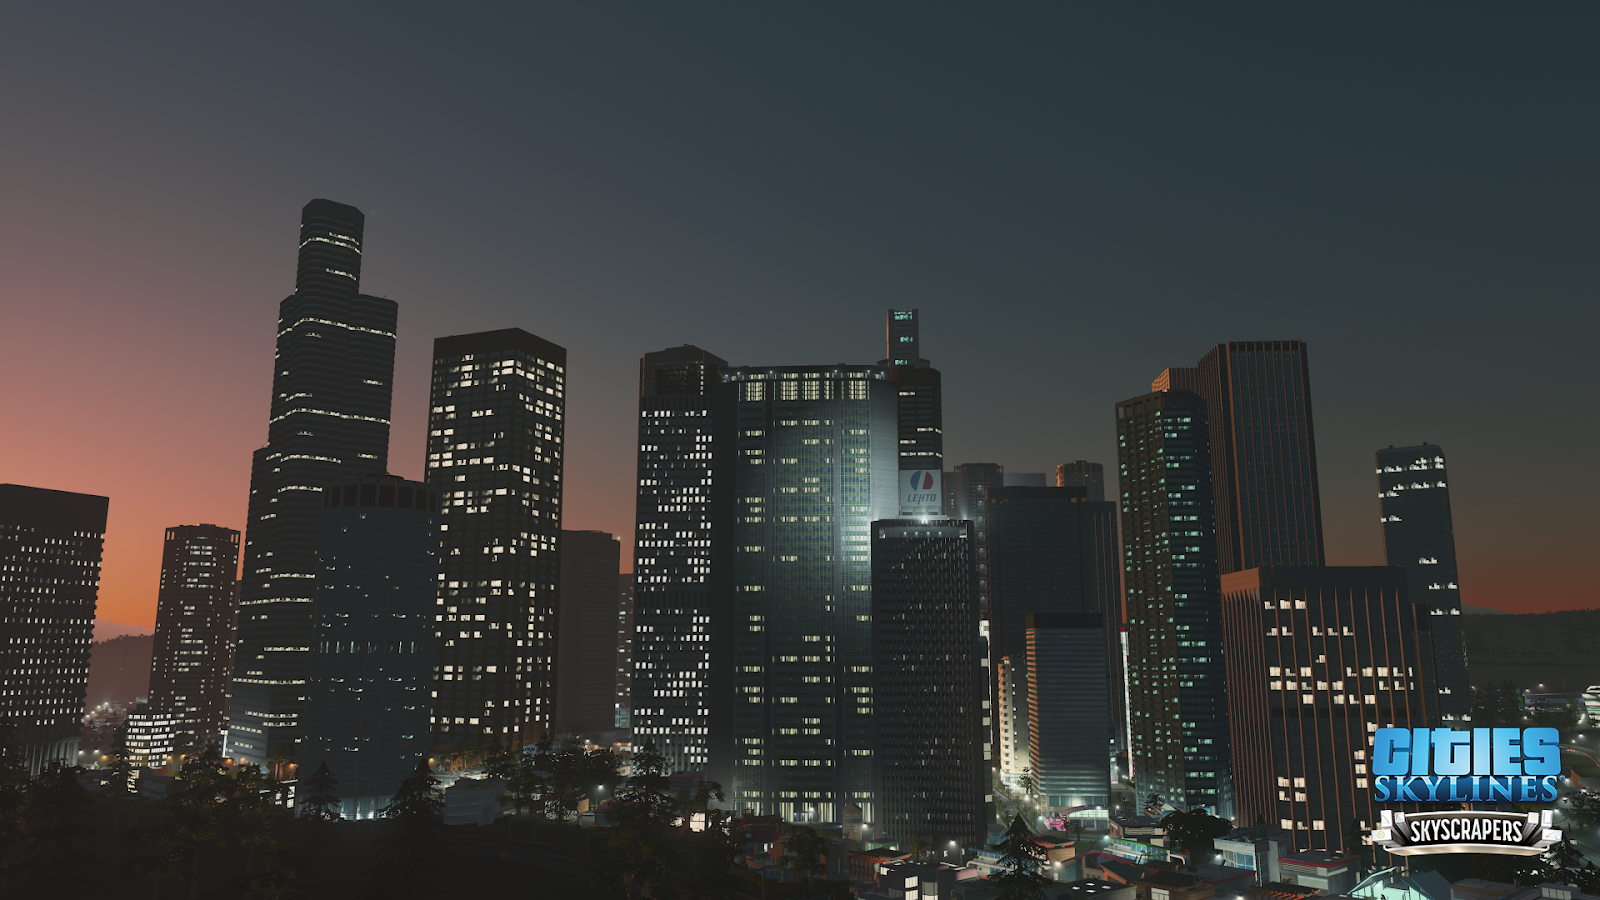
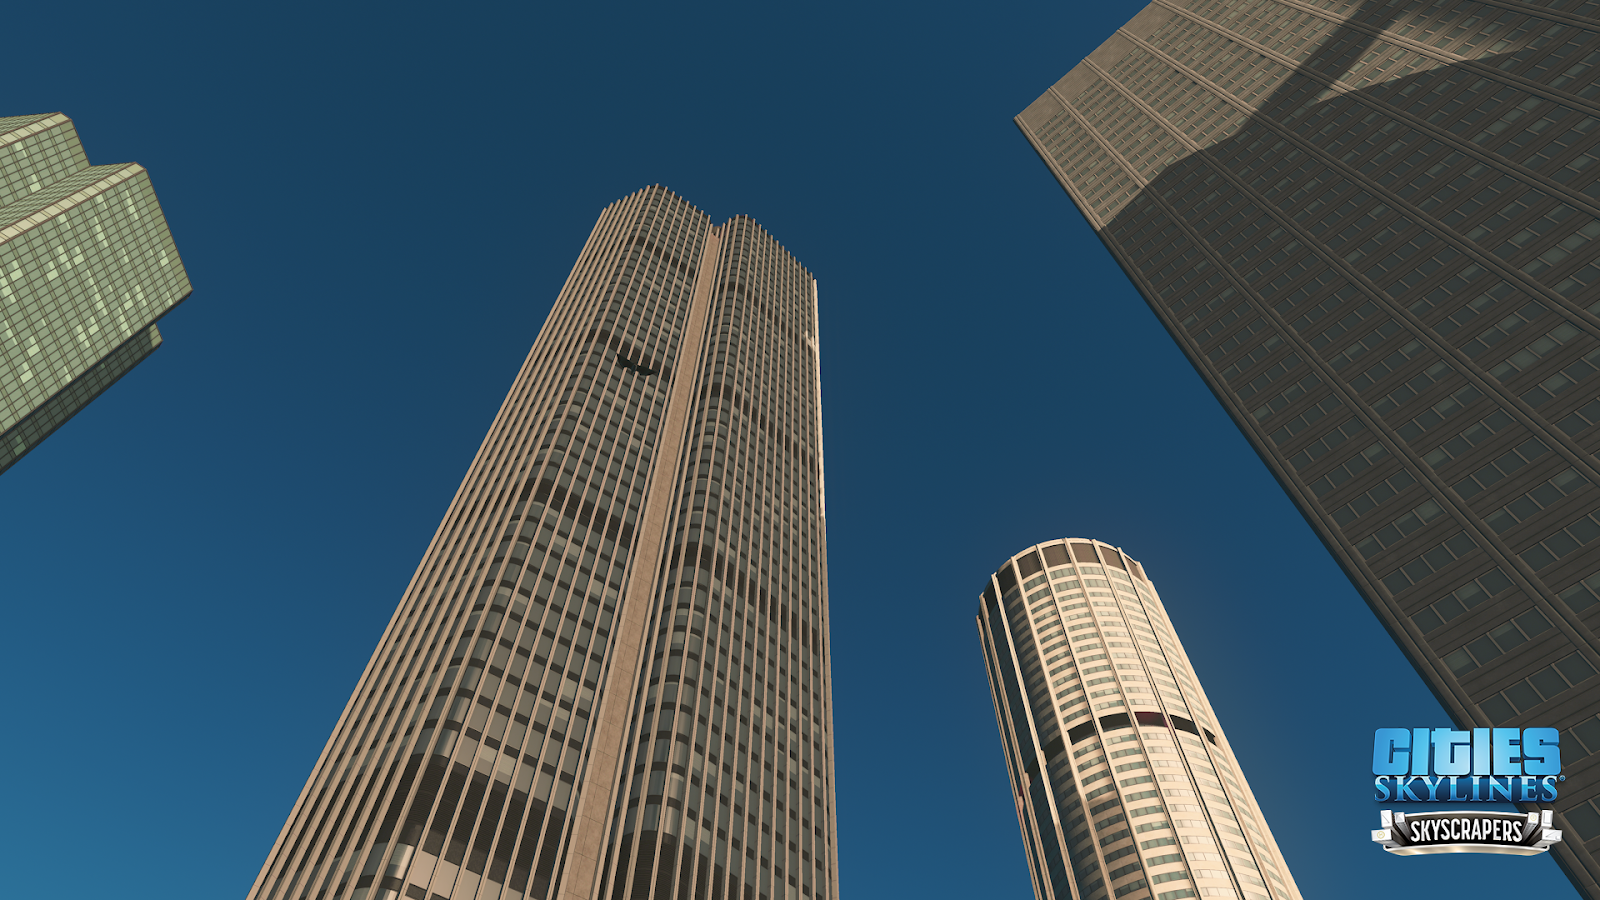
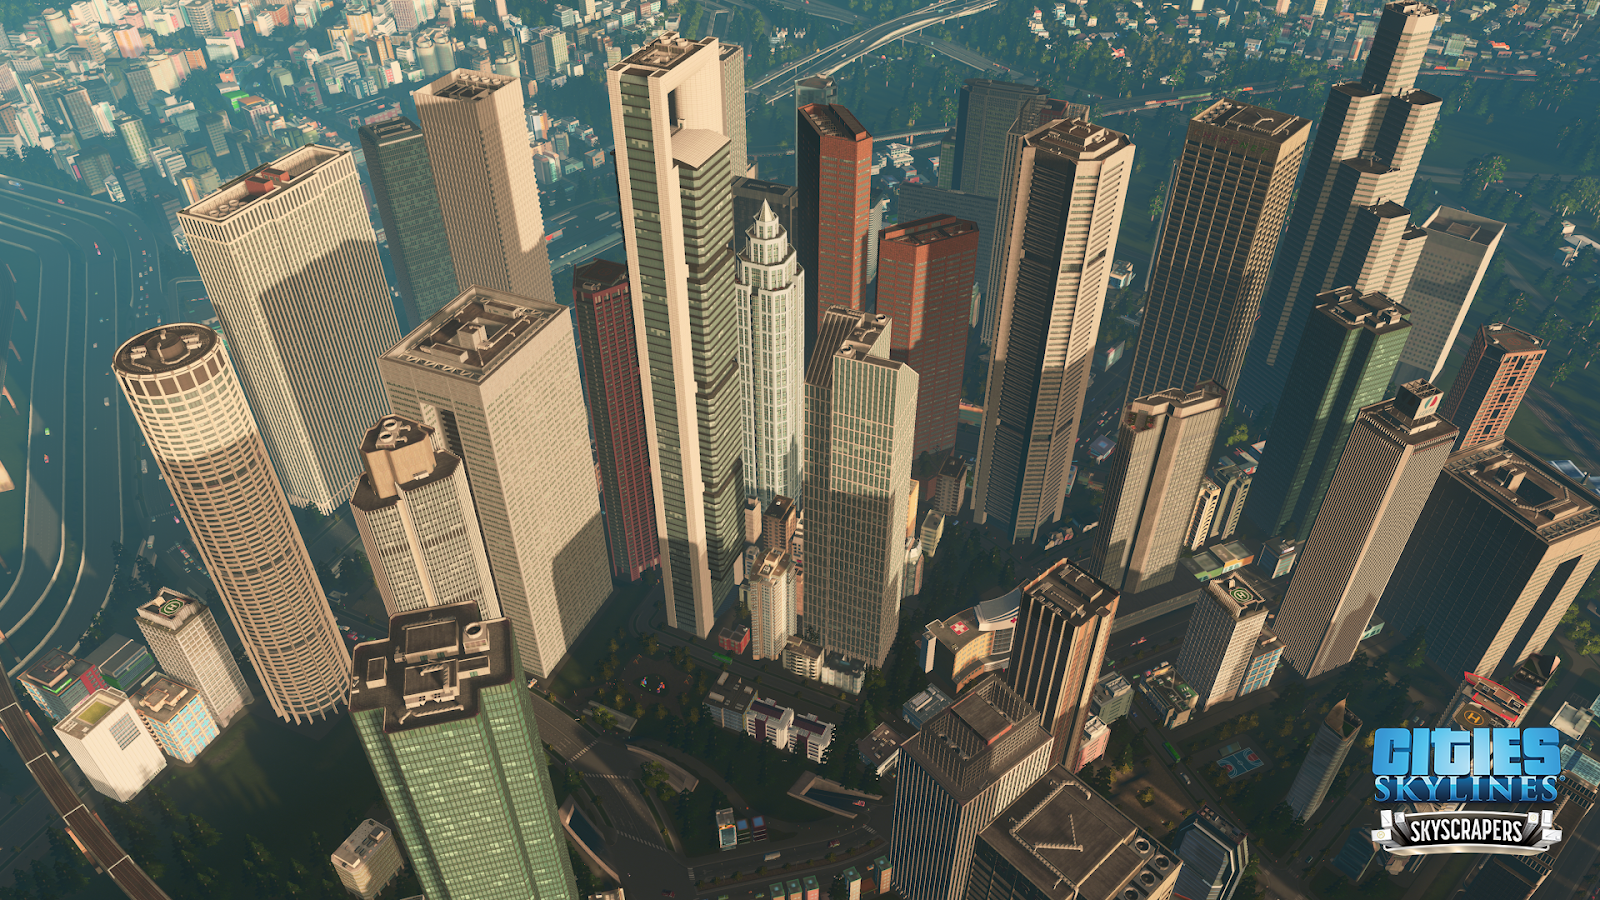
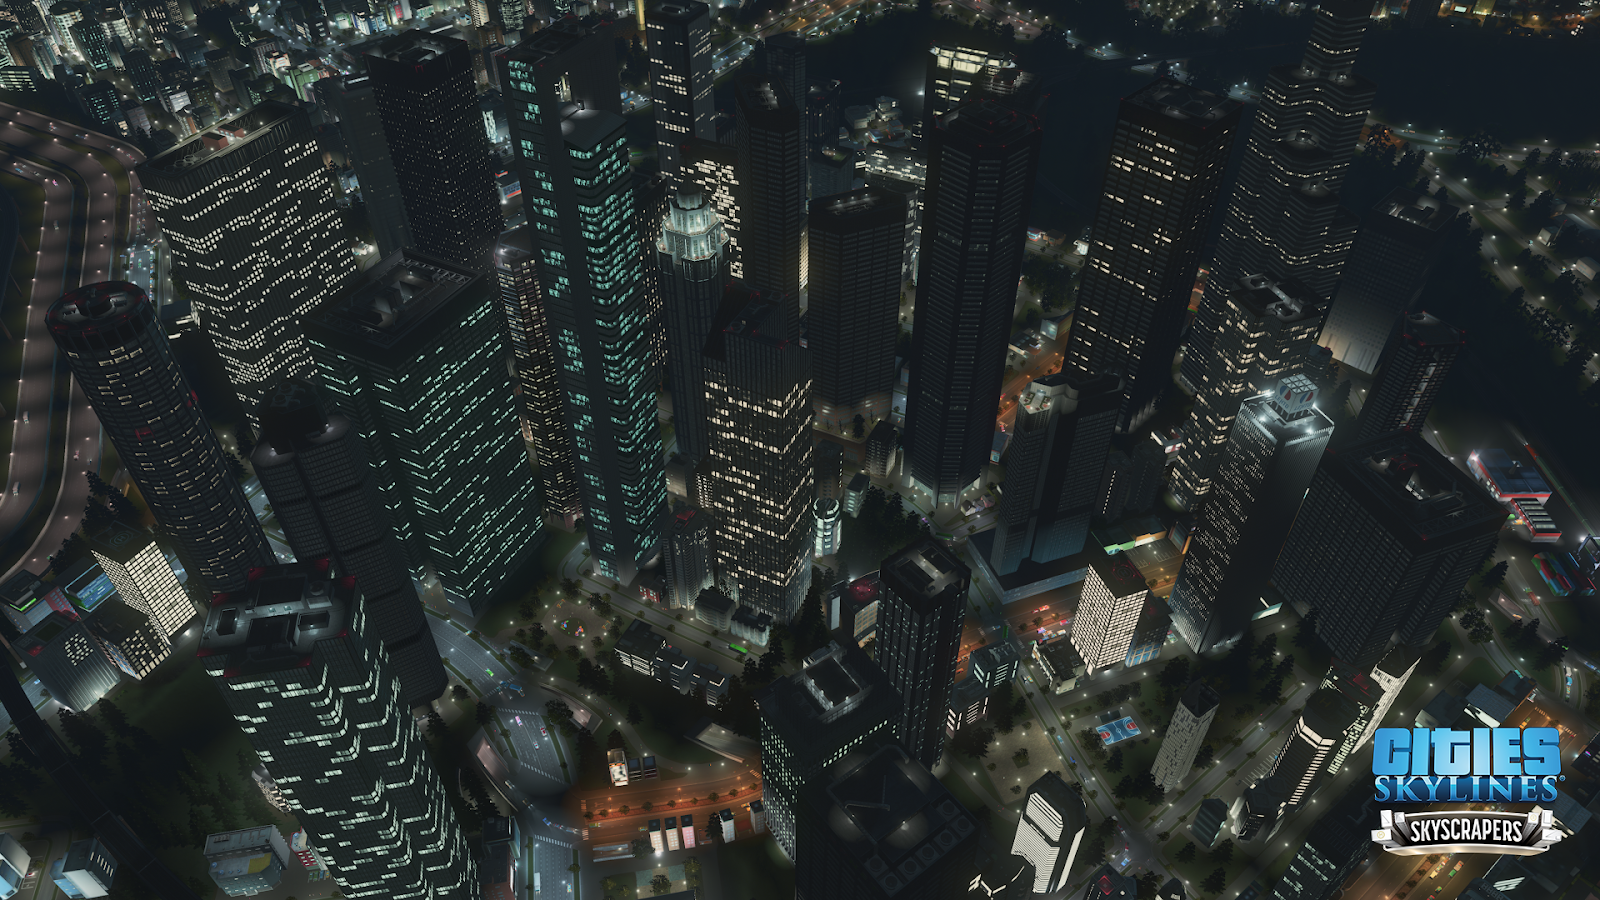
At the end of the dev-diary I want to show you some additional screenshots from the pack. I hope you will have fun building larger skylines, and enjoy being creative with the content.
Thank you for reading,
Feindbold


- 13

- 5
- 1