Hello! Art Lead reporting in with some quick answers to the new Map Editor. We're looking into creating some more comprehensive guides in the future, but for starters I'm here to start off with a few instructions on how to start using the map editor for those of you starting out with map mods.
Known Issues
- Files in the common/defines folder cannot be modded right now, as they're overwritten by the game. (We're looking into enabling this in a future patch.)
Editor Basics
Starting the Map Editor
Editing map data outside the editor
Clearing the height map data for a clean start
How to change the location, width etc. of rivers.
Saving your map
Turning off the editor
Adding new content
I want to add my own texture materials
New terrain textures can be added in \game\gfx\map\terrain
We're using the Metalness-Roughness PBR workflow.
Texture -> Data
Diffuse RGB - RGB
Diffuse A - Material heightmap, used for blending.
Normal R -> Normal R
Normal G -> Normal R
Normal B -> Emissive (fill black, unless you like self illumination)
Normal A -> Normal G
Properties R -> Unused
Properties G -> Specular intensity - Used sparingly on metallic surfaces.
Properties B -> Metalness
Properties A -> Roughness
Note! - After adding a new texture you will need to re-export the map for the optimized detail maps to be updated. Otherwise the games textures will offset and you'll get snow instead of grass or the like.
I want to change the dimensions of the map to another shape
I want to change the clouds surrounding the map
I'll add more instructions here over time, but this should be the basics to map creation.
Also, if you have any specific actions you'd like more explanation on, quality of life improvements or feature suggestions, feel free to share those too. The Map editor will be evolving along with Imperator.
Known Issues
- Files in the common/defines folder cannot be modded right now, as they're overwritten by the game. (We're looking into enabling this in a future patch.)
Editor Basics
Starting the Map Editor
If in-game you can write the console command
However we recommend starting the game straight into the editor, since this leads to less issues as less unused game components are loaded.
Code:
map_editorHowever we recommend starting the game straight into the editor, since this leads to less issues as less unused game components are loaded.
- If running via Steam, start the game with -mapeditor as launch option.
- Otherwise, create a shortcut to the .exe with -mapeditor added in the target. Rename the shortcut to Mapeditor for ease of use.
Editing map data outside the editor
- \game\map_data contains most data maps, like heightmap.bmp.
- heightmap.bmp - The file that is used by the editor, black and white height data
- heightmap.heightmap - Data file for heightmap
- indirection_heightmap.bmp - Optimized file created by the editor on export, do not edit this manually.
- packed_heightmap.bmp - Same as indirection file above.
- Note that the map can act weird at first when creating a new one from scratch. Put in your own heightmap in heightmap.bmp, then do an export, restart the editor, that should create a new set of files and align everything.
- \game\gfx\map contains most texture and detail maps related to the map.
- There are a lot of mask files that are used to tell textures and props where they are to exist. These files must have the same dimensions as the heightmap
- If you're starting out from scratch I recommend you mod your masks to be entirely black, thus not giving any data to your blank map.
Clearing the height map data for a clean start
- Open game/map_data/heightmap.bmp
- Fill the bmp with a block of #292929 grey if you want it flat just above water level, #000000 if you want everything at the bottom of the ocean as a base.
- Start game with launch option -mapeditor, as the previous change might be too volatile to do from the games console.
- Things are probably looking really weird, go toheightmap resolution (shortcut 4) and then press the repack button on the top-bar. Choose your desired resolution tile size (33x33 is the standard)
- Done! Remember to press ctrl+s to save this blank state. Then press the export button to make it create the optimized files used by the game. (indirection and packed heightmap, game never uses the heightmap.bmp alone)
- As you work and give the world more geometry, or replace it with an external heightmap, remember to repack again to keep each square optimized for its amount of details.
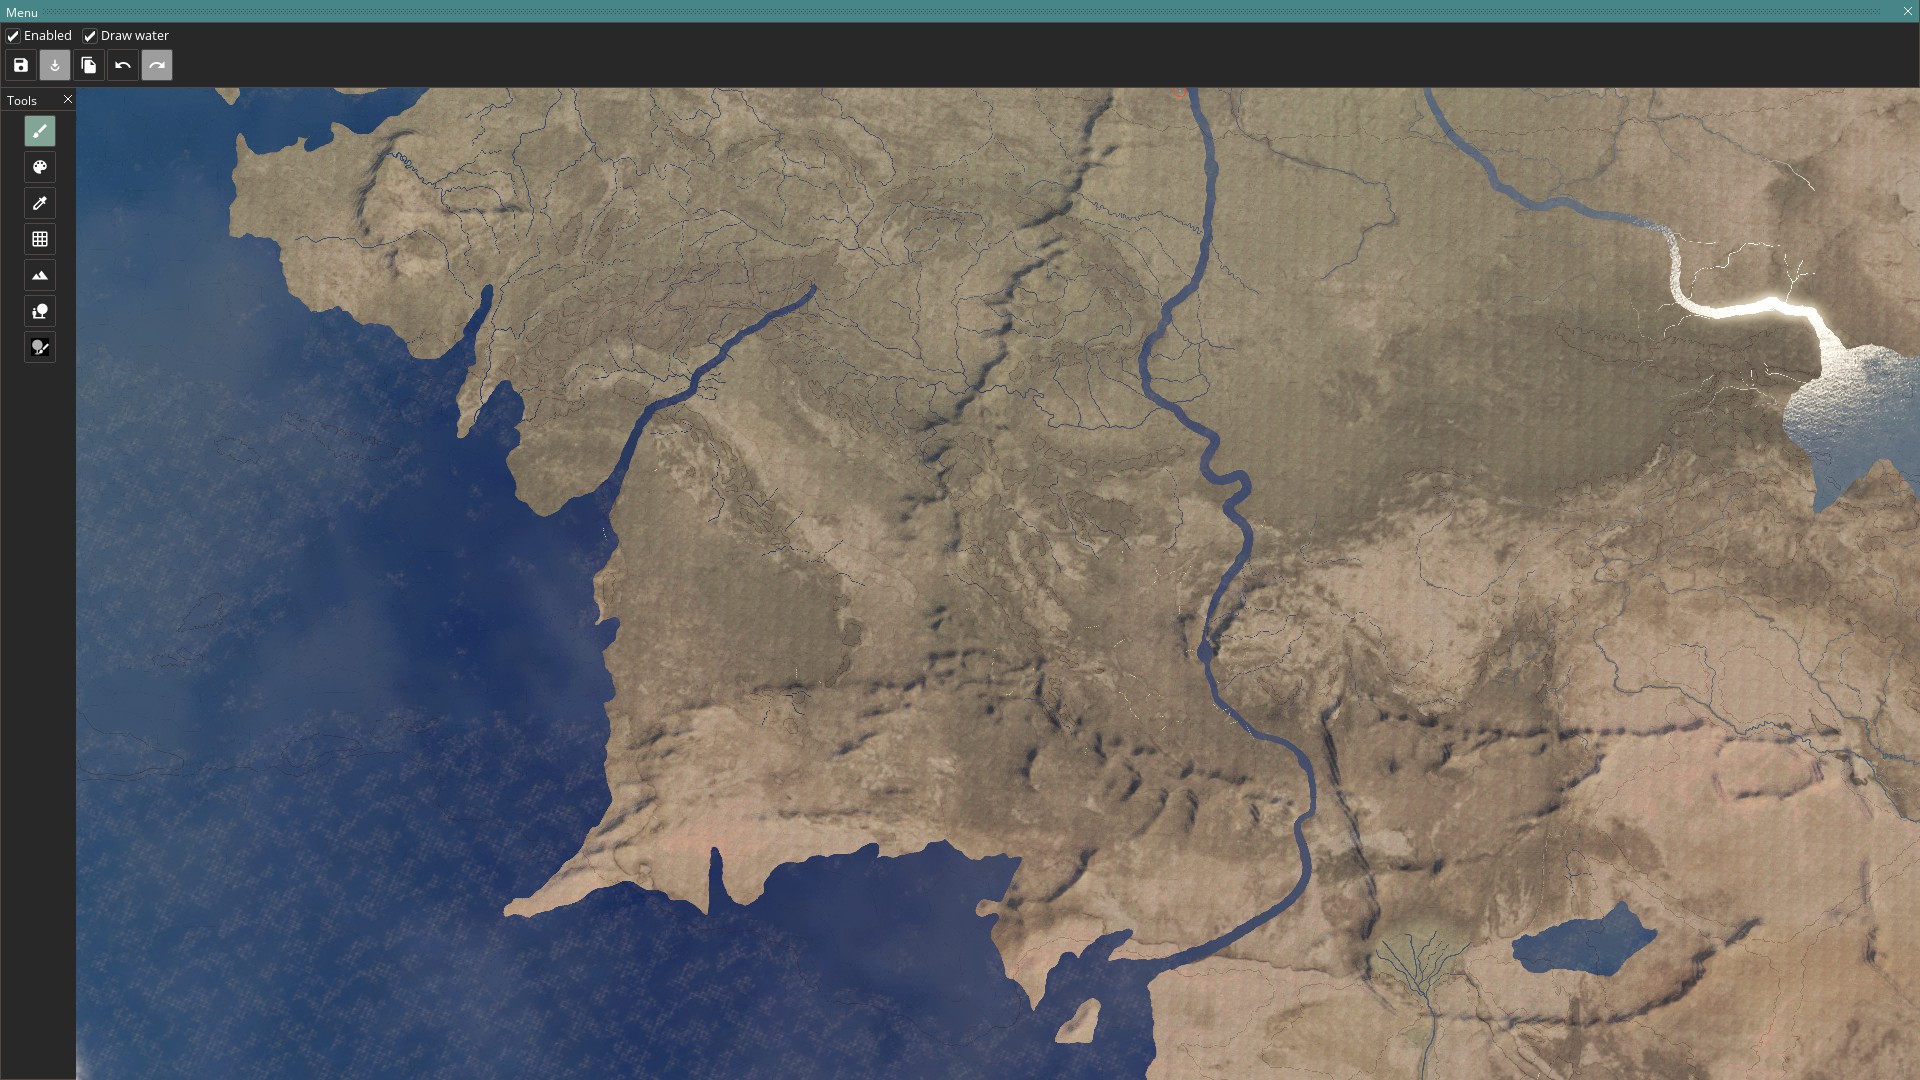
How to change the location, width etc. of rivers.
A couple of rules about rivers.bmp:
- White represents land, pink represents the ocean. Mostly a guide to allow ease of identifying coastlines and dont affect rivers themselves.
- Rivers uses a gradient of blue and green colors to denote the width of the river. Green colors are wider, blue are thinner, brighter variants are wider, darker thinner out of those.
- Use the only the width colors already in the river file.
- Rivers start at a green dot (0, 255, 0)
- Rivers connects to other rivers as a tributary at a red dot (255, 0, 0)
- River can diverge at a yellow dot (255, 252, 0)
- Diverged rivers cannot rejoin with red dot, this causes errors.
- In a river system only the main unbroken river should have a green starting dot.
- Every pixel in a river needs to connect to another to form an unbroken line.
- No pixel can have more than 2 connecting pixels. Except when a river connects or diverges. Doing so will cause an error or crash.
Saving your map
There are two save commands in the editor, found in the top right.
The regular save button saves the editor changes to the data files and mesh object locations.
The export button pushes the changes to the more compressed data files that the game uses. A successful export means that this button will turn white and disable until new changes are made.
Sometimes a regular save will trigger an export too, we are maybe looking at merging the two into one in the future. If you cant export, try making a minor change in the world and try again.
Turning off the editor
There is no exit button, you're here forever!
Just kidding, on a serious note though we dont have an exit button, just press Alt+F4. But don't worry though, if you have unsaved changes it will tell you and give you an opportunity to save before losing the changes.
Edit: There is an exit button now.
Just kidding, on a serious note though we dont have an exit button, just press Alt+F4. But don't worry though, if you have unsaved changes it will tell you and give you an opportunity to save before losing the changes.
Edit: There is an exit button now.
Adding new content
I want to add my own texture materials
New terrain textures can be added in \game\gfx\map\terrain
We're using the Metalness-Roughness PBR workflow.
- You will need 3 .DDS textures, a diffuse texture, a normal texture, a properties texture and a mask that you add to the above mentioned folder.
- Material.settings is the file where you add new terrain layers with script, link in your new textures here.
- Settings.terrain controls data for how all materials act globally, like how they blend, tile and such.
- The mask.bmp file needs to be the same size as the heightmap.bmp
Texture -> Data
Diffuse RGB - RGB
Diffuse A - Material heightmap, used for blending.
Normal R -> Normal R
Normal G -> Normal R
Normal B -> Emissive (fill black, unless you like self illumination)
Normal A -> Normal G
Properties R -> Unused
Properties G -> Specular intensity - Used sparingly on metallic surfaces.
Properties B -> Metalness
Properties A -> Roughness
Note! - After adding a new texture you will need to re-export the map for the optimized detail maps to be updated. Otherwise the games textures will offset and you'll get snow instead of grass or the like.
I want to change the dimensions of the map to another shape
Even though this doesnt work without changing the game defines manually, here's how to try it out:
00_defines.txt
00_graphics.txt
00_defines.txt
Code:
NJominiMap = {
#Dimensions needs to be the chosen resolution, -1 unit
    WORLD_EXTENTS_X = 8191
    WORLD_EXTENTS_Y = 25.5
    WORLD_EXTENTS_Z = 4095
    WATERLEVEL = 3.9
}
00_graphics.txt
Code:
#The following data points control the extent of the surround map/clouds
    SURROUND_MAP_INNER_RECT = { 700.0 900.0 7700.0 3600.0 }             #x-start, y-start, x-end, y-end
    SURROUND_MAP_OUTER_RECT = { -10000.0 -10000.0 20000.0 20000.0 }        #x-start, y-start, x-end, y-end
I want to change the clouds surrounding the map
Open \game\gfx\map\surround_map
There will be a file there called surround_mask.dds
It controls the extent of the surround cloud and is rendered within a square, but has a central exclusion zone so it's not rendering for the whole center area at all times. Below there is a picture explaining the outer and inner squares.
Adjusting the size of these squares were handled in the post above on how to change the map dimensions.
I'll add more instructions here over time, but this should be the basics to map creation.
Also, if you have any specific actions you'd like more explanation on, quality of life improvements or feature suggestions, feel free to share those too. The Map editor will be evolving along with Imperator.
Last edited:
- 3

- 2