Case Yellow
Commander in Chief of the German Armed Forces
Erich von Manstein
Commander in Chief of the German Army
Gerd von Rundstedt
Top Secret
Senior commanders only
Following swift action the eastern border has been pacified, and through diplomatic means the Soviet Union has been made a friend of Germany. The only threat left remaining to the Reich is Britain and France. Political attempts to provide a peaceful solution have failed, and the English and French have resorted to offensive aerial actions. Therefore, to bring peace to the continent, a strike against the west is to be organised.
The German Armed Forces must be prepared to crush the combined might of the Anglo-French militaries in a lighting campaign. As France is the primary land-based power of the Allied forces, the attention of the armed forces will be on defeating France first before follow-up attacks on the United Kingdom are considered. During recent fighting on the border it has been determined that the French lack the ability to break through the West Wall, while our forces lack the strength to likewise breakthrough the Maginot Line. It has therefore been decided that the attack on France will be launched through the Low Countries.
For this purpose OB West, under the command of von Rundstedt, has been assigned 1,170,000 men in 102 divisions. The main strike will be launched by the Panzer Army (under the personal command of von Manstein) through Belgium aiming for Paris, while von Leeb’s Army Group B will clear the Netherlands and move to trap the main French Army in the Maginot Line (see appendix A). The initial forces that will be met will be the Dutch and Belgium armies. The Dutch Army comprises of at least eight divisions and can be mostly discounted, while the Belgium force of around 28 divisions may provide the Allies with a strong outer shell. The latest intelligence reports suggest that the French Army contains close to 100 divisions, however only 75 are based in mainland France with the majority being assigned to the Maginot Line. Our reports indicate that the United Kingdom’s forces are largely colonial, and based accordingly. However, two British divisions have already been identified supporting the Maginot Line, and several Corps headquarters have been detected at Dunkirk suggesting the size of the British Expeditionary Force is no more than 10 divisions strong.
Direction of operations against France:
I. The main strike will be launched by I.Panzerarmee, containing 12 army panzer divisions and the three SS divisions of the SS Panzer Corps. The army will strike through northern Belgium, bypassing the strong Belgium fortifications, capturing the capital before advancing for Paris to bring about a rapid end to the war.
II. Army Group B, under the command of von Leeb, will launch operations to encircle the Maginot Line and clear the Netherlands.
IIa. Third Army (von Wietersheim), Fourth Army (von Kuchler), Seventh Army (von Reichenau), and Ninth Army (Eicke) will advance through southern Belgium and Luxembourg, avoiding the strong border defences, aiming to block French forces from moving north while at the same time battling to encircle and then destroy the main French Army.
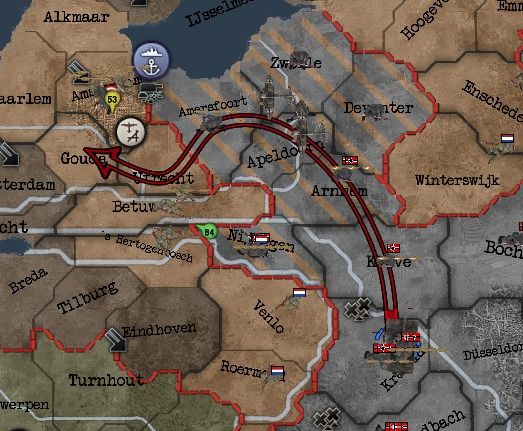
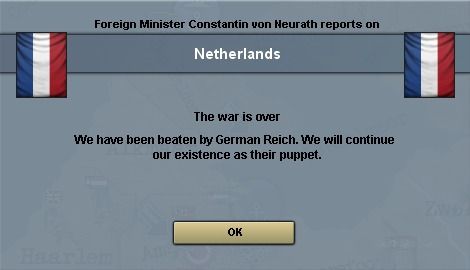
IIb. First Army (Adam) will break through the Dutch border defences, and conduct a rapid advance on the capital. If the Dutch do not surrender then First Army will clear the Netherlands of enemy forces, otherwise they will then advance into Belgium and clear the pockets created by the advance of the main force
III. Tenth Army and the paratroopers will be held in reserve and employed as needed.
IV. Kostring’s Army Group C, 32 divisions strong, will defend the border and ensure French forces do not cross into Germany.
V. The Luftwaffe is to provide a maximum effort in support of break through operations while achieving air superiority.
VI. No role is envisioned for the Kriegsmarine during the initial battle for France.
Direction of Operations in Poland:
German forces (26 divisions spread across OKH, under the command of von Bock, and Army Group A, under the command of von Kluge) in Poland are to continue with their current objectives of pacifying the region and manning the border defences.
Erich von Manstein
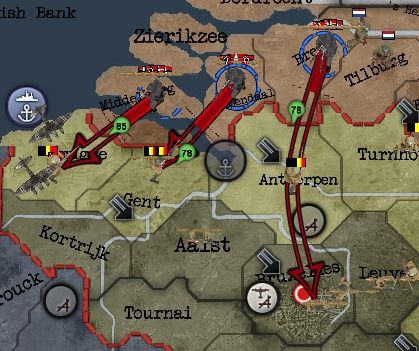
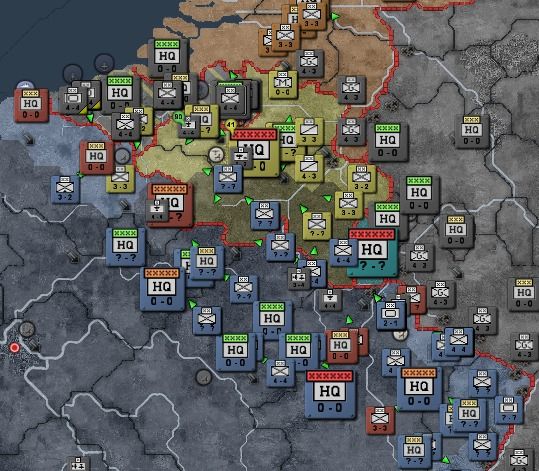
Appendix I
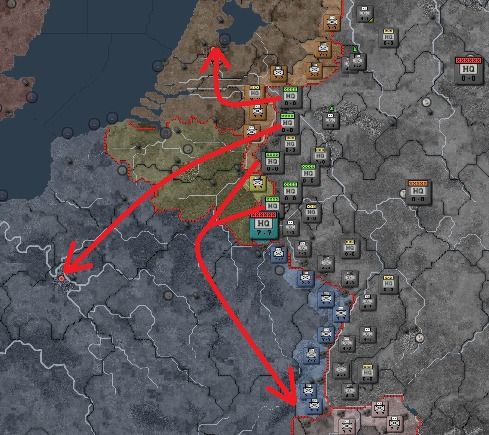
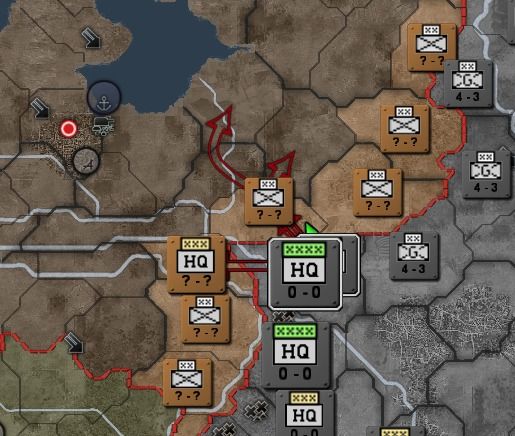
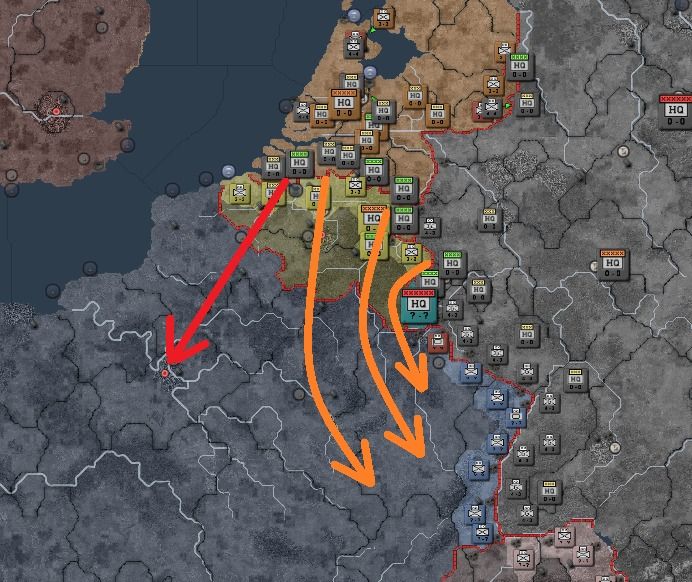
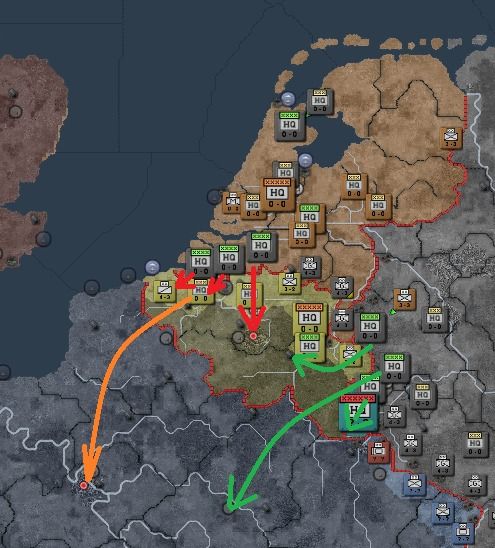
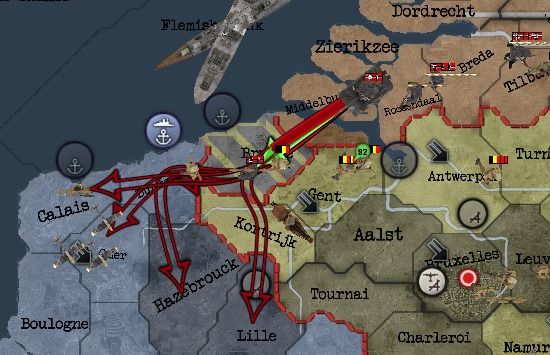
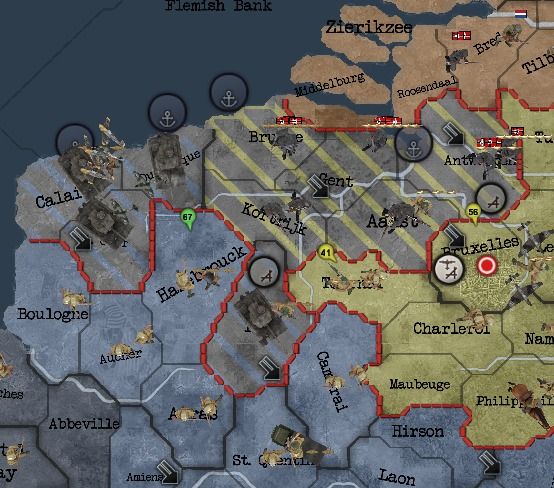
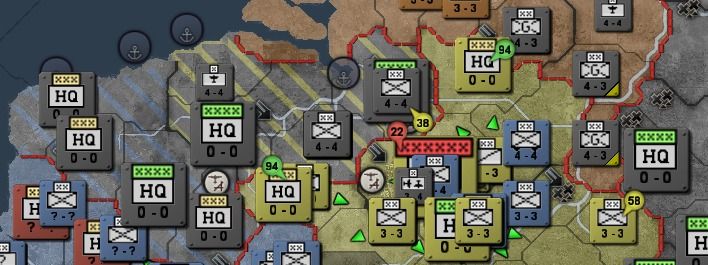
Outline of Case Yellow: operations to be conducted by Army Group B and the 1st Panzer Army to defeat the western Allies armies.
Commander in Chief of the German Armed Forces
Erich von Manstein
Commander in Chief of the German Army
Gerd von Rundstedt
Top Secret
Senior commanders only
OKW headquarters, Berlin
31 October 1939
Directive No. 7
Case Yellow
31 October 1939
Directive No. 7
Case Yellow
Following swift action the eastern border has been pacified, and through diplomatic means the Soviet Union has been made a friend of Germany. The only threat left remaining to the Reich is Britain and France. Political attempts to provide a peaceful solution have failed, and the English and French have resorted to offensive aerial actions. Therefore, to bring peace to the continent, a strike against the west is to be organised.
The German Armed Forces must be prepared to crush the combined might of the Anglo-French militaries in a lighting campaign. As France is the primary land-based power of the Allied forces, the attention of the armed forces will be on defeating France first before follow-up attacks on the United Kingdom are considered. During recent fighting on the border it has been determined that the French lack the ability to break through the West Wall, while our forces lack the strength to likewise breakthrough the Maginot Line. It has therefore been decided that the attack on France will be launched through the Low Countries.
For this purpose OB West, under the command of von Rundstedt, has been assigned 1,170,000 men in 102 divisions. The main strike will be launched by the Panzer Army (under the personal command of von Manstein) through Belgium aiming for Paris, while von Leeb’s Army Group B will clear the Netherlands and move to trap the main French Army in the Maginot Line (see appendix A). The initial forces that will be met will be the Dutch and Belgium armies. The Dutch Army comprises of at least eight divisions and can be mostly discounted, while the Belgium force of around 28 divisions may provide the Allies with a strong outer shell. The latest intelligence reports suggest that the French Army contains close to 100 divisions, however only 75 are based in mainland France with the majority being assigned to the Maginot Line. Our reports indicate that the United Kingdom’s forces are largely colonial, and based accordingly. However, two British divisions have already been identified supporting the Maginot Line, and several Corps headquarters have been detected at Dunkirk suggesting the size of the British Expeditionary Force is no more than 10 divisions strong.
Direction of operations against France:
I. The main strike will be launched by I.Panzerarmee, containing 12 army panzer divisions and the three SS divisions of the SS Panzer Corps. The army will strike through northern Belgium, bypassing the strong Belgium fortifications, capturing the capital before advancing for Paris to bring about a rapid end to the war.
II. Army Group B, under the command of von Leeb, will launch operations to encircle the Maginot Line and clear the Netherlands.
IIa. Third Army (von Wietersheim), Fourth Army (von Kuchler), Seventh Army (von Reichenau), and Ninth Army (Eicke) will advance through southern Belgium and Luxembourg, avoiding the strong border defences, aiming to block French forces from moving north while at the same time battling to encircle and then destroy the main French Army.
IIb. First Army (Adam) will break through the Dutch border defences, and conduct a rapid advance on the capital. If the Dutch do not surrender then First Army will clear the Netherlands of enemy forces, otherwise they will then advance into Belgium and clear the pockets created by the advance of the main force
III. Tenth Army and the paratroopers will be held in reserve and employed as needed.
IV. Kostring’s Army Group C, 32 divisions strong, will defend the border and ensure French forces do not cross into Germany.
V. The Luftwaffe is to provide a maximum effort in support of break through operations while achieving air superiority.
VI. No role is envisioned for the Kriegsmarine during the initial battle for France.
Direction of Operations in Poland:
German forces (26 divisions spread across OKH, under the command of von Bock, and Army Group A, under the command of von Kluge) in Poland are to continue with their current objectives of pacifying the region and manning the border defences.
Erich von Manstein
Appendix I
Outline of Case Yellow: operations to be conducted by Army Group B and the 1st Panzer Army to defeat the western Allies armies.
 o
o